
ParaLLEl RDP this year has singlehandedly caused a breakthrough in N64 emulation. For the first time, the very CPU-intensive accurate Angrylion renderer was lifted from CPU to GPU thanks to the powerful low-level graphics API Vulkan. This combined with a dynarec-powered RSP plugin has made low-level N64 emulation finally possible for the masses at great speeds on modest hardware configurations.
ParaLLEl RDP Upscaling

It quickly became apparent after launching ParaLLEl RDP that users have grown accustomed to seeing upscaled N64 graphics over the past 20 years. So something rendering at native resolution, while obviously accurate, bit-exact and all, was seen as unpalatable to them. Many users indicated over the past few weeks that upscaling was desired.
Well, now it’s here. ParaLLEl RDP is the world’s first Low-Level RDP renderer capable of upscaling. The graphics output you get is unlike any HLE renderer you’ve ever seen before for the past twenty years, since unlike them, there is full VI emulation (including dithering, divot filtering, and basic edge anti-aliasing). You can upscale in integer steps of the base resolution. When you set resolution upscaling to 2x, you are multiplying the input resolution by 2x. So 256×224 would become 512×448, 4x would be 1024×896, and 8x would be 2048×1792.
Now, here comes the good stuff with LLE RDP emulation. As said before, unlike so many HLE renderers, ParaLLEl RDP fully emulates the RCP’s VI Interface. As part of this interface’s postprocessing routines, it automatically applies an approximation of 8x MSAA (Multi-Sampled Anti-Aliasing) to the image. This means that even though our internal resolution might be 1024×896, this will then be further smoothed out by this aggressive AA postprocessing step.
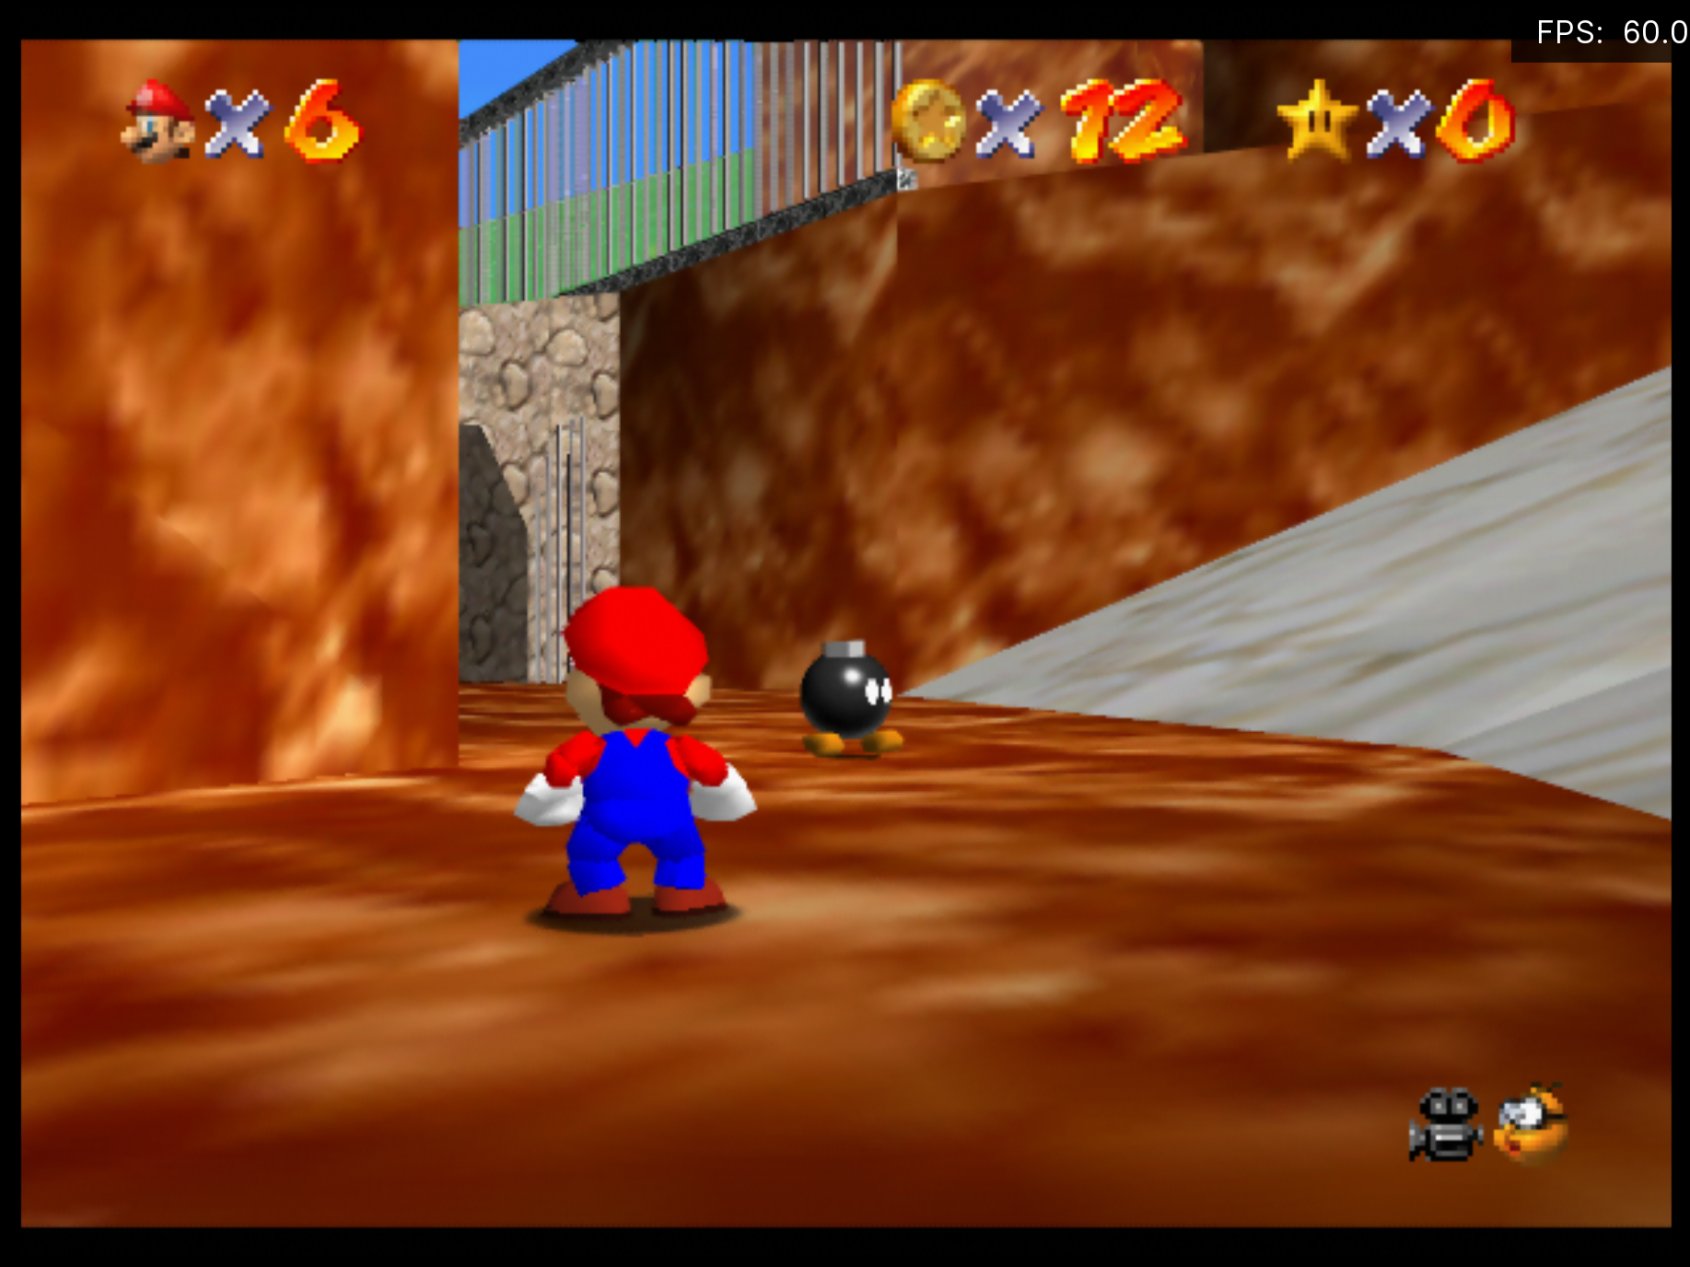
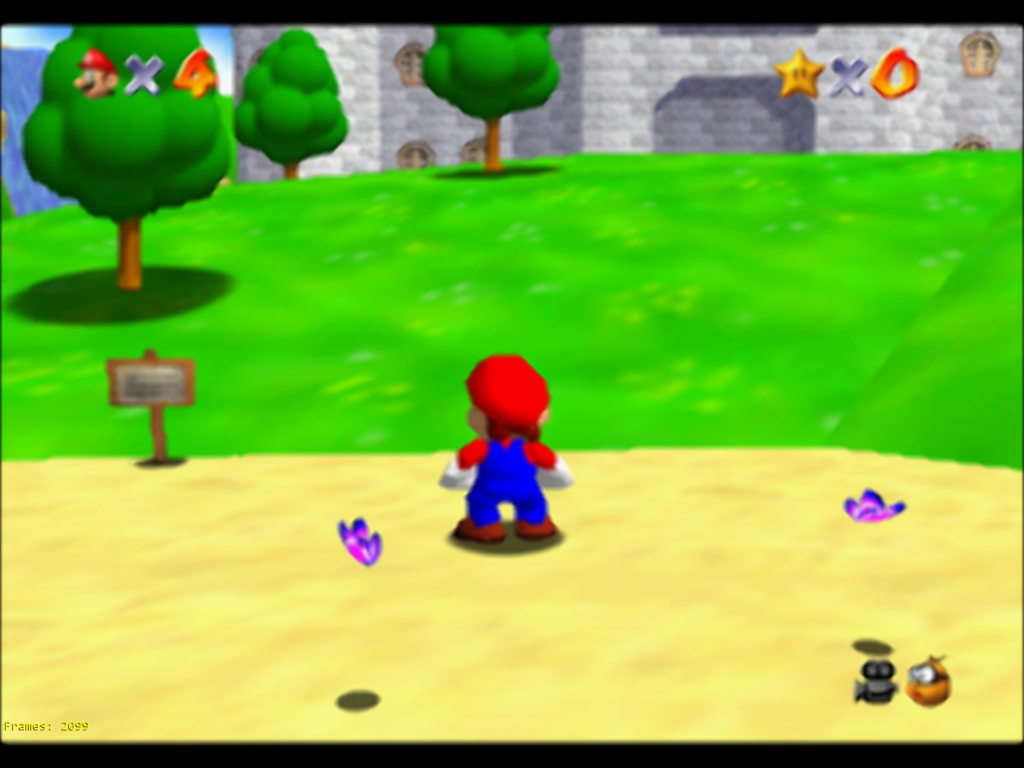
This results in even games that run at just 2x native resolution looking significantly better than the same resolution running on an HLE RDP renderer. Look for instance at this Mario 64 screenshot here with the game running at 2x internal upscale (512×448).
How to install and set it up
RDP upscaling is available right now on Windows, Linux, and Android. We make no guarantees as to what kind of performance you can expect across these platforms, this is all contingent on your GPU’s Vulkan drivers and its compute power.
Anyway, here is how you can get it.
- In RetroArch, go to Online Updater.
- (If you have paraLLEl N64 already installed) – Select ‘Update Installed Cores’. This will update all the cores that you already installed.
- (If you don’t have paraLLEl N64 installed already) – go to ‘Core Updater’ (older versions of RA) or ‘Core Downloader’ (newer version of RA), and select ‘Nintendo – Nintendo 64 (paraLLEl N64)’.
- Now start up a game with this core.
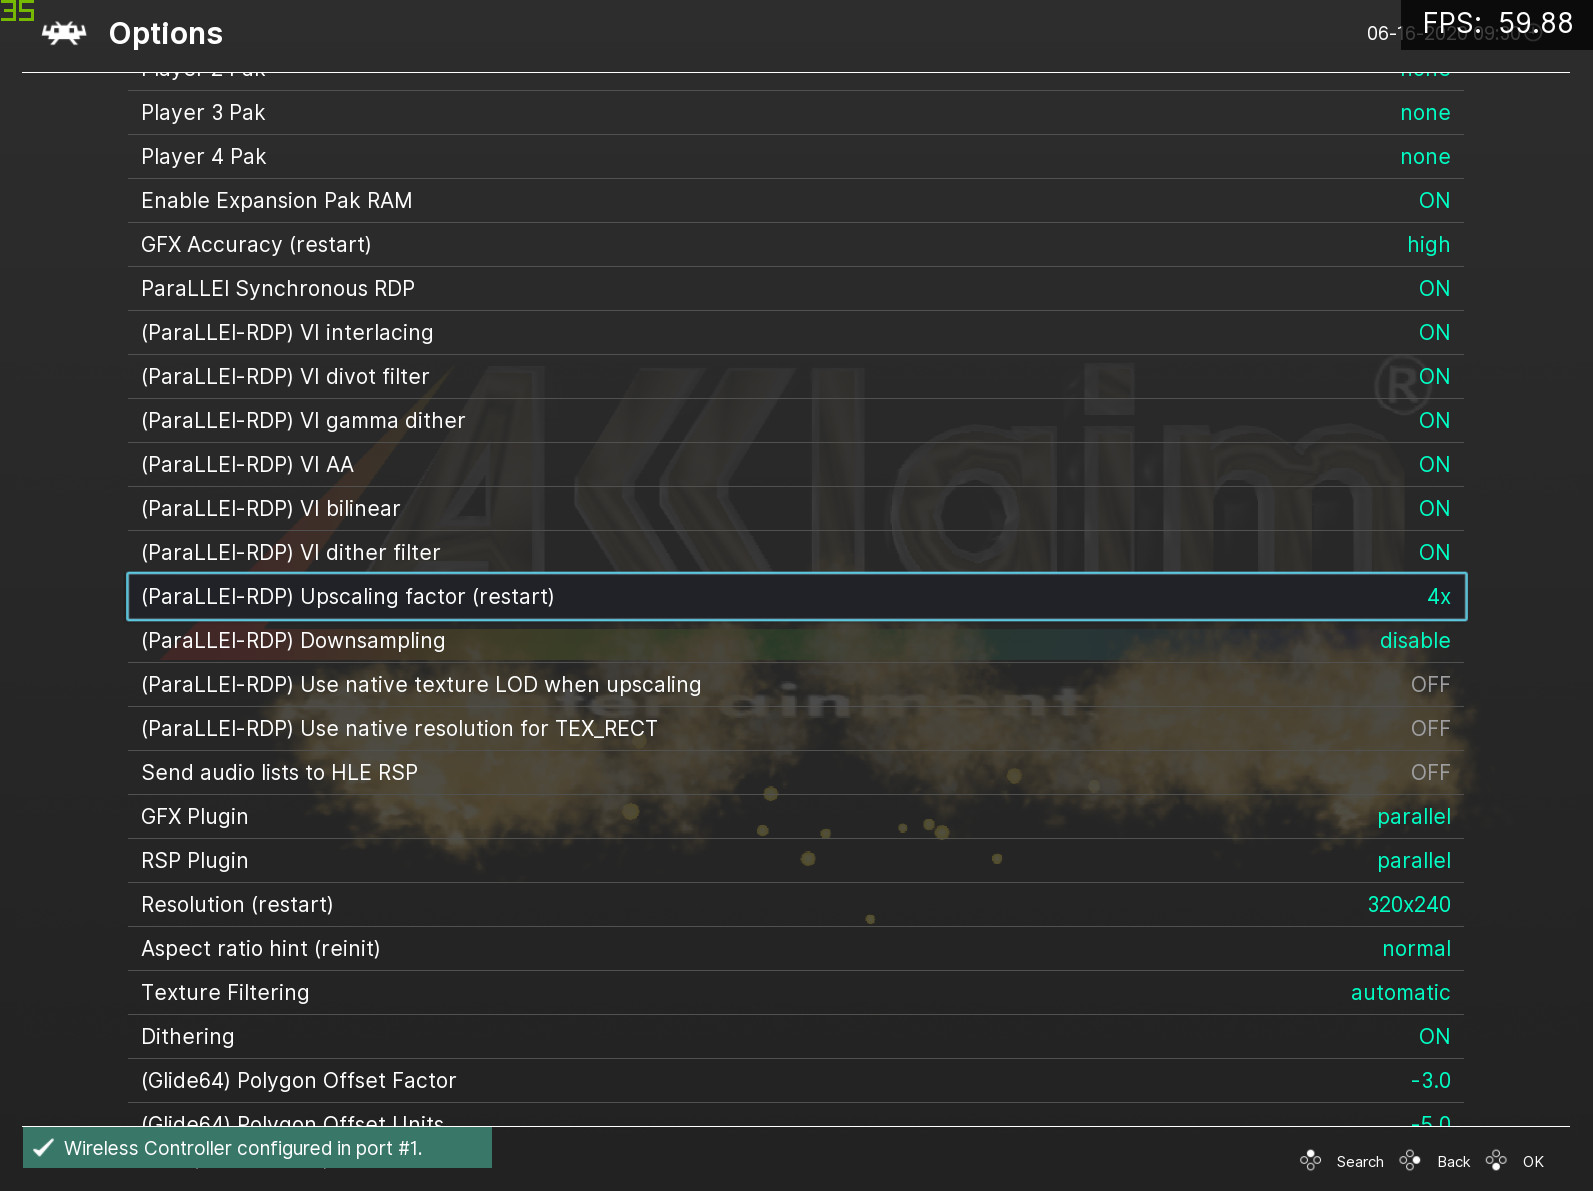
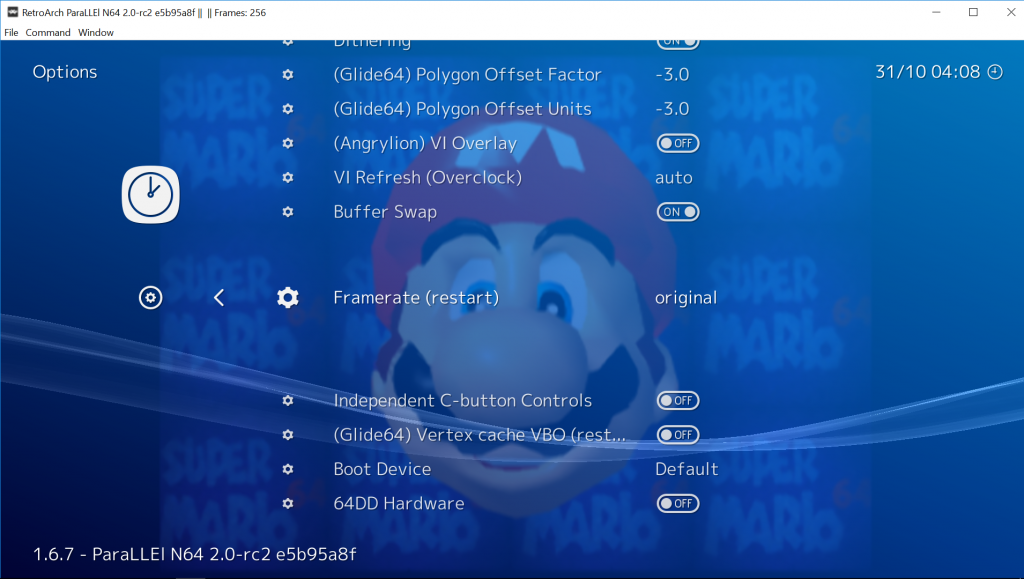
- Go to the Quick Menu and go to ‘Options’. Scroll down the list until you reach ‘GFX Plugin’. Set this to ‘parallel’. Set ‘RSP plugin’ to ‘parallel’ as well.
- For the changes to take effect, we now need to restart the core. You can either close the game or quit RetroArch and start the game up again.
In order to upscale, you need to first set the Upscaling factor. By default, it is set to 1x (native resolution). Setting it to 2x/4x/8x then restarting the core makes the upscaling take effect.
Explanation of core options
A few new core option features have been added. We’ll briefly explain what they do and how you can go about using them.
- (ParaLLEl-RDP) Upscaling factor (Restart)
Available options: 1x, 2x, 4x, 8x
The upscaling factor for the internal resolution. 1x is default and is the native resolution. 2x, 4x, and 8x are all possible. NOTE: It bears noting that 8x requires at least 5GB/6GB VRAM on your GPU. System requirements are steep for 8x and we generally don’t recommend anything less than a 1080 Ti or better for this. Your mileage may vary, just be forewarned. 2x and 4x by comparison are much lighter. Even when upscaling, the rendering is still rendering at full accuracy, and it is still all software rendered on the GPU. 4x upscale means 16x times the work that 1x Angrylion would churn through.
- (paraLLEl-RDP) Downsampling
Available options: Disabled, 1/2, 1/4, 1/8
Also known as SSAA, this works pretty similar to the SSAA downscaling feature in Beetle PSX HW’s Vulkan renderer. The idea is that you internally upscale at a higher resolution, then set this option from ‘Disabled’ to any of the other values. What happens from there is that this internal higher resolution image is then downscaled to either half its size, one quarter of its size, or one eight of its size. This gives you a very smoothed out anti-aliased picture that for all intents and purposes still outputs at 240p/240i. From there, you can apply some frontend shaders on top to create a very nice and compelling look that still looks better than native resolution but is also still very faithful to it.
So, if you would want 4x resolution upscaling with 4x SSAA, you’d set ‘Downsample’ to ‘1/2’. With 4x upscale, and 1/4 downsample, you get 240p output with 16x SSAA, which looks great with CRT shaders.
- (paraLLEl-RDP) Use native texture LOD when upscaling
This option is disabled by default.
We have so far only found one game that absolutely required this to be turned on for gameplay purposes. If you don’t have this enabled, the Princess-to-Bowser painting transition in Mario 64 is not there and instead you just see Bowser in the portrait from a far distance. There might be further improvements later to attempt to automatically detect these cases.
Most N64 games didn’t use mipmapping, but the ones that do on average benefit from this setting being off – you get higher quality LOD textures instead of a lower-quality LOD texture eventually making way for a more detailed one as you look closer. However, turning this option on could also be desirable depending on whether you favor accurate looking graphics or a facsimile of how things used to look.
- (paraLLEl-RDP) Use native resolution for TEX_RECT
This option is on by default.
2D elements such as sprites are usually rendered with TEX_RECT commands, and trying to upscale them inevitably leads to ugly “seams” in the picture. This option forces native resolution rendering for such sprites.
Managing expectations
It’s important that people understand what the focus of this renderer is. There is no intent to have yet another enhancement-focused renderer here. This is the closest there has ever been to date of a full software rendered reimplementation of Angrylion on the GPU with additional niceties like upscaling. The renderer guarantees bit-exactness, what you see is what you would get on a real N64, no exceptions.
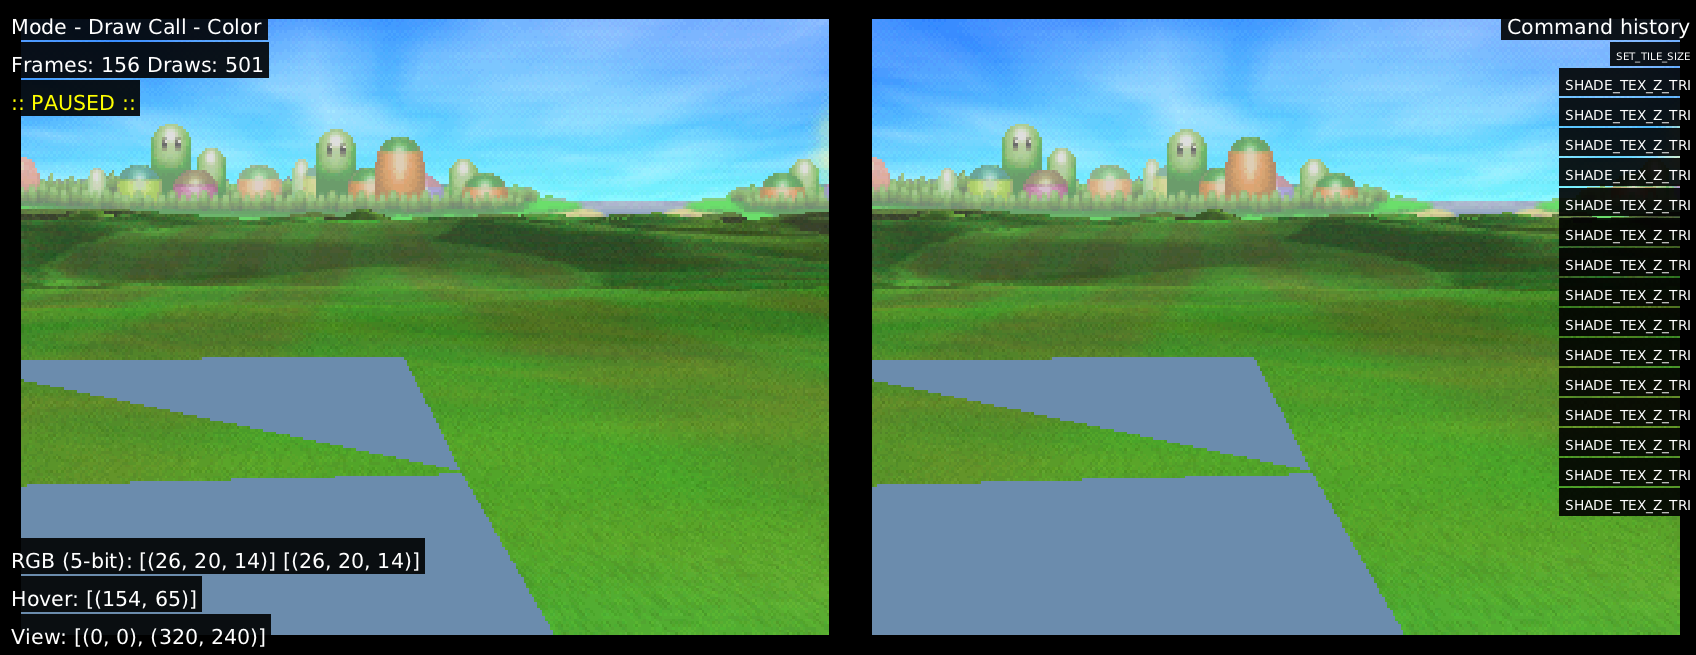
With a HLE renderer, the scene is rendered using either OpenGL or Vulkan rasterization rules. Here, neither is done – the exact rasterization steps of the RDP are followed instead, there are no API calls to GL to draw triangles here or there. So how is this done? Through compute shaders. It’s been established that you cannot correctly emulate the RDP’s rasterization rules by just simply mapping it to OpenGL. This is why previous attempts like z64gl fell flat after an initial promising start.
So the value proposition here for upscaling with ParaLLEl RDP is quite compelling – you get upscaling with the most accurate renderer this side of Angrylion. It runs well thanks to Vulkan, you can upscale all the way to 8x (which is an insane workload for a GPU done this way). And purists get the added satisfaction of seeing for the first time upscaled N64 graphics using the N64’s entire postprocessing pipeline finally in action courtesy of the VI Interface. You get nice dither filtering that smooths out really well at higher resolutions and can really fake the illusion of higher bit depth. HLE renderers have a lot of trouble with the kind of depth cuing and dithering being applied on the geometry, but ParaLLEl RDP does this effortlessly. This causes the upscaled graphics to look less sterile, whereas with traditional GL/Vulkan rasterization, you’d just see the same repeated textures everywhere with the same basic opacity everywhere. Here, we get dithering and divot filtering creating additional noise to the image leading to an overall richer picture.
So basically, the aim here is actually emulating the RDP and RSP. The focus is not on getting the majority of commercial games to just run and simulating the output they would generate through higher level API calls.
Won’t be done – where HLE wins
Therefore, the following requests will not be pursued at least in the near future:
* Widescreen rendering – Can be done through game patches (ASM patches applied directly to the ROM, or bps/ups patches or something similar). Has to be done on a per-game basis, with HLE there is some way to modify the view frustum and viewport dimensions to do this but it almost never works right due to the way the game occludes geometry and objects based on your view distance, so game patches implementing widescreen and DOF/draw distance enhancements would always be preferable.
So, in short, yes, you can do this with ParaLLEl RDP too, just with per-game specific patches. Don’t expect a core option that you can just toggle on or off.
* Rendering framebuffer effects at higher resolution – not really possible with LLE, don’t see much payoff to it either. Super-sampled framebuffer effects might be possible in theory.
* Texture resolution packs – Again, no. The nature of an LLE renderer is right there in the name, Low-Level. While the RDP is processing streams of data (fed to it by the RSP), there is barely any notion whatsoever of a ‘texture’ – it only sees TMEM uploads and tile descriptors which point to raw bytes. With High Level emulation, you have a higher abstraction level where you can ‘hook’ into the parts where you think a texture upload might be going on so you can replace it on the fly. Anyway, those looking for something like that are really at the wrong address with ParaLLEl RDP anyway. ParaLLEl RDP is about making authentic N64 rendering look as good as possible without resorting to replacing original assets or anything bootleg like that.
* Z-fighting/subpixel precision: In some games, there is some slight Z-fighting in the distance that you might see which HLE renderers typically don’t have. Again, this is because this is accurate RDP emulation. Z-fighting is a thing. The RDP only has 18-bit UNORM of depth precision with 10 bits of fractional precision during interpolation, and compression on top of that to squeeze it down to 14 bits. A HLE emulator can render at 24+ bits depth. Compounding this, because the RSP is Low-level, it’s sending 16-bit fixed point vertex coordinates to the RDP for rendering. A typical HLE renderer and HLE RSP would just determine that we are about to draw some 3D geometry and then just turn it into float values so that there is a higher level of precision when it comes to vertex positioning. If you recall, the PlayStation1’s GTE also did not deal with vertex coordinates in floats but in fixed point. There, we had to go to the effort of doing PGXP in order to convert it to float. I really doubt there is any interest to contemplate this at this point. Best to let sleeping dogs lie.
* Raw performance. HLE uses the hardware rasterization and texture units of the GPU which is far more efficient than software, but of course, it is far less accurate than software rendering.
Where LLE wins
Conversely, there are parts where LLE wins over HLE, and where HLE can’t really go –
* HLE tends to struggle with decals, depth bias doesn’t really emulate the RDP’s depth bias scheme at all since RDP depth bias is a double sided test. Depth bias is also notorious for behaving differently on different GPUs.
* Correct dithering. A HLE renderer still has to work with a fixed function blending pipeline. A software rendered rasterizer like ParaLLEl RDP does not have to work with any pre-existing graphics API setup, it implements its own rasterizer and outputs that to the screen through compute shading. Correct dither means applying dither after blending, among other things, which is not something you can generally do [with HLE]. It generally looks somewhat tacky to do dithering in OpenGL. You need 8-bit input and do blending in 8-bit but dither + quantization at the end, which you can’t do in fixed function blending.
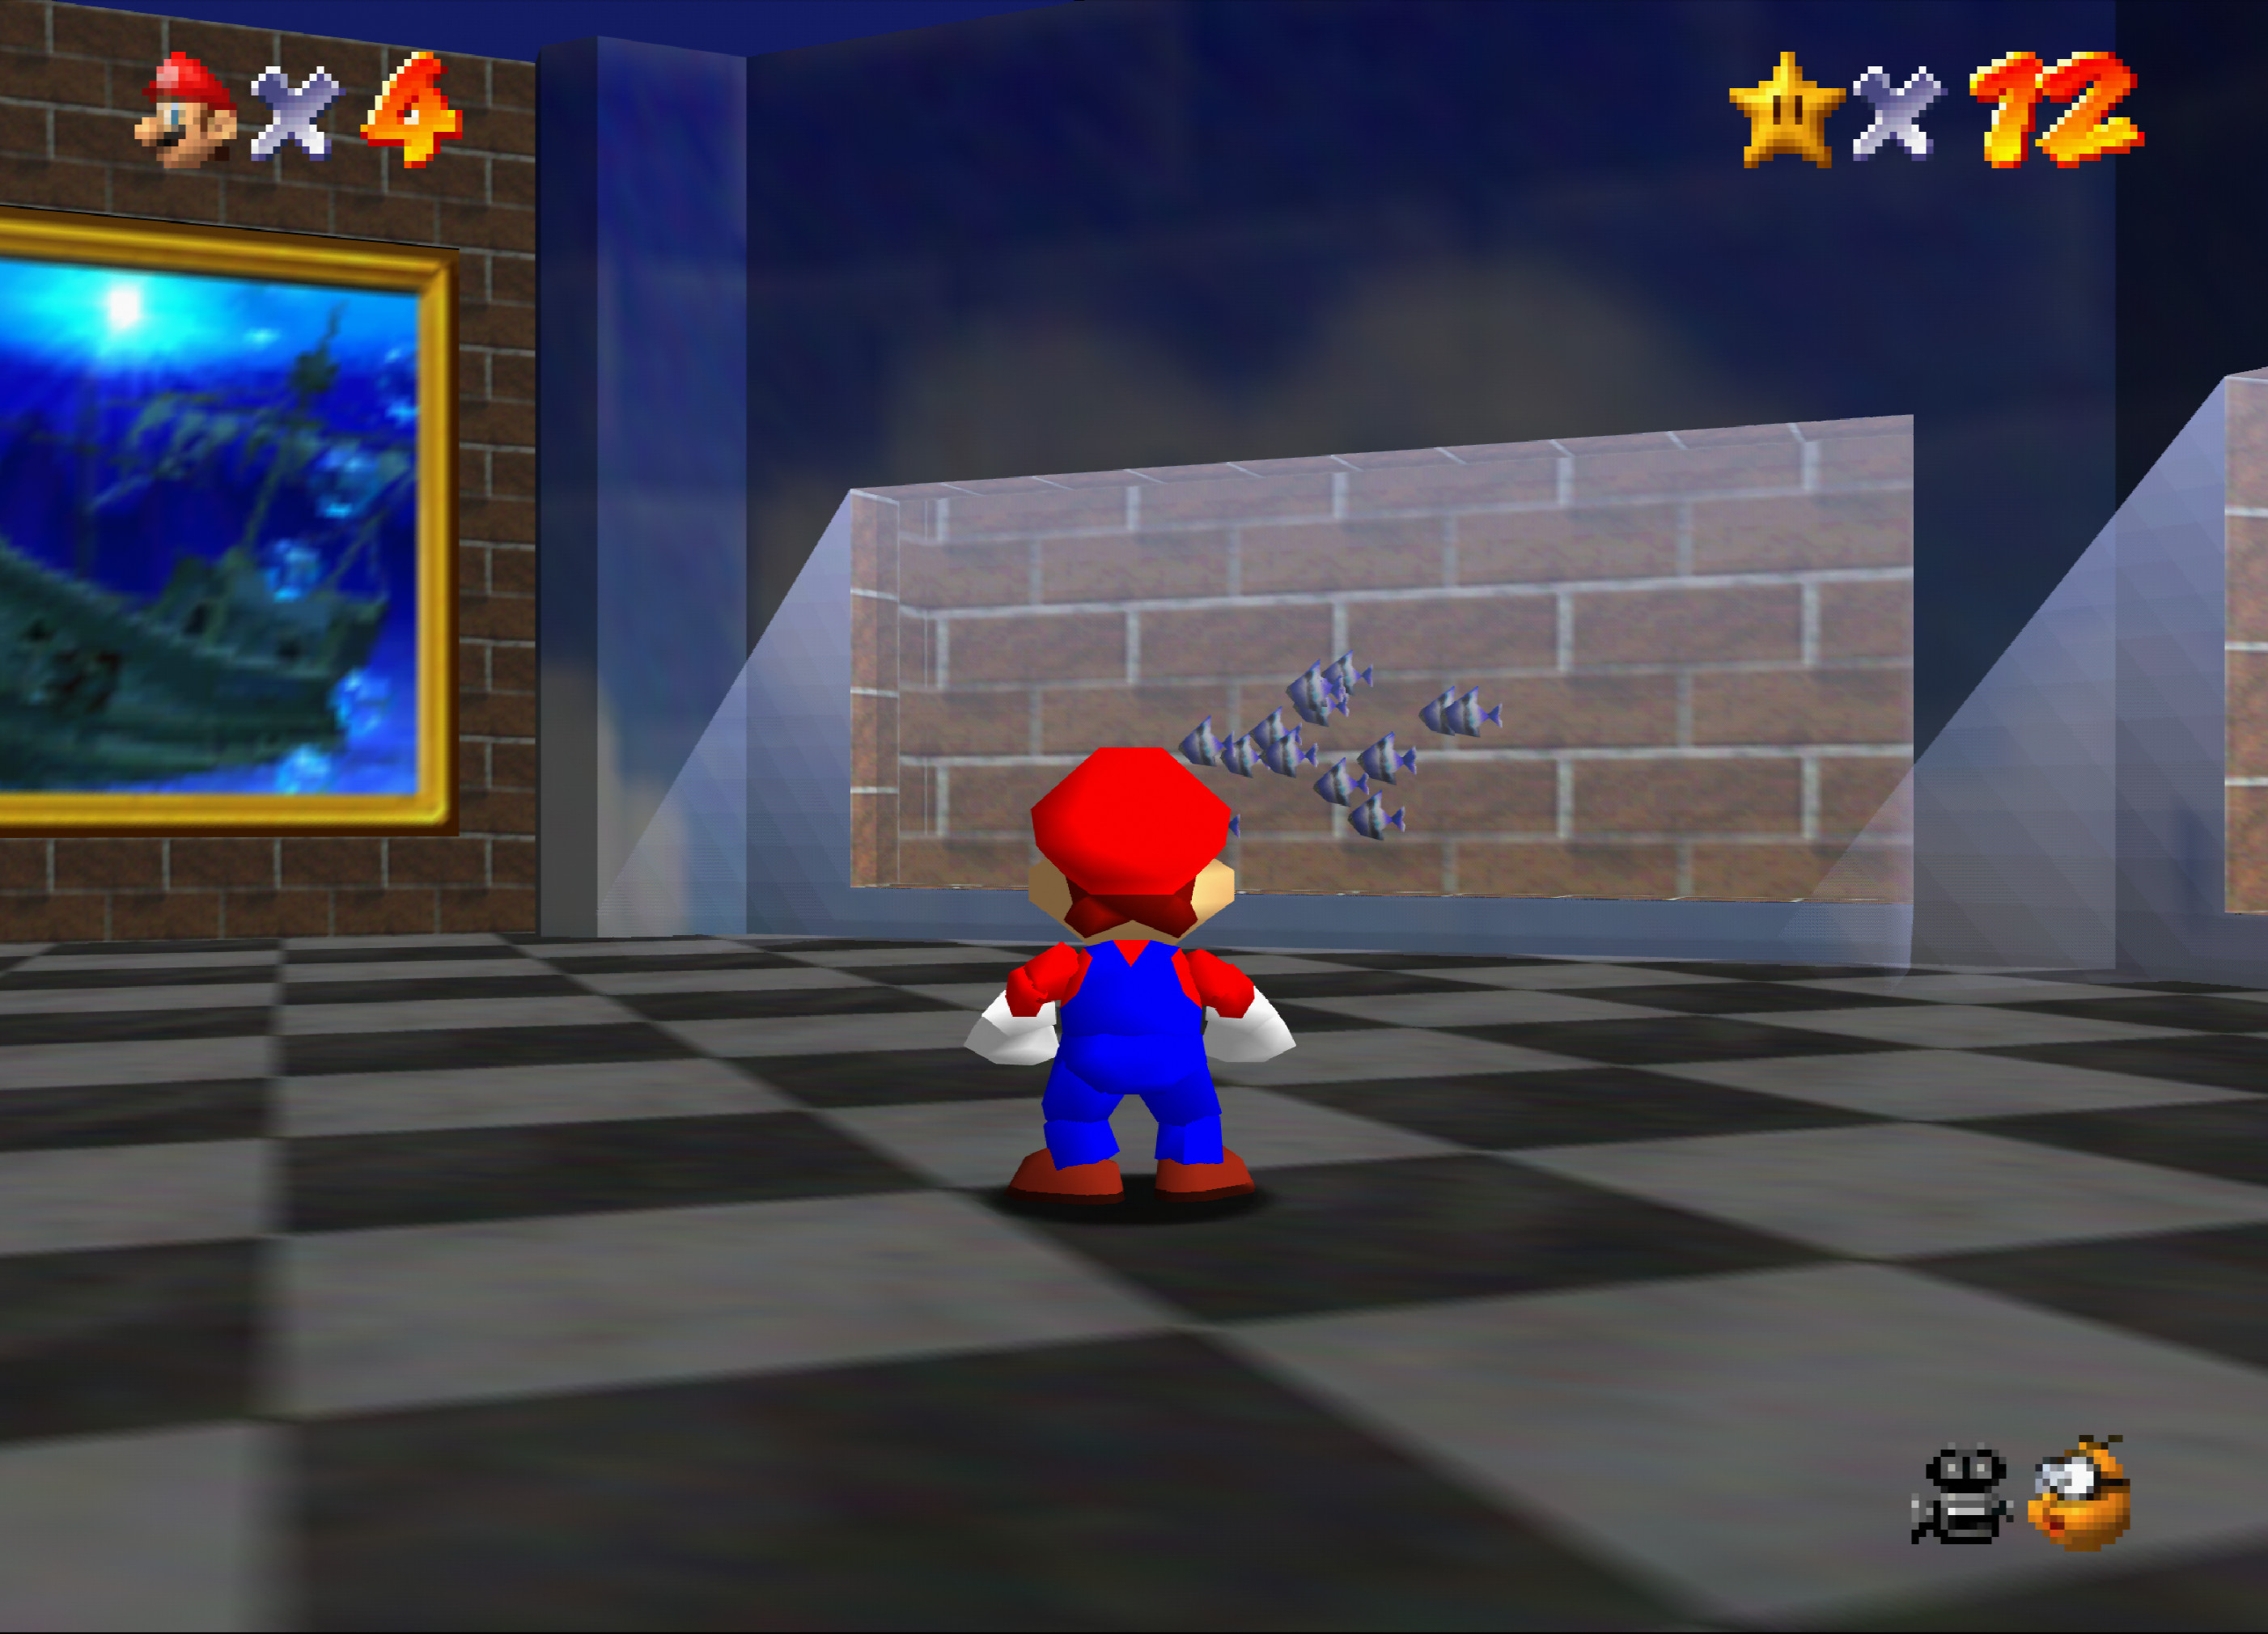
* The entire VI postprocessing pipeline. Again, it bears repeating that not only is the RDP graphics being upscaled, so is the VI filtering. VI filtering got a bad rep on the N64 because this overaggressive quasi-8x MSAA would tend to make the already low-resolution images look even blurrier. But at higher resolutions as you can see here, it can really shine. You need programmable blending to emulate the VI’s coverage, and this just is not practical with OpenGL and/or the current HLE renderers out there. The VI has a quite ingenious filter that distributes the dither noise where it reconstructs more color depth. So not only are we getting post-processing AA courtesy of the RDP, we’re also getting more color depth.
* What You See Is What You Get. This renderer is the hypothetical what-if scenario of how an N64 Pro unit would look like that could pump out insane resolutions while still having the very same hardware. Notice that the RDP/VI implementations in ParaLLEl RDP have NOT been enhanced in any way. The only real change was modifying the rasterizer to test fractional pixel coordinates as well.
* Full accuracy with CPU readbacks. CPU can freely read and write on top of RDP rendered data, and we can easily deal with it without extra hacks.
Known issues
- The deinterlacing process for interlaced video modes is still rather poor (just like Angrylion), basic bob and weave setup. There are plans to come up with a completely new system.
- Mario Tennis glitches out a bit with upscaling for some reason, there might be subtle bugs in the implementation that only manifest on that game. This seems to not happen on Nvidia Windows drivers though.
Screenshots
The screenshots below here show ParaLLEl RDP running at its maximum internal input resolution, 8x the original native image. This means that when your game is running at say 256×224, it would be running at 2048×1792. But if your game is running at say 640×480 (some interlaced games actually set the resolution that high, Indiana Jones IIRC), then we’d be looking at 5120×3840. That’s bigger than 4K! Then bear in mind that on top of that you’re going to get the VI’s 8x MSAA on top of that, and you can probably begin to imagine just how demanding this is on your GPU given that it’s trying to run a custom software rasterizer on hardware. Suffice it to say, the demands for 2x and 4x will probably not be too steep, but if you’re thinking of using 8x, you better bring some serious GPU horsepower. You’ll need at least 5-6GB of VRAM for 8x internal resolution for starters.
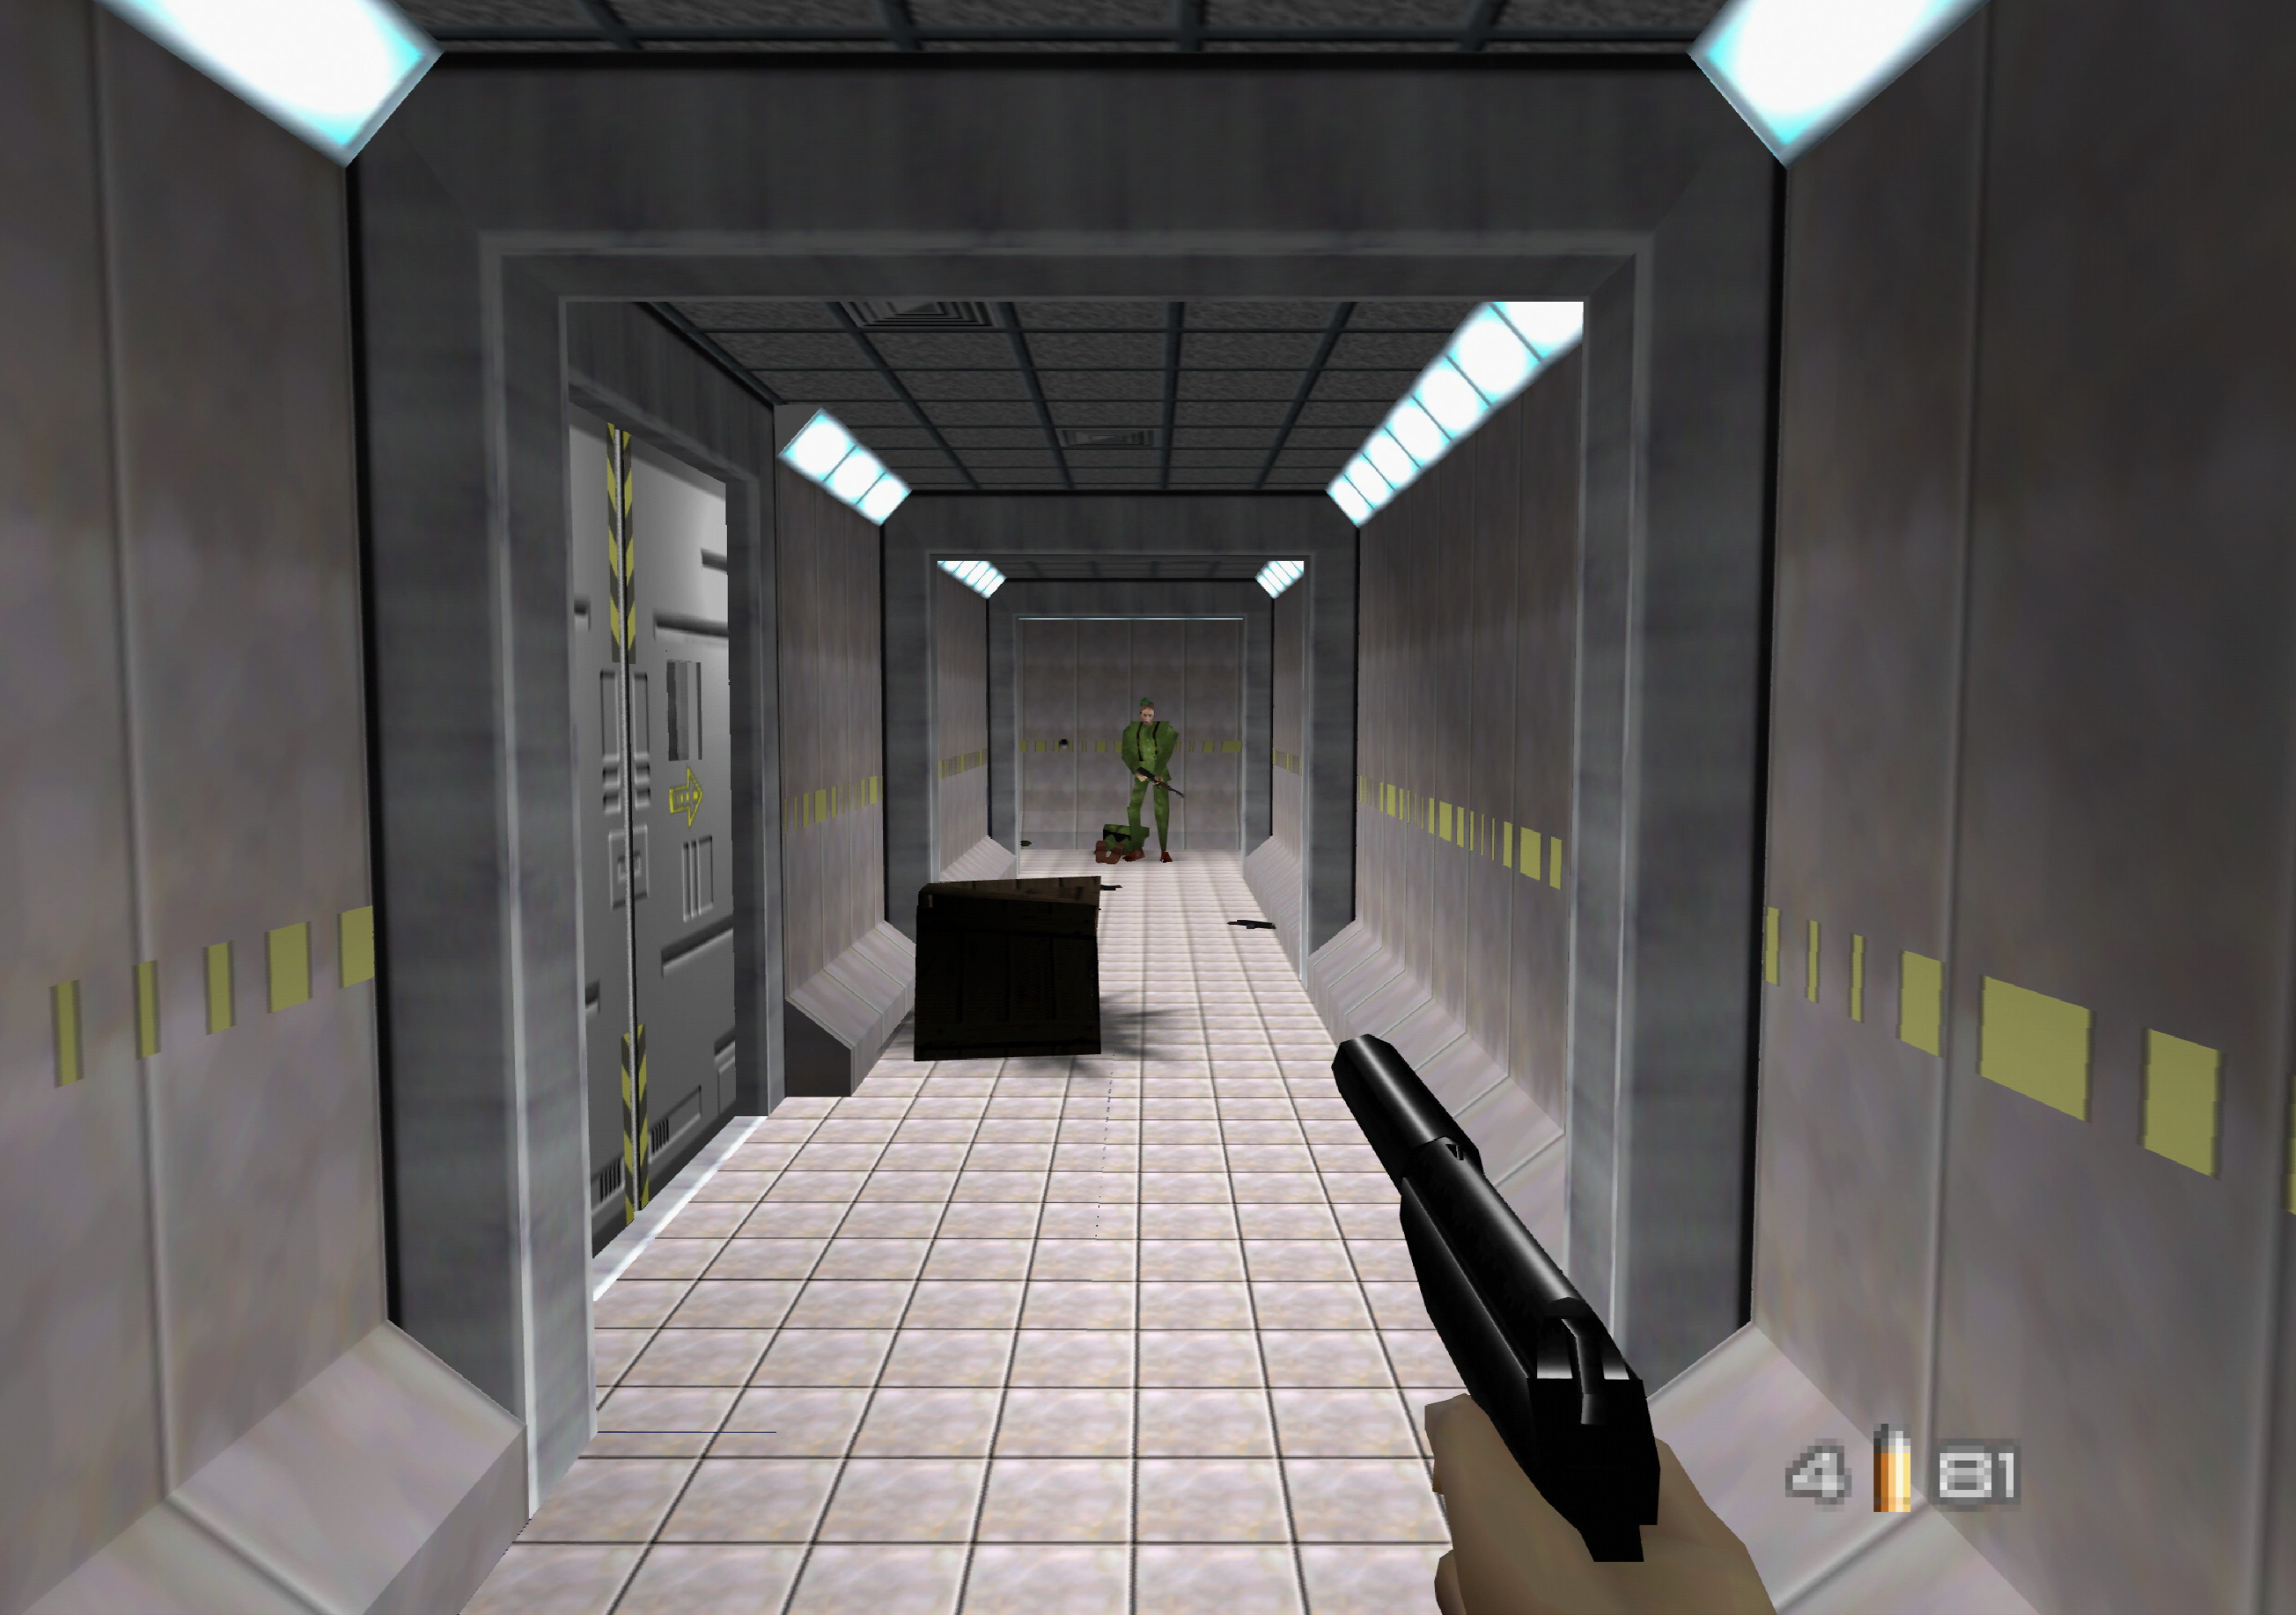
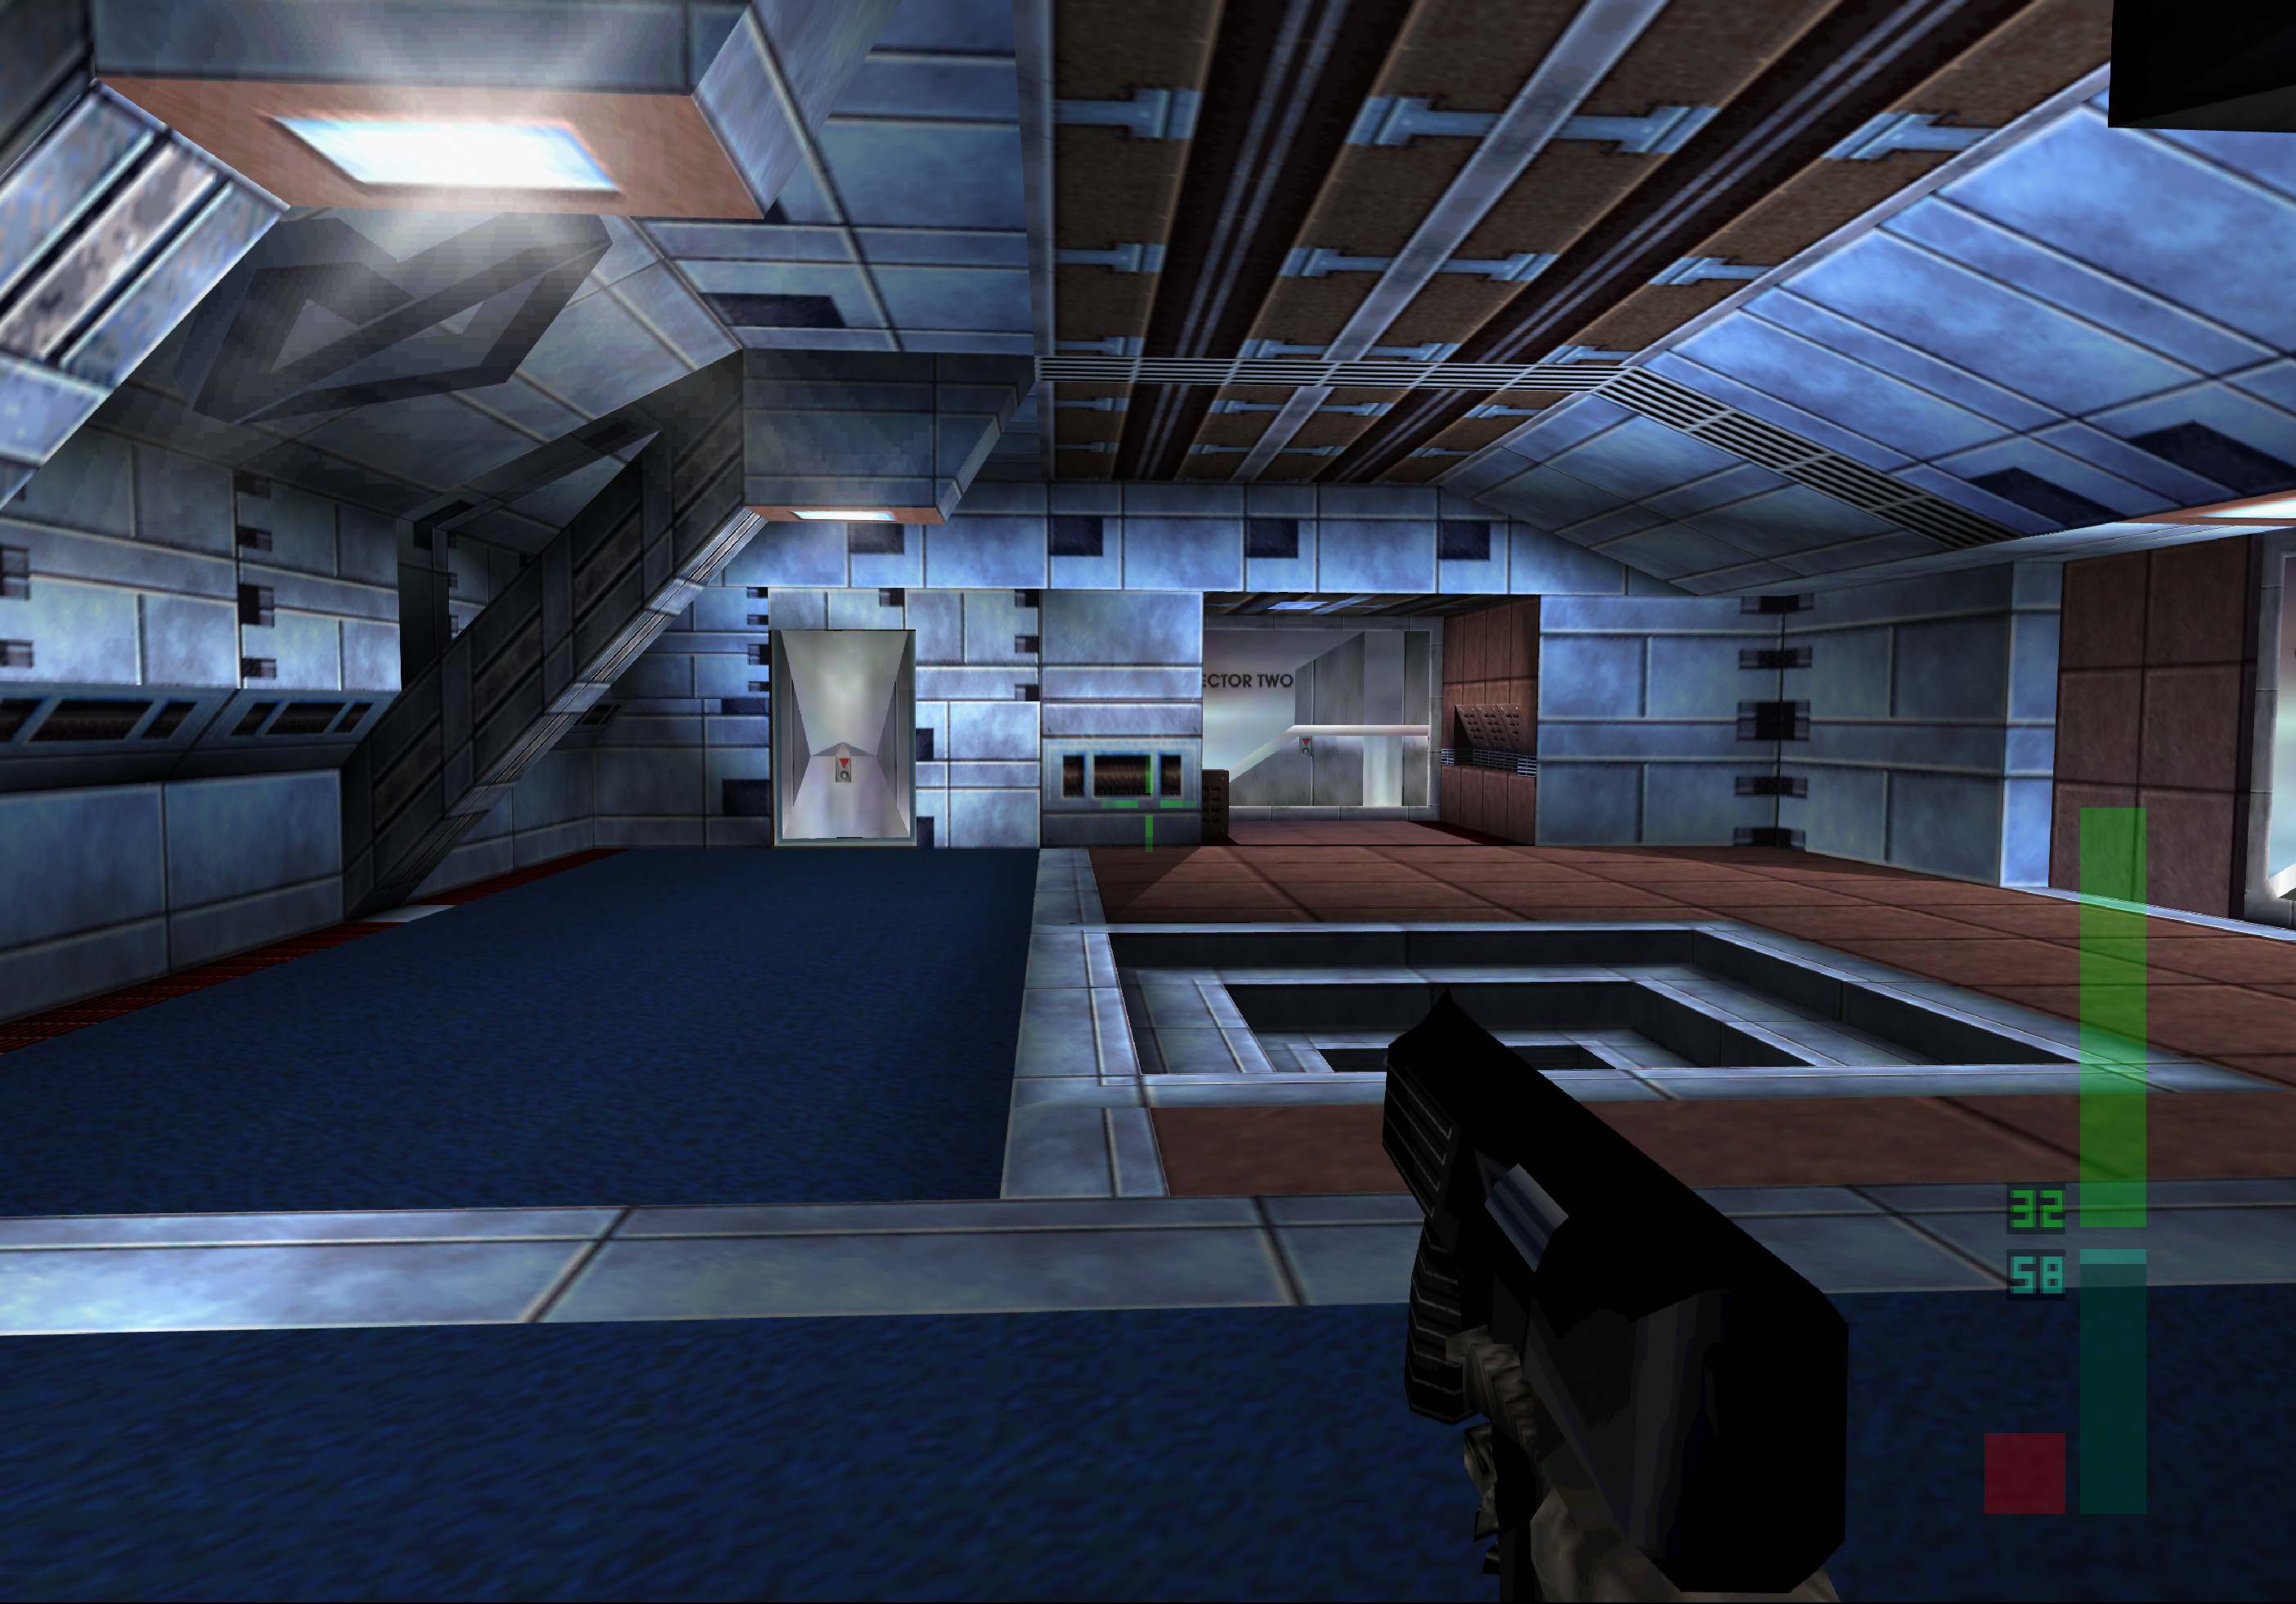
Anyway, without much further ado, here are some glorious screenshots. GoldenEye 007 now looks dangerously close to the upscaled bullshot images on the back of the boxart!
Videos
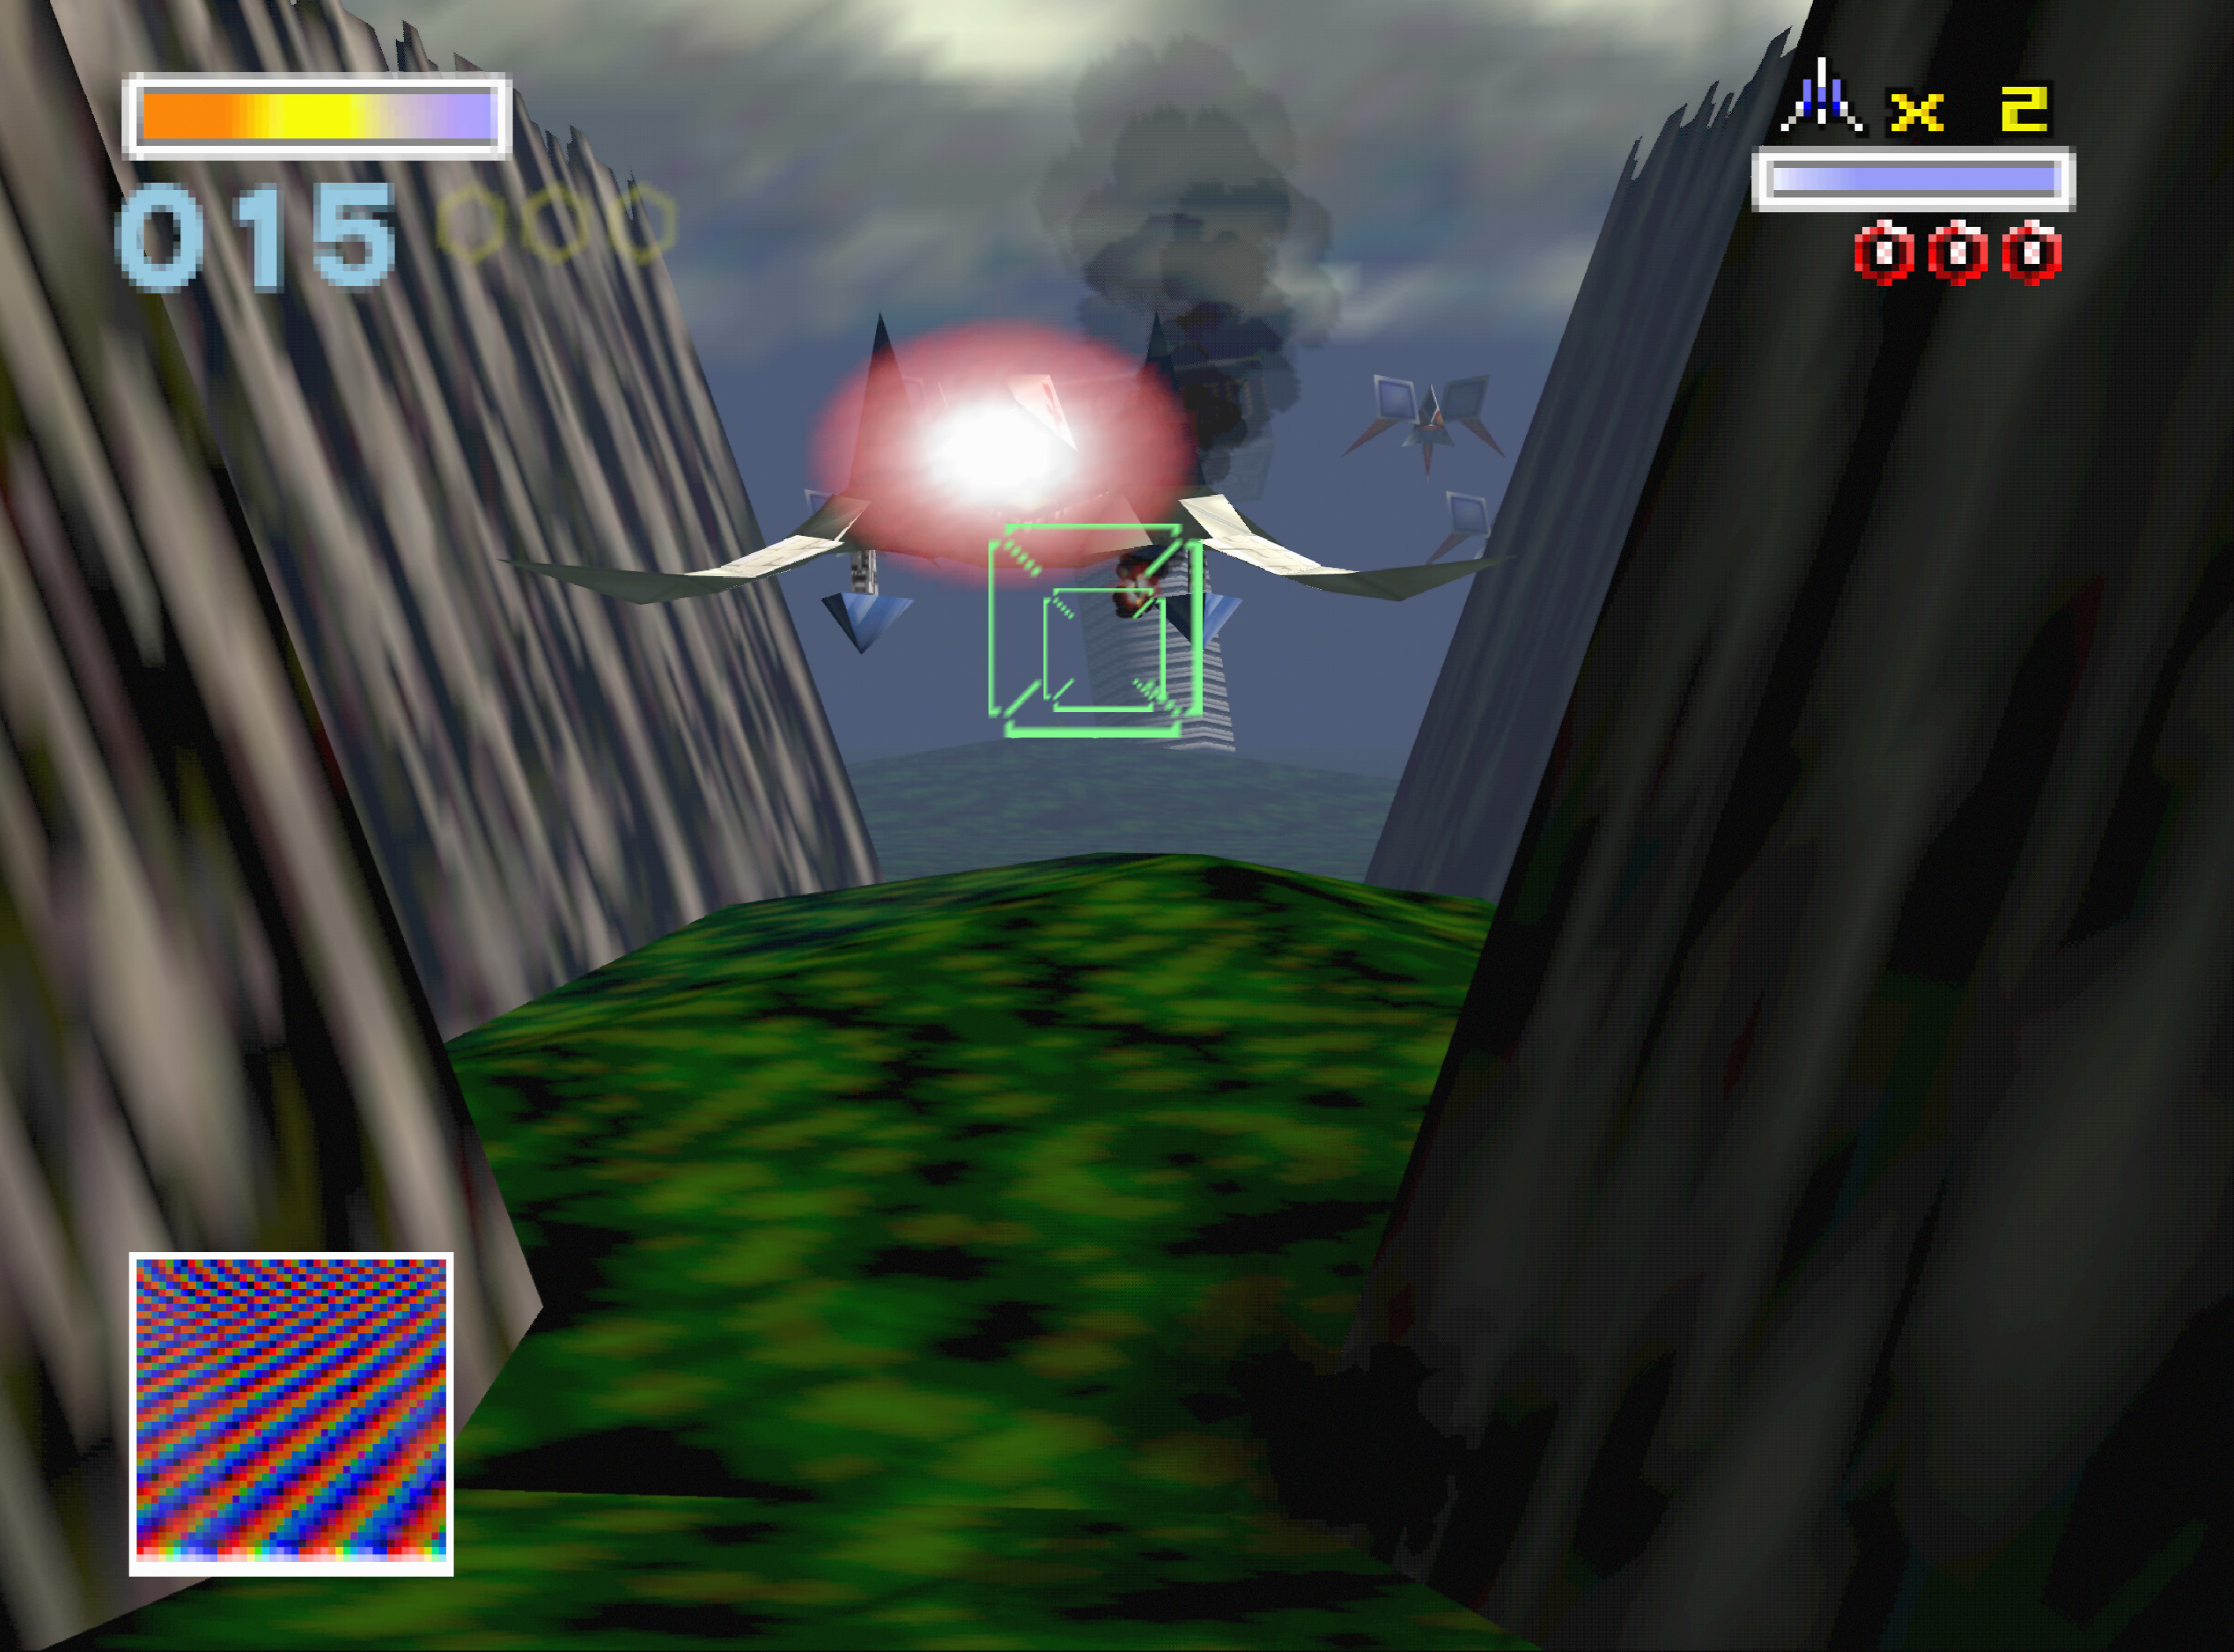
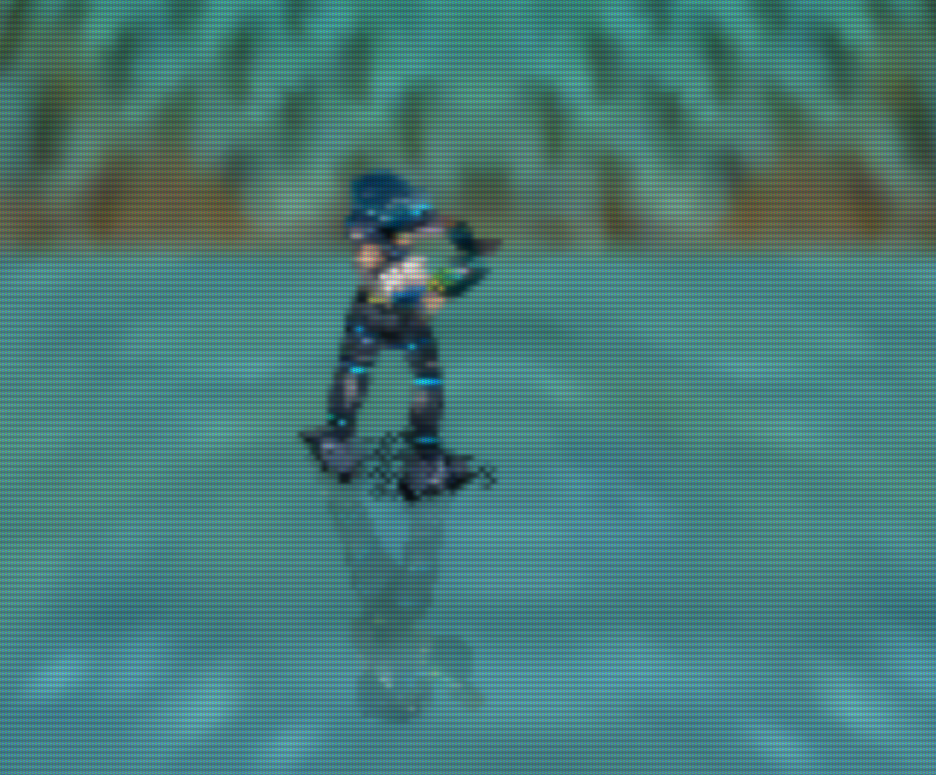
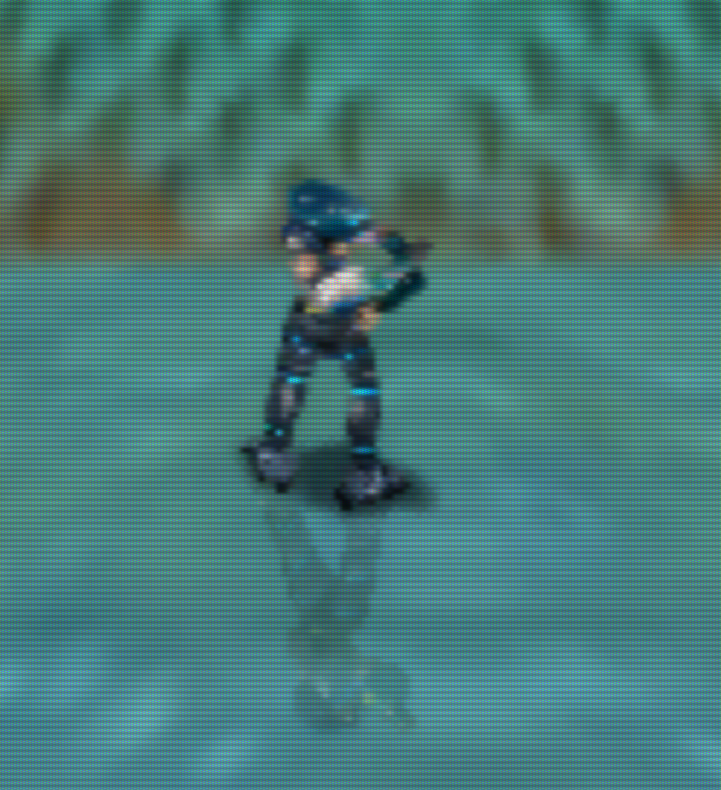
Body Harvest
Perfect Dark
Legend of Zelda: Ocarina of Time
Super Mario 64
Coming to Mupen64Plus Next soon
ParaLLEl RDP will also be making its way into the upcoming new version of Mupen64Plus Next as well. Expect increased compatibility over ParaLLEl N64 (especially on Android) and potentially better performance in many games.
Future blog posts
There might eventually be some future blog post by Themaister going into more technical detail on the inner workings of ParaLLEl RDP. I will also probably release a performance test-focused blog post later testing a variety of different GPUs and how far we can take them as far as upscaling is concerned.
I can already tell you to neuter your expectations with regards to Android/mobile GPUs. I tested ParaLLEl RDP with 2x upscaling on a Samsung Galaxy S10+ and performance was about 36fps, this is with vsync off. With 1x native resolution I manage to get on average 64 to 70fps with the same games. So obviously mobile GPUs still have a lot of catching up to do with their discrete big brothers on the desktop.
At least it will make for a nice GPU benchmark for mobile hardware until we eventually crack fullspeed with 2x native!
