RetroArch 1.8.2 – Usability Improvements

This is an addendum article to our main RetroArch 1.8.2 release post. To read the main article, read this here.

Fullscreen thumbnail viewer

We have added a fullscreen thumbnail viewer to Material UI, Ozone, and XMB. It’s analogous to RGUI’s fullscreen thumbnail view mode.

When viewing any playlist thumbnail view, fullscreen thumbnails may be shown for the selected entry by:

Long pressing the entry (mouse or touchscreen)

Pressing start on a gamepad

Pressing space on a keyboard

When fullscreen thumbnails are shown, any menu action will disable them again.

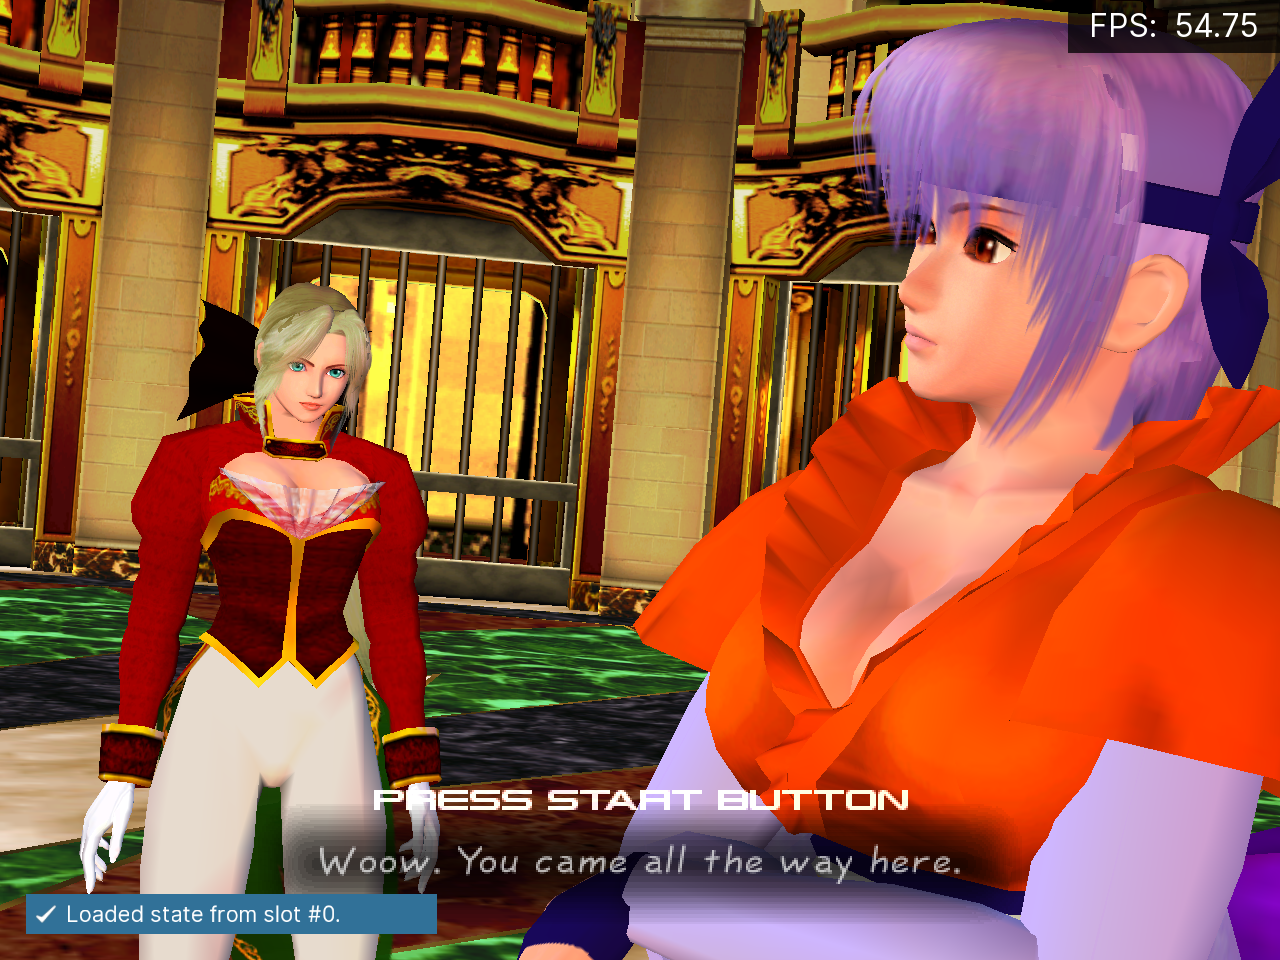
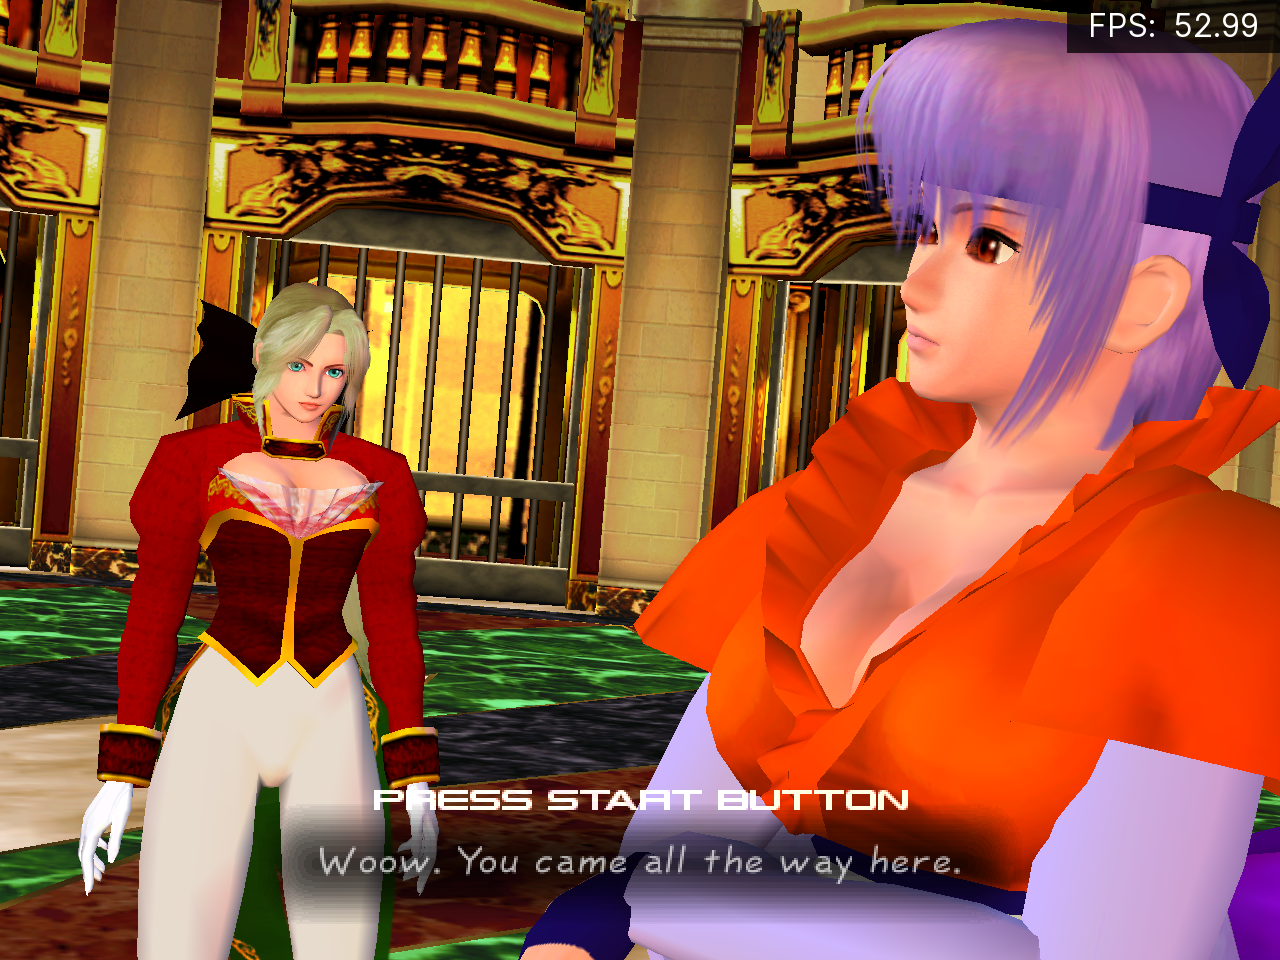
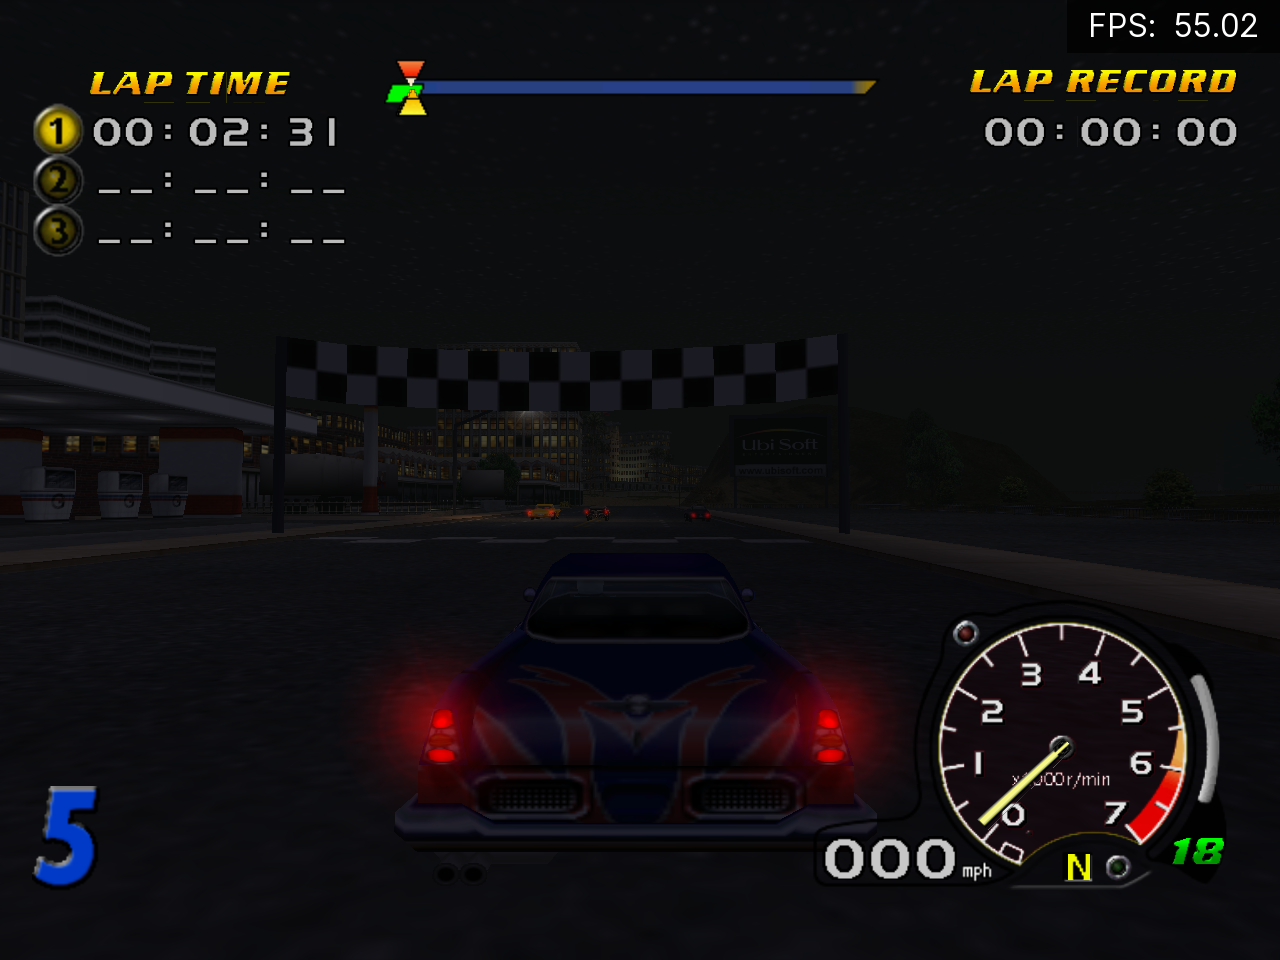
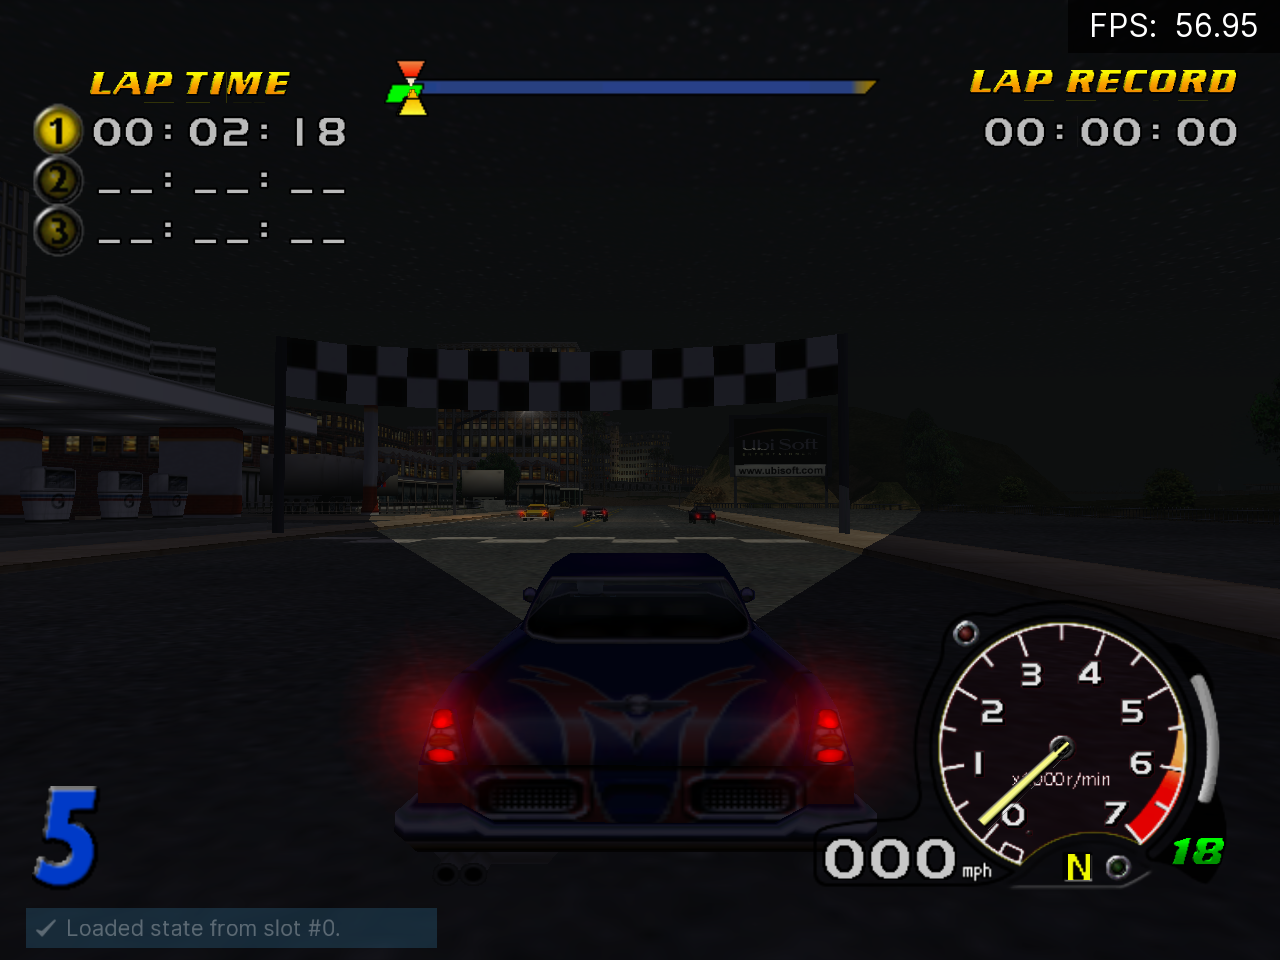
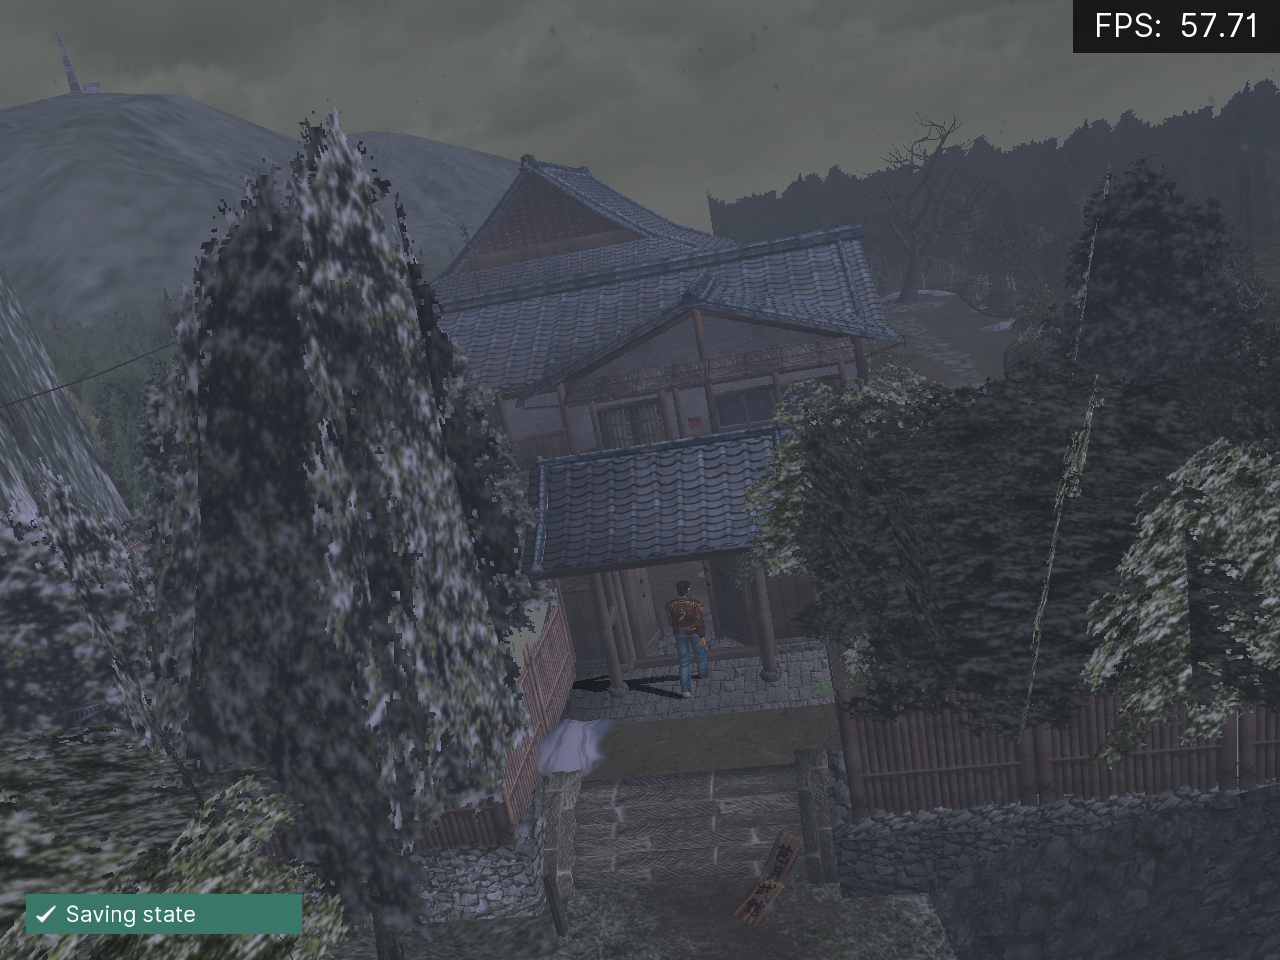
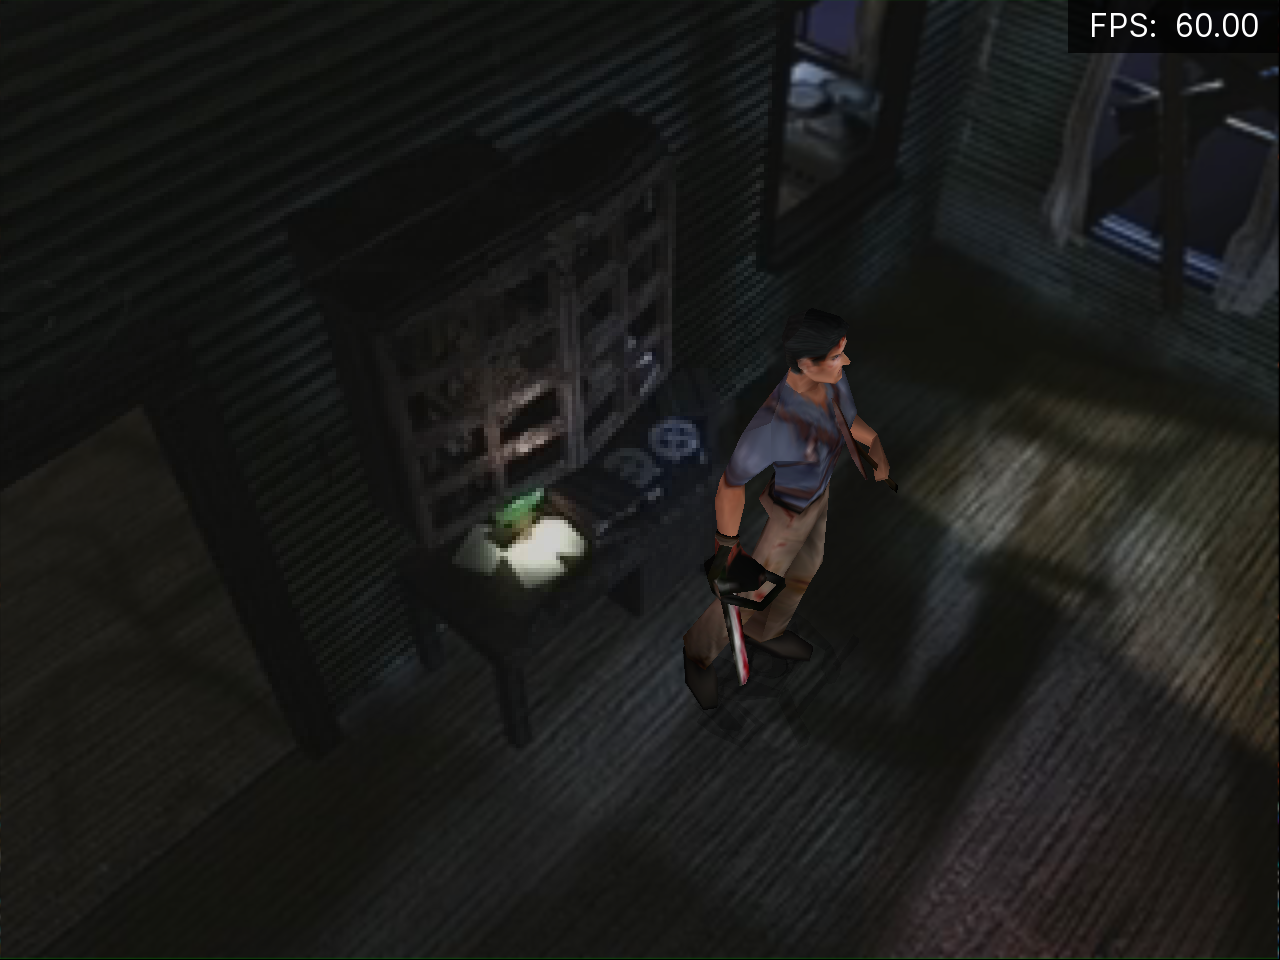
Here are some random example screenshots of fullscreen thumbnails in action:

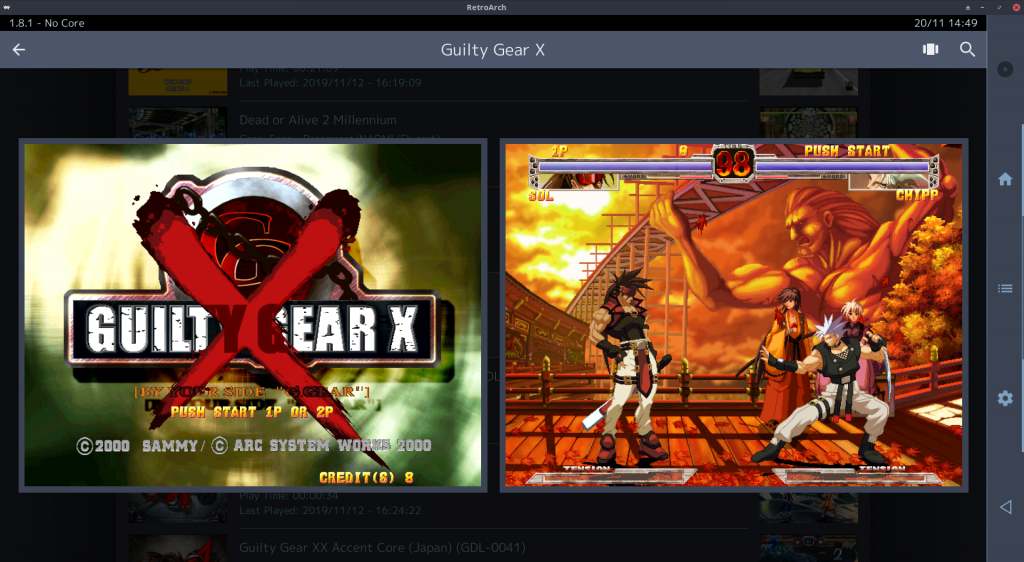
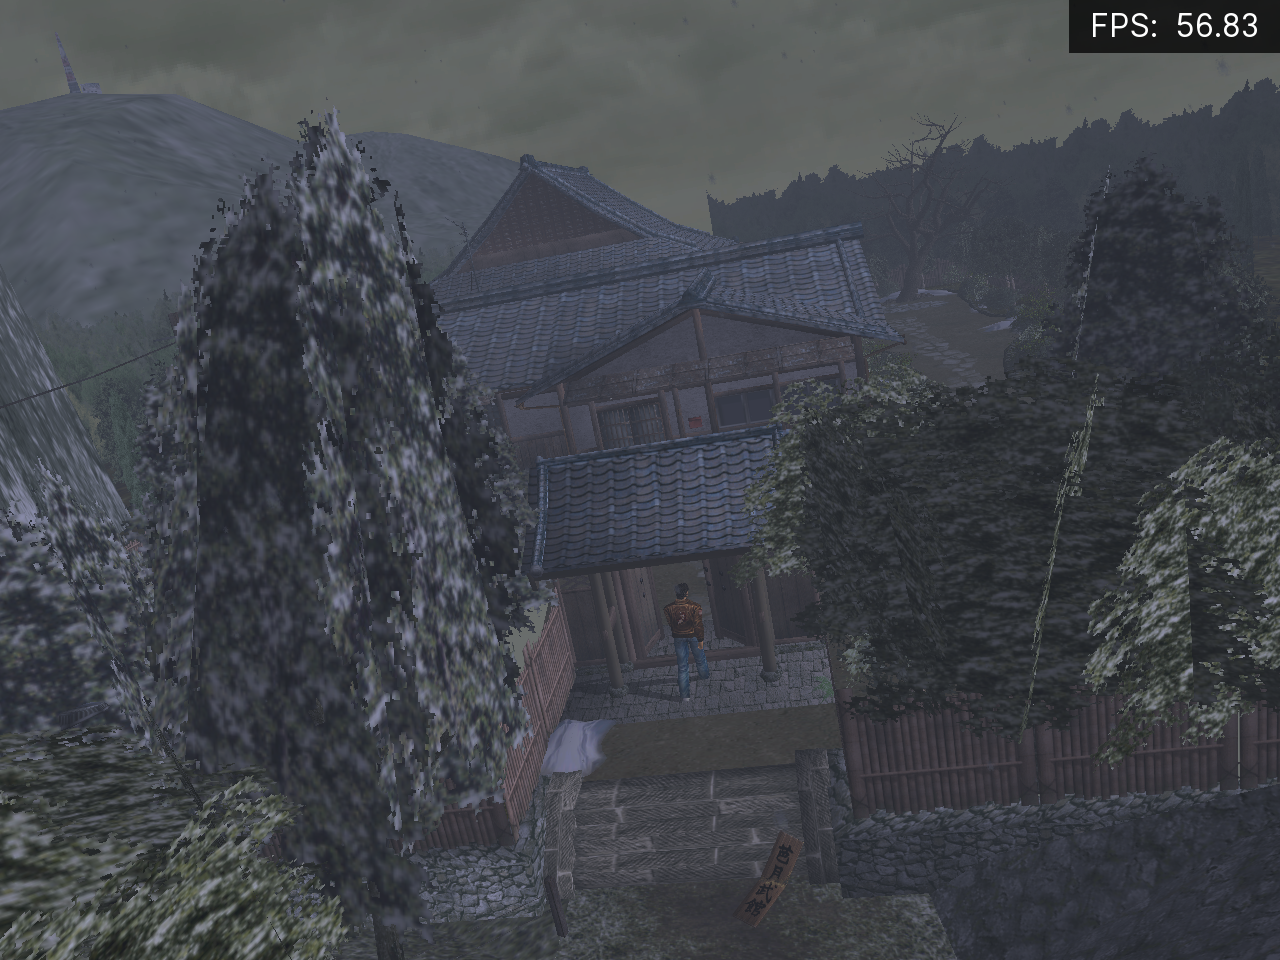
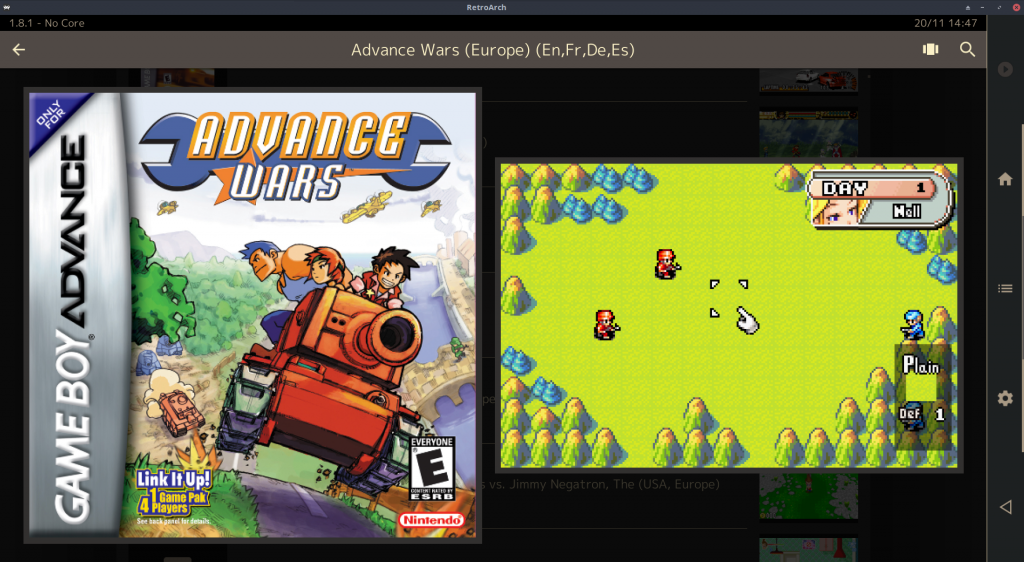
MaterialUI – Dual thumbnail support

RetroArch has added dual thumbnail support to the Material UI menu driver.

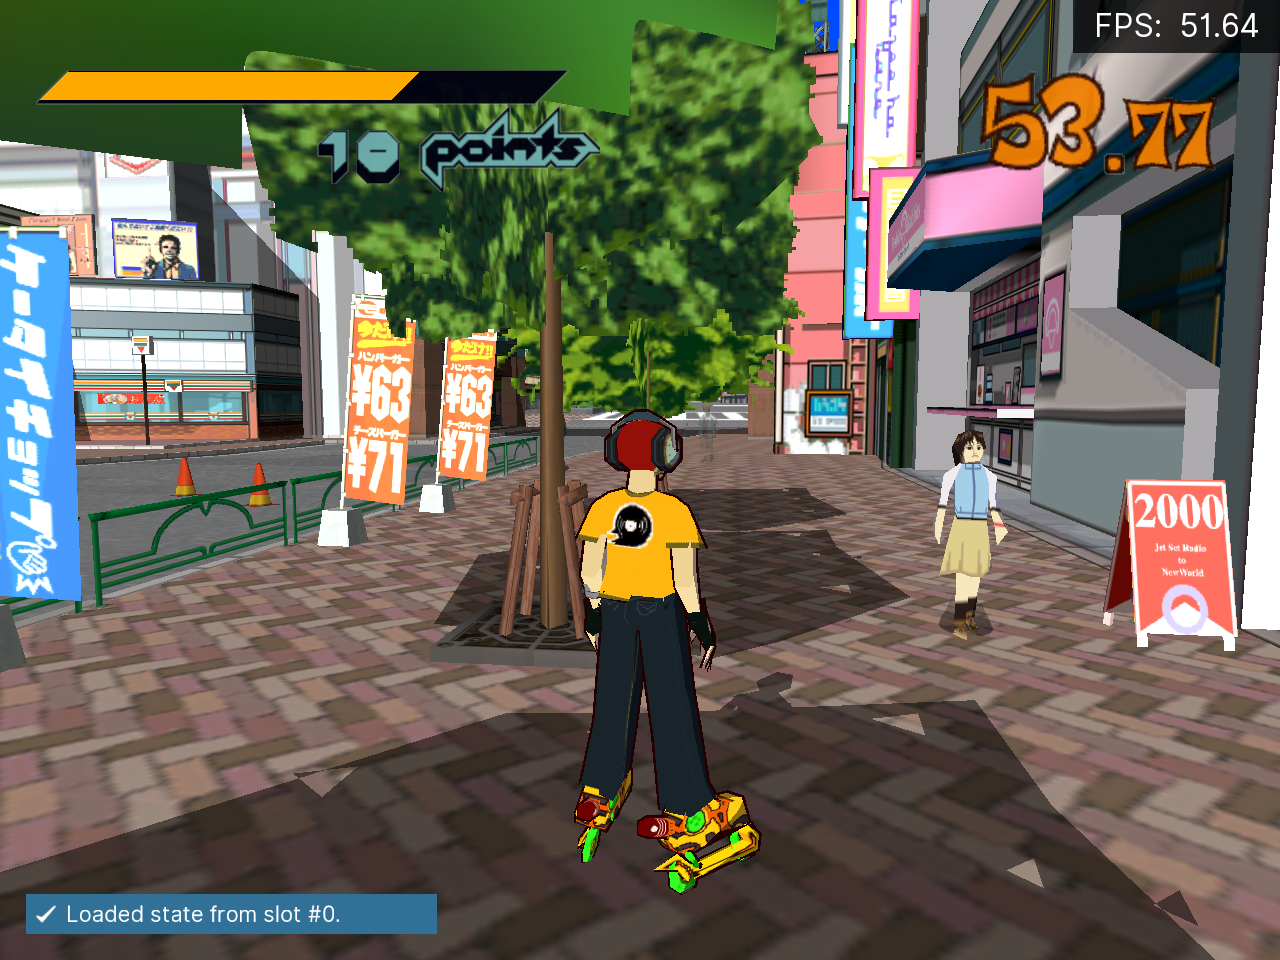
A new Show Secondary Thumbnail In List Views option has been added under User Interface > Appearance. When enabled, two thumbnails are shown in all List views (Small, Medium, Large) – but only if the display is actually wide enough to show two thumbnails. It looks something like this:

If the Secondary Thumbnail option is set to OFF and the user explicitly requests a thumbnail view with secondary thumbnails enabled, the global Secondary Thumbnail option will automatically be set to an appropriate value. This prevents users with fresh installs (default options) from getting a list of ‘missing thumbnail’ images when selecting a view with mandatory secondary thumbnails. NOTE: This does not affect per-playlist thumbnail overrides – if the user wishes to force disable secondary thumbnails with such an override, they are still free to do so.

A new Draw Thumbnail Backgrounds option has been added under User Interface > Appearance. This is enabled by default (which matches the existing behaviour), and when disabled allows thumbnails to be drawn without a solid colour background.

Selective hiding for settings

Several important improvements have been made when it comes to the settings and the overall presentation of them.

Let’s go over some of the most important changes:

  • We have subdivided many cluttered entries into submenus. Examples: Video -> Scaling, Output, CRT Switch Res.
  • We have included dropdown lists now for several important actions, such as ‘shader parameters’.
  • We now selectively hide options based on context. For instance, if you have Vsync disabled, it makes no sense to show you ‘Vsync Swap Interval’ as well. So when Vsync is disabled, the screen gets refreshed and the Swap interval setting is not shown until you turn Vsync on again. We have made sure to implement this in as many settings categories as possible, see our exhaustive changelog for the nitty gritty.
  • There were many settings which were not clickable before with touch-based devices such as mobile phones.

Let’s now go into some specific examples of what we consider by increased usability – let’s take Video -> Scaling –

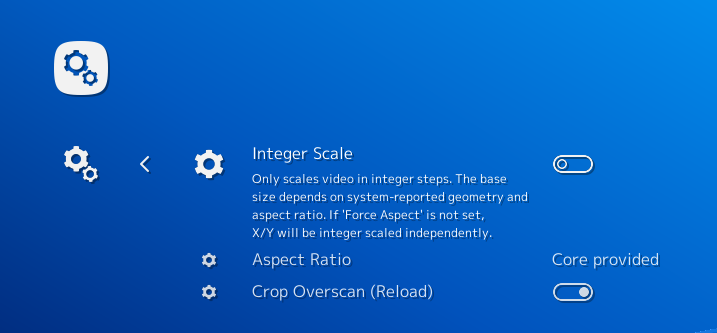
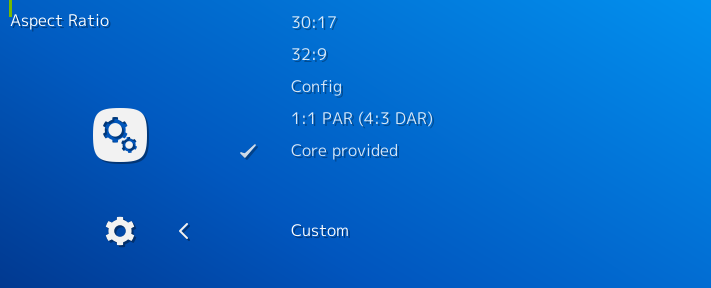
Aspect Ratio is currently set to ‘Core Provided’. We now bring up the dropdown box, and we select ‘Custom’ from the list.

Upon selecting ‘Custom’, we can now see several entries have appeared – ‘Custom Aspect Ratio X Position’, ‘Custom Aspect Ratio Y Position’, ‘Custom Aspect Ratio Width’, and ‘Custom Aspect Ratio Height’. If you read the description for X and Y position, you’ll notice that the sublabel states that if ‘Integer scale’ is enabled, these settings will be ignored and the X/Y position will be done automagically. In the past, we’d just have listed all these settings regardless of what aspect ratio is selected. Now watch what happens when we set Integer Scale to enabled –

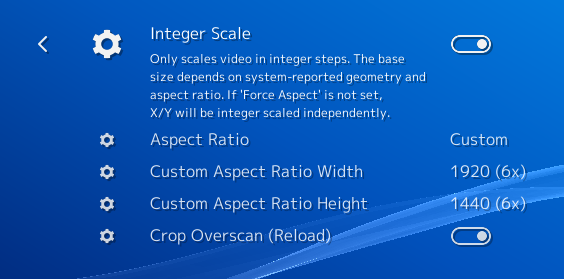
As you can see, X and Y Position are now hidden from view. They won’t be shown again until you turn Integer Scaling off, at which point they’ll actually serve a purpose again.

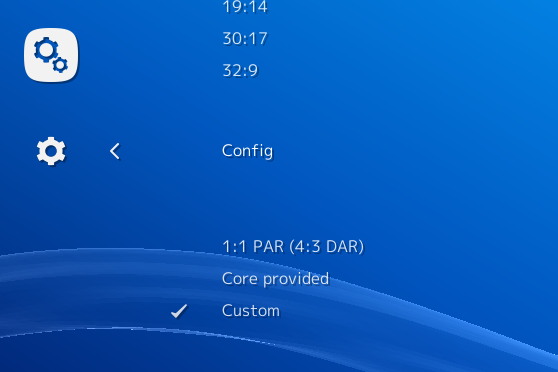
Now let’s try another aspect ratio. This time we’ll select ‘Config’.

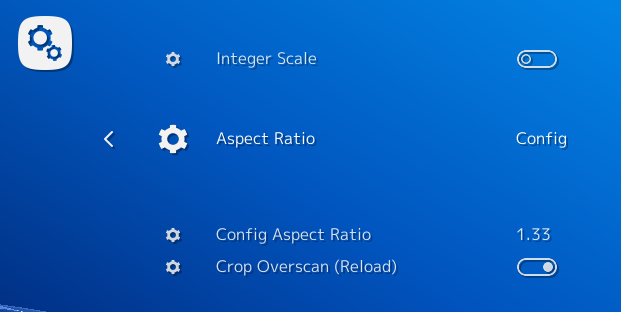
We notice that the Custom Aspect Ratio settings are now gone, since they no longer serve a purpose for the currently selected aspect ratio. Instead, another setting is shown, Config Aspect Ratio.

Now, to contrast that with how things were previously –

in the past, not only would all the Custom Aspect Ratio settings be shown regardless of whether the aspect ratio was actually set to ‘Custom’, but also ‘Config Aspect Ratio’ would be shown even though the user might not have set Aspect Ratio to ‘Config’. This of course caused lots of unnecessary clutter which leads to confused users who can’t find the needle in a haystack anymore.

We have implemented tons of these usability flourishes everywhere and we hope this leads to an increased positive user experience.

MaterialUI Playlist management

It’s now possible to long press a playlist inside the Playlist tab and go to a Playlist submenu. From here, you can do various actions to the playlist, including deleting the playlist and setting a default core association to every entry in the playlist that has not yet been configured to start with a specific core.

In Development – RetroArch ANGLE support – OpenGL support for UWP and more

ANGLE is middleware developed by Google that serves as an OpenGL compatibility layer on systems where OpenGL support is either spotty or missing entirely. It converts OpenGL calls to Direct3D 9/11.

In this video, you will see ANGLE being used on RetroArch UWP. In specific, it allows us to run OpenGL cores now on the Xbox One, where only Direct3D 11/12 are available as graphics APIs. Mupen64plus Next is shown running in this video on an Xbox One S with fairly acceptable results.

Will this be ready for the next version?

We don’t know yet if this will make it for version 1.8.2.

Let us tell you though what this will entail in the future –

  • There will likely be two binaries from now on for the desktop Win32 Windows version – one with ANGLE, one without. The non-ANGLE version will use your system-provided OpenGL driver, while the ANGLE version will use the ANGLE version of the OpenGL dynamic libraries.
  • ANGLE works over OpenGL ES. This means that ANGLE requires separately compiled cores targeting OpenGL ES 2/3 instead of desktop OpenGL. What this means is that 1) we need separate cores since the current OpenGL cores available for Windows assume that desktop OpenGL will be targeted, and 2) a libretro core has to have a working OpenGL ES 2 or 3 implementation in order for it to work. This will mean that currently, cores like Quake 2/3/Doom 3 won’t work since there are no working OpenGL ES 2 codepaths in those cores. However, Mupen64plus Next and Flycast do have OpenGLES 2 codepaths.

What usecases are there for using ANGLE instead of regular OpenGL?

There are several scenarios imaginable where you would want to use ANGLE. Here are some of them –

  • UWP (shorthand for Universal Windows Platform) allows you to make one binary that will work on Windows Mobile 10, Windows 10 and Xbox One. The only graphics API available for UWP programs is Direct3D 11 or 12. So for OpenGL cores to work, a middleware layer like ANGLE which converts OpenGL to Direct3D is our only option. Therefore, ANGLE allows us to run OpenGL ES 2 cores on the Xbox One.
  • Certain graphics cards might have nonexistent OpenGL support on Windows 10 and therefore fall back to Microsoft’s reference OpenGL 1.1 drivers. This is pretty much the worst case imaginable and really limits what you can do with OpenGL on such graphics cards. Intel HD 2000/3000 series integrated GPUs are pretty much in this position. For such GPUs, ANGLE might be your only option to get any kind of acceptable level of hardware accelerated graphics support with openGL-based cores.
  • OpenGL driver support might be stagnating for certain graphics cards, and therefore several bugs go unresolved in their OpenGL driver implementations. ANGLE is a good way to work around that assuming you are OK with an OpenGL ES 2/3 feature set.

We will fill you in as things develop how ANGLE will fit into RetroArch’s future releases. For now, the path seems clear – separate core versions for the emulators that have viable OpenGL ES 2/3 codepaths, and separate binaries at least on Windows desktop for an ANGLE-enabled and non-ANGLE enabled version. The redist (redistributable) will also need to be updated to include the extra dynamic library dependencies.

RetroArch 1.8.2 – Accessibility features for blind people

RetroArch singlehandedly takes big strides to cater to an underrepresented group of people, opening up a whole new world of entertainment.

See here the perspective of a blind person talking about the new accessibility features available in the latest nightly versions of RetroArch. This and more will be available out of the box starting as of version 1.8.2.

Also read our version 1.8.2 release announcement post here.

Written by Devin Prater, Certified Assistive technology instructor
Edits by Barry Rowe, AI Service and Accessibility contributor

Background

For decades, video games have offered entertainment for many people. Childhoods were changed by iconic franchises like Super Mario, Zelda, Final Fantasy, and Castlevania. People can reasonably count on others to understand the meaning behind video game references.

For people who are blind, however, these games could only be enjoyed through their great music, or by reading novelizations or fanfiction. Audio games have been created, to fill the void of video games which could not be played, an some blind people braved fighting games by memorizing menus and special attacks, but audio games were few in number, and didn’t usually have much content.

Emulation

Emulation has helped many people who are blind relive their childhood playing fighting games. With the rise of machine learning, however, blind gamers now have another tool in their arsenal: optical character recognition, the extracting of text from images. With this being a part of many screen readers, blind people could use that to read menus, character select screens, and unspoken dialog.

RetroArch

RetroArch is the first “emulator” to now offer Accessibility to blind people by speaking the interface. Along with the text-to-speech AI service, RetroArch has not only become the first emulator to implement accessibility for blind people in menus, but also in reading game text as well.

This doesn’t, however, mean that all games are accessible. A blind person still cannot get Super mario into the castle in Super Mario 64, nor defeat Lavos in Chrono Trigger, although perhaps one could probably play Radical Dreamers now. Much more work will be needed to make video games completely accessible to blind people, even portraying health bars in fighting games through sound cues. Even so, the accessibility of RetroArch means that blind users of Windows, MacOS, and Linux can enjoy the state of the art in video game accessibility through emulation.

How to enable accessibility

Once you’ve downloaded and installed RetroArch, there are two ways to enabled accessibility. The first way is by turning it on via the menu. Once RetroArch is started press: right, then up seven times, then enter (on some systems this could be the x key), and then right. You should hear “Accessibility Accessibility Enable ON” at this point. If this doesn’t, restart RetroArch and try again. This method navigates the menu, which may change in later versions, so you should read the RetroArch Accessibility Docs for any updated key presses.

The second method is to enable it via the command line. This is done by running the RetroArch executable (for example: retroarch.exe) in the command line or terminal. On windows for instance, once you’ve opened the command line, navigate to the RetroArch folder, and run “retroarch.exe –accessibility” and you should hear “RetroArch Accessibility On. Main Menu Load Core.” From there you can navigate right to the settings submenu, and then down to the Accessibility option, and then turn set Accessibility Enable on. Now you’ll be able to start RetroArch with accessibility from outside the command line as usual.

If these options don’t work for you, it could be that your OS does not have the required speech libraries or voices that RetroArch needs. For windows, RetroArch uses the Windows Narrator, which you can read how to download additional voices for here. On MacOS, it uses the “say” command, which you can read how to download voices for here. And on Linux it uses Espeak. For Ubuntu, you can install espeak by running “sudo apt-get install espeak” and then “sudo apt-get install espeak-data” for the additional voices.

Using the AI Service with Accessibility

The AI Service can also use the Accessibility narrator for Text-to-Speech. This can be done by going to the AI Service settings section, and changing the AI Service Output to “Narrator Mode.” This handles the Text-To-Speech, but the AI Service still needs to process the game screen to get that text. You can follow the setup instructions for the AI Service here.

Conclusion

While people without disabilities have been able to play thousands of video games, both current and past, blind people have not had the ability to enjoy more than a handful of video games. Through
emulation, this is beginning to change. Games which were once only playable if one could memorize menus and selection screens are becoming accessible using OCR, and more will be possible through the hard work of developers who may build upon this foundation for accessible video game emulation.

RetroArch is the first emulation center to provide accessibility for the user interface, and an AI service to perform OCR on video games, allowing blind users of all three major desktop operating systems to enjoy playing fighting games now with knowledge of any text that appears onscreen. It is hoped that this is only the beginning of a great advancement in accessibility, with RetroArch paving the way to even greater video game accessibility for people who are blind.

Flycast world’s first Dreamcast emulator to receive Vulkan renderer – available later today on RetroArch with nightly core!

The first Dreamcast emulator ever to get a Vulkan renderer. Completely open-source, written from scratch, and available later today on RetroArch. Update your core later today to get the latest version with the Vulkan renderer! Available for Android, Windows, and Linux.

For more information, read down below…

Wait … a new what?

The renderer is the emulator component that emulates the Dreamcast/Naomi GPU chip, namely the PowerVR Series2. It was one of the first generations of 3D chips, with only a fixed pipeline. The PowerVR2 supported DirectX 6.0, which was the graphics API used by Windows CE games on the Dreamcast. Successors of the PowerVR2 would later be found in the original iPhone and iPod Touch (PowerVR4), iPhone 4 and iPad (PowerVR5) and many many other mobile devices. Now the Dreamcast GPU is more than 20 years old. You might think it should be easy to emulate such an ancient chip on modern hardware, right? Well … yes for the most part. But there’s one thing that the PVR2 does really well, and it’s order-independent transparency. And even today this is still not trivial to implement even on modern hardware. You won’t find this feature in Open GL or DirectX, and you need a pretty recent version of these APIs to be able to emulate it, which means manually sorting individual pixels from back to front and blending them together, and doing this for each visible pixel on the screen!

OK, but what about Vulkan?

For those of you who are not familiar with Vulkan, it is a relatively new 3D graphics API, basically a follow-on to Open GL. Open GL is quite permissive and has little declarative constraints. You just throw stuff at the driver when you need to and the driver’s job is to figure it out. The downside of this is that the Open GL driver often needs to guess what you’ll do next and he might not guess right. And when it doesn’t, performance suffers. Vulkan is radically different in that everything must be declared in advance, in great details, and there’s very little room for improvisation on the part of the driver. Vulkan works much closer to the hardware than Open GL does. So you can expect less overhead, more reliability and better performance in many cases.

The downside of Vulkan is the sheer amount of code you have to write to display just a single triangle on the screen, let alone a full-featured Dreamcast renderer. Last time I checked, the Vulkan renderer had 47 source files and around 7800 lines of code. (The Open GL renderer only has around 6000 lines of code.)

So what do we get?

As with Open GL, there are actually two Vulkan renderers: The first one uses a traditional single render pass with per-triangle or per-mesh sorting done by the CPU. The second one is capable of order-independent transparency with per-pixel sorting performed by the GPU. It uses multiple subpasses to compose the final image: the first subpass draws the opaque geometry depth map and the shadows casted on them. The second subpass renders all opaque geometry to a temporary color framebuffer, and transparent geometry into a huge pixel linked list. The last subpass then renders shadow volumes for translucent geometry. And finally all pixels are sorted and blended together using the opaque framebuffer of the previous subpass as background.

The next Flycast nightly build will have support for Vulkan on all major platforms: Windows, Linux and Android. In terms of features, the new renderer should be on par with the Open GL renderer, with the notable exception of lightgun crosshair and VMU screens display, which will be added soon. However, expect to find bugs and crashes here and there as is expected with any new piece of software. Also it may be slower than Open GL depending on many factors such as GPU, driver version, game being played, etc. We’ll do our best to fix any issue encountered and overcome performance issues. When reporting problems, make sure to indicate what GPU you’re using and the Vulkan driver version. It is highly recommended to upgrade your drivers to the latest version available, especially on mobile.

Here is a showcase of the differences between the basic and OIT renderers. By the way, this also applies to Open GL.

Here the hair of these ladies show glitching triangles in basic mode.

In Speed Devils 2, the shadow volumes (called “Modifier Volumes” in Dreamcast literature) are used in a special way to project headlights. This is only possible by using deferred rendering.

In this example, look at Ryo’s cast shadow on his left. There is a fog effect applied to this scene, but the basic single pass renderer cannot apply a fog effect to the cast shadow. In the OIT renderer, the shadow is perfectly fogged.

In Jet Set Radio, the character is composed of translucent polygons, and these polygons can be shadowed as well. Only the OIT renderer can properly render shadows cast on translucent polygons.

To finish, here is another seldom used GPU features: secondary accumulation buffer. It can be used to do tri-linear filtering and other effects. This is Evil Dead – Hail to the King and it is clear that the basic renderer is having a hard time here.

Final thoughts

Yes, the per-pixel alpha transparency option which to this date was only available on Windows and Linux now also works on Android with the Vulkan renderer. However, keep in mind that per-pixel alpha sorting is heavily memory bandwidth-limited. It has been tested on a Mali G76 (Samsung Galaxy S10+) – and it runs acceptably at 640×480 or 800×600 resolution. Your mileage may vary depending on the GPU power inside your Android phone. We recommend you to find that sweet spot which works best for you, and if results are too bad with per-pixel alpha enabled, turn back to per-triangle.

Some clear advantages of the Vulkan renderer is that frame pacing is much better than the OpenGL renderer, and performance is far higher when it comes to texture uploads and/or framebuffer manipulation. For example – when you KO an opponent in Dead Or Alive 2 against an explosive wall – the framerate would often tumble a bit on GL, but no such issues with Vulkan. Similar improvements can be noticed in Virtua Tennis 2 – when certain framebuffer effects happen after a replay, performance is much more steady with Vulkan thanks to the high degree of parallelism.

With Vulkan, we have heard reports that virtually all sound crackles and stutters are gone. That’s because with vulkan you choose the sync points where you wait. In GL the driver has to guess and sometimes it fails. These effects are using render to texture, and with OpenGL this creates sync issues.

RetroArch – Hardware video decoding – coming soon!

As you may well know, RetroArch has embedded video player support on platforms such as Windows, and Linux. Just like VLC, Kodi, mpv and other video players out there, it accomplishes this by leveraging the ffmpeg project.

Up until now, all video decoding was performed entirely in software. This means that the CPU has to do all the decoding instead of being able to delegate it to the GPU. This meant that on some systems, video playback could be too slow if the CPU was too underpowered. This so happens to be the case on many ARM SoC devices out there, such as the Raspberry Pi and Odroids.

Now, we finally support hardware video decoding through ffmpeg’s own APIs! This should really help on systems where there is a CPU bottleneck and the GPU happens to support hardware decoding. Whether or not you are able to decode 1080p, 1440p or 4K on hardware depends entirely on your GPU’s capabilities however.

In addition to hardware decoding, frame based multithreading is now enabled for SW based video decoders, but actual effectiveness hasn’t been proven yet.

The core switches back to SW based decoding if the HW based decoding couldn’t be initialized.

The following backends have been tested:

  • DXVA2 [Windows]
  • D3D11VA [Windows] (it will use this when using the D3D11 driver
  • VDPAU [Linux] (Tested on an AMD System with VDPAU to VAAPI layer)
  • VAAPI

We have performed the following tests so far:

  • Nvidia Titan XP/RTX 2080 Ti
  • – Can hardware decode 1080p/1440p/4K content.

  • Intel UHD 630
  • – Can hardware decode 1080p/1440p/4K content.

  • AMD Radeon R9 290x
  • – This is a slightly older card from 2014. It only supports 1080p hardware video decoding at best. 1440p and 4K content therefore falls back to software video decoding. This means that if your CPU is not up to the task, you won’t be able to run this content at fullspeed.

As a stress test video, we picked a 4K video (3840×2160) with a total bitrate of 29561 kb/s (h264/AVC1, YUV420P), running at 30 frames per second. The CPU we’re using for this test is an Intel Core i7 7700k. With such a CPU, we don’t really have a CPU bottleneck and we are merely GPU bound when it comes to rendering the content.

With software decoding (the current default in RetroArch) – we averaged around 55fps with the 2080 Ti. Our CPU load averages around 15% with GPU load averaging around 11%.

With hardware decoding (the 2080 Ti defaults to DXVA2 for this test) – we averaged 77fps with the 2080 Ti. Our CPU load averages around 11% with GPU load averaging around 20%.

NOTE: The above is long since out of date – the same video is now 256fps with hardware decoding and 224fps with threaded video decoding at an automatically defined amount of threads. Quite the improvement from 55fps I’m sure you’ll agree.

What remains to be done

We will still need to gather tests for the following backends:

  • Cuda
  • Videotoolbox
  • DRM
  • OpenCL
  • Mediacodec

Future plans

In short, we hope this will really help out RetroArch’s video playback capabilities not only on desktops such as Windows and Linux, but also on the ARM SoCs, and in specific our own Linux distribution, Lakka.

But hardware video decoding is not the end-all-be all. There is certainly a lot of room for improvement for future speedups, and these are being investigated. But that’s the subject of another blog post somewhere down the line.

For now, rest assured that big things are coming up for the next version of RetroArch!