(Coming Soon) RetroArch 1.9.0 – Widget-based ‘load content’ animation

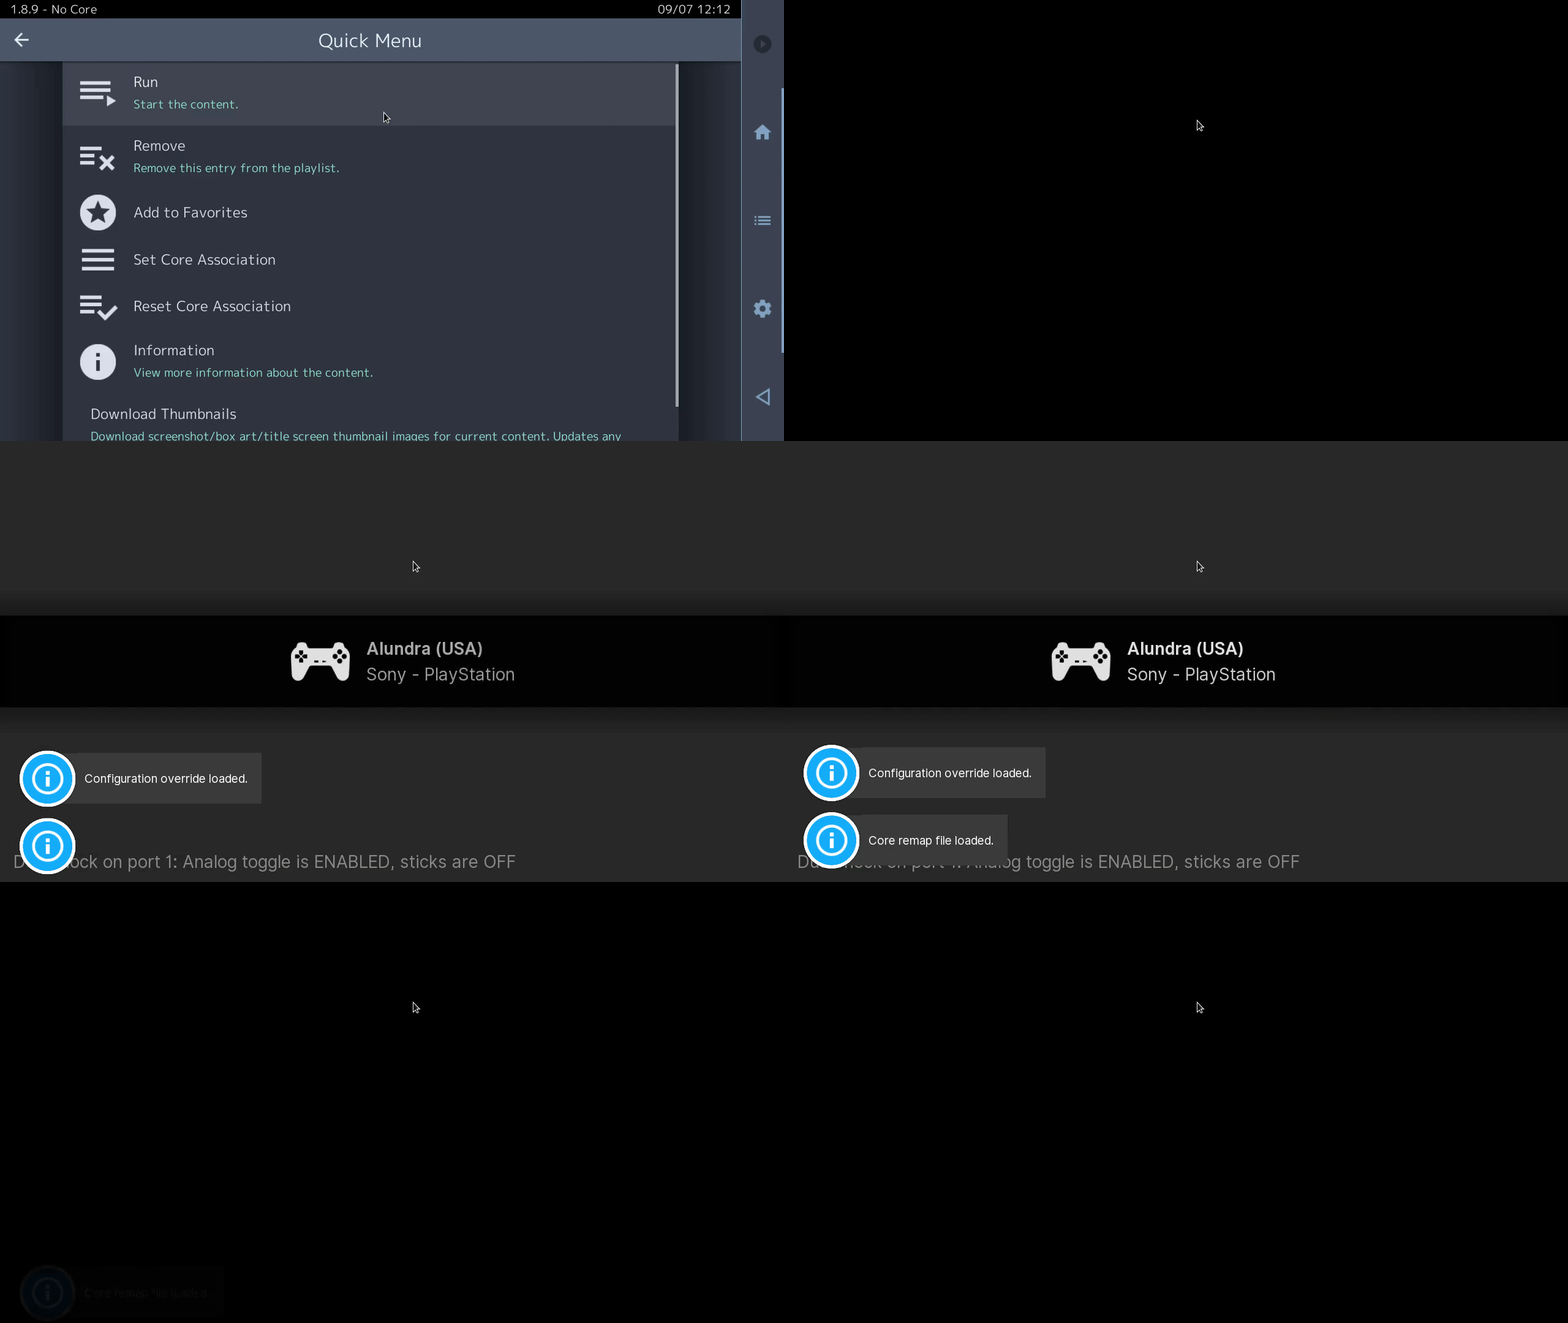
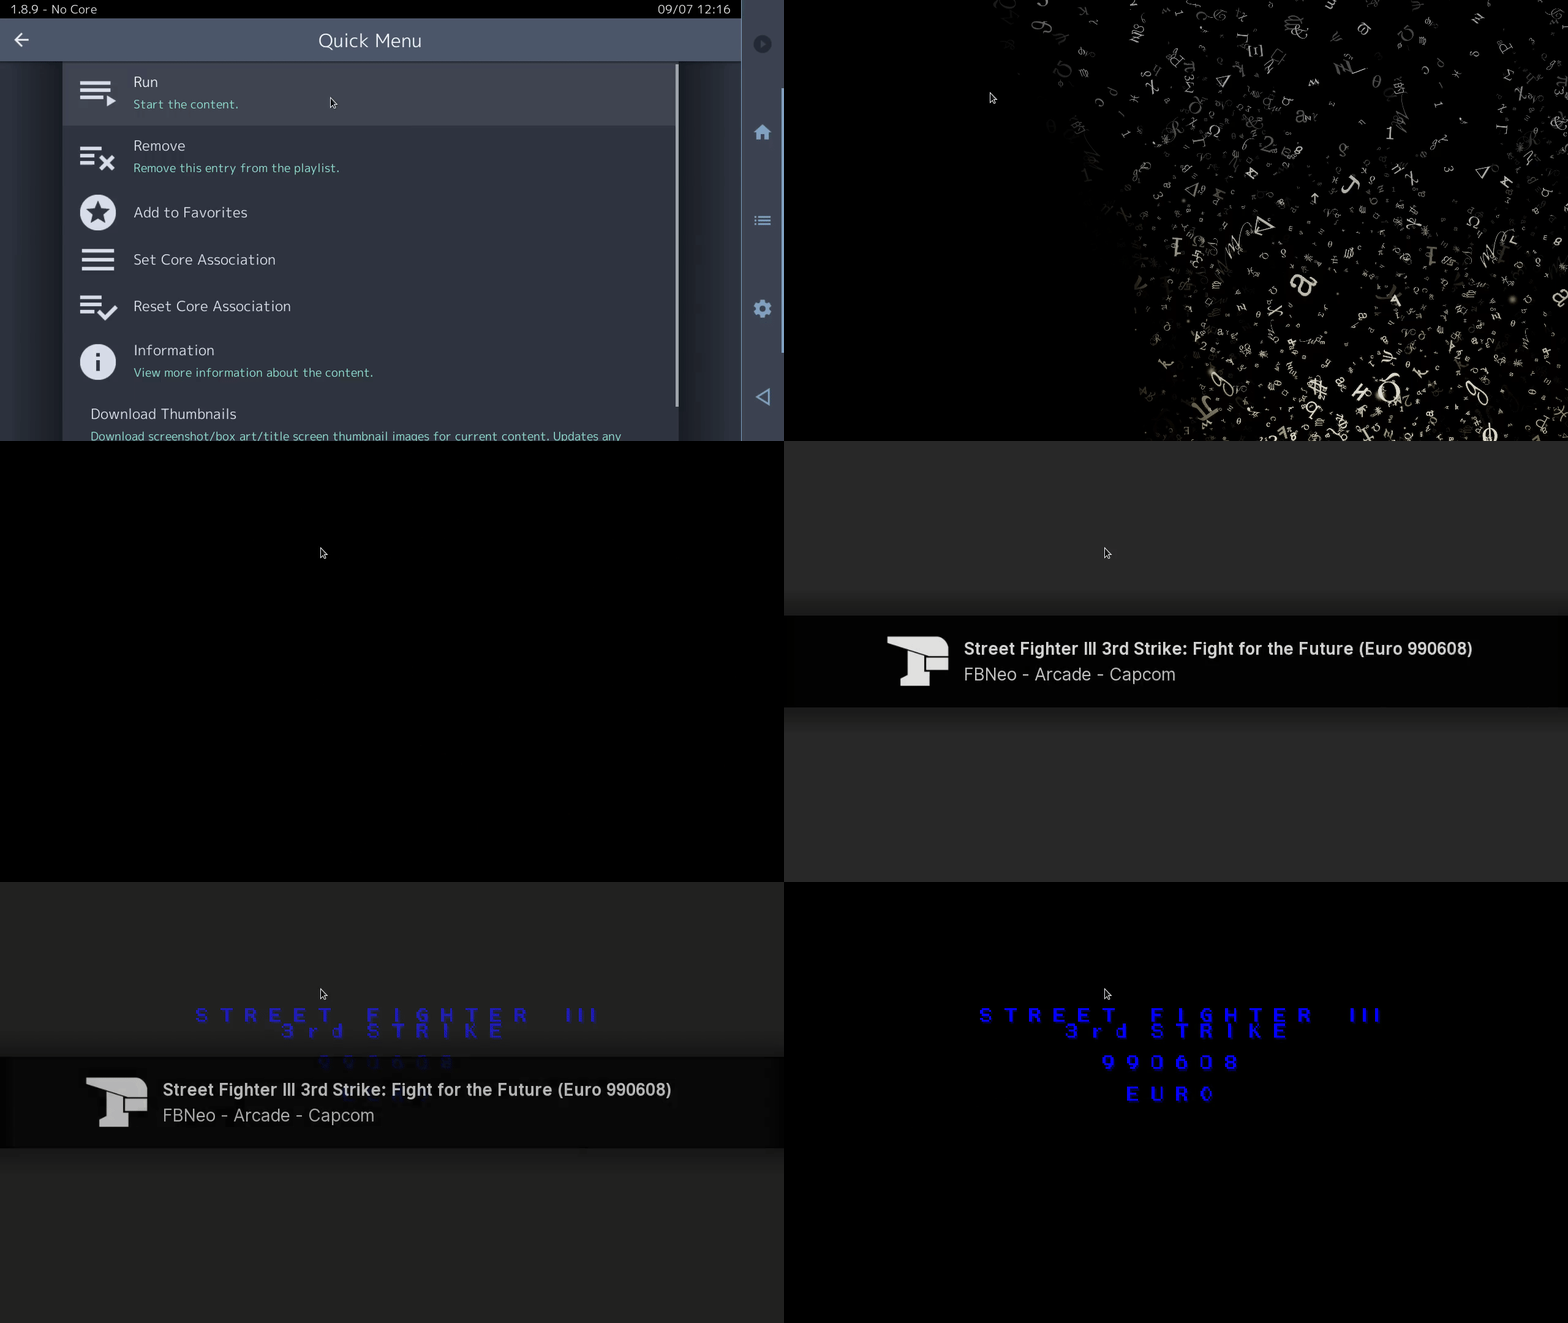
A new “Load Content” Startup Notification option has been added under Settings > On-Screen Display > On-Screen Notifications. When enabled, a brief animation is shown whenever content is launched – it looks something like this –

Notes:

  • The animation is disabled when running a core without content (there are some underlying technical issues that prevent this)
  • The animation is disabled when running content with ‘in-built’ cores (imageviewer, music/video player).
  • The animation works both for content launched via the menu and via the command line

Preview of custom texture replacement pack for WipeOut 2097/XL (Beetle PSX HW)!

Here is a sneak peek of LyonHrt’s upcoming texture pack replacement for Wipeout 2097/XL! You will be able to use this with the Beetle PSX HW core on RetroArch! Experience Wipeout XL/2097 with never-before-seen fidelity!

NOTE: To use this texture replacement pack, you will need to use Beetle PSX HW and in specific the Vulkan renderer.

Mupen64Plus-Next – v2.1

The long-anticipated big update to Mupen64Plus-Next has finally arrived!

Important Information and notes

Beforehand, be warned that the core name changed
As you probably know, up until now, the flavour (if it’s a GLES/GL build) was appended to the Core Name, this caused the frontend to categorize them with the appendix. Now with Vulkan support added, this would break remap/game specific core options/etc anyway, so I decided to just kill it and append it to the version (there was never a good reason why I added it to the name to begin with…).
Now a new folder named `Mupen64Plus-Next` will be created inside your config folder on first start.
You can move and rename your existing core config override, core options and shader presets there, named accordingly (Mupen64Plus-Next.cfg/opt/slangp…).

RetroArch Nintendo Switch Notes

With the development of the threaded renderer support we noticed a few Issues in our platform specific Audio drivers, especially audren_thread, that will cause some cores, most often multithreaded cores, to randomly freeze. We have a fix for this in the pipeline, while also nearly halving our current audio latency.
Due to time concerns tho, I didn’t get to push the fix yet and it needs more testing.
So, for now, I recommend switching to the `switch_thread` audio driver until the issues are fixed.
Another core where it’s likely to happen is PPSSPP, so if you encounter random freezes, give it a try, the only thing you will lose is audio in in-game recordings.

GlideN64

This new version of Mupen64Plus-Next should be up-to-date with the most recent versions of GLideN64.
Here are some highlights, which are now available in the libretro-core as well!

Threaded Renderer

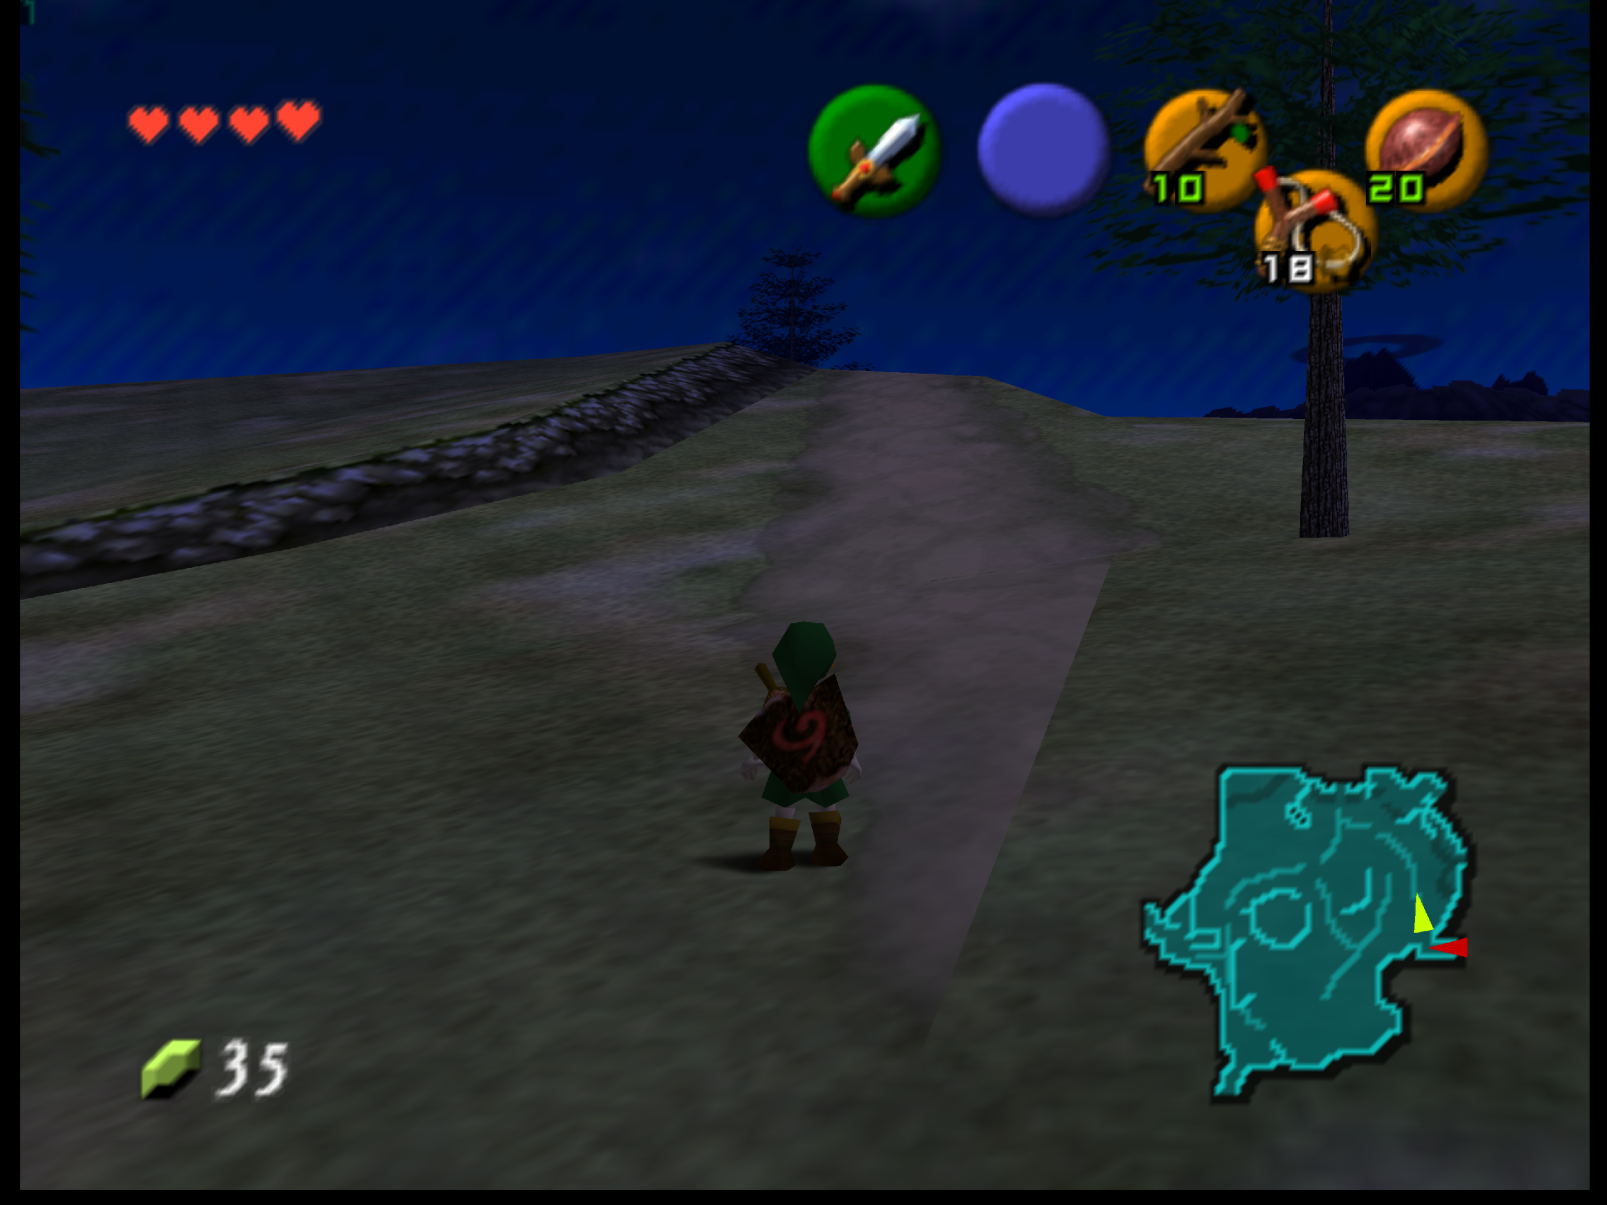
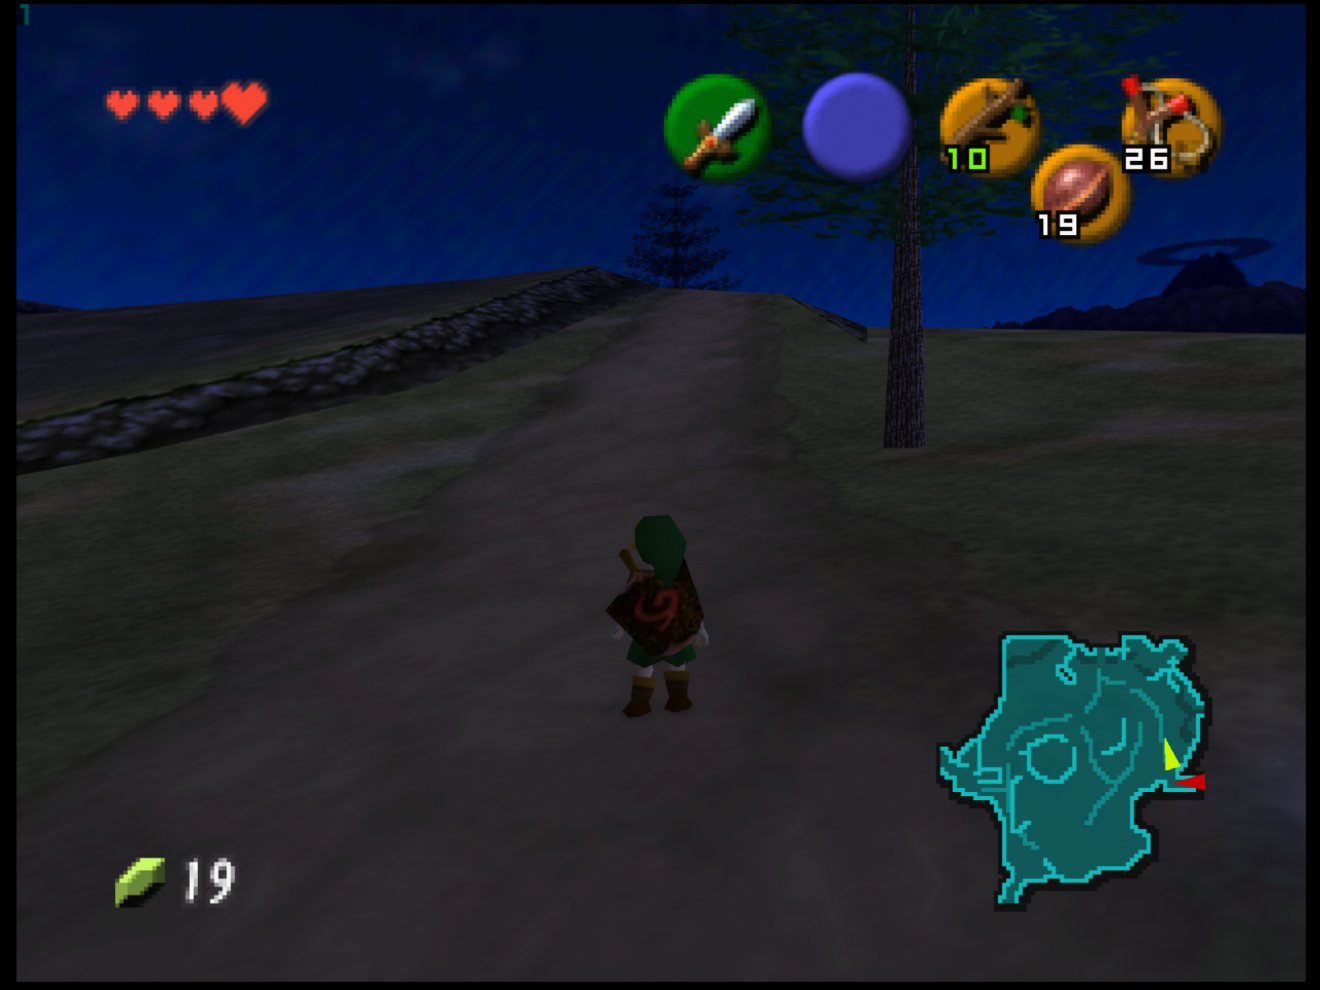
There’s now a ‘threaded rendering’ option for the libretro core. Enabling this can significantly increase performance, at the expense of slightly more input latency.
It has been available upstream for a while, but the implementation doesn’t play well with how a libretro core works.
I started work on it sometime mid last-year and after more than a dozen iterations and months of testing, it’s now ready for production.
An enormous shoutout to fzurita, who originally came up with the implementation!

How to use it


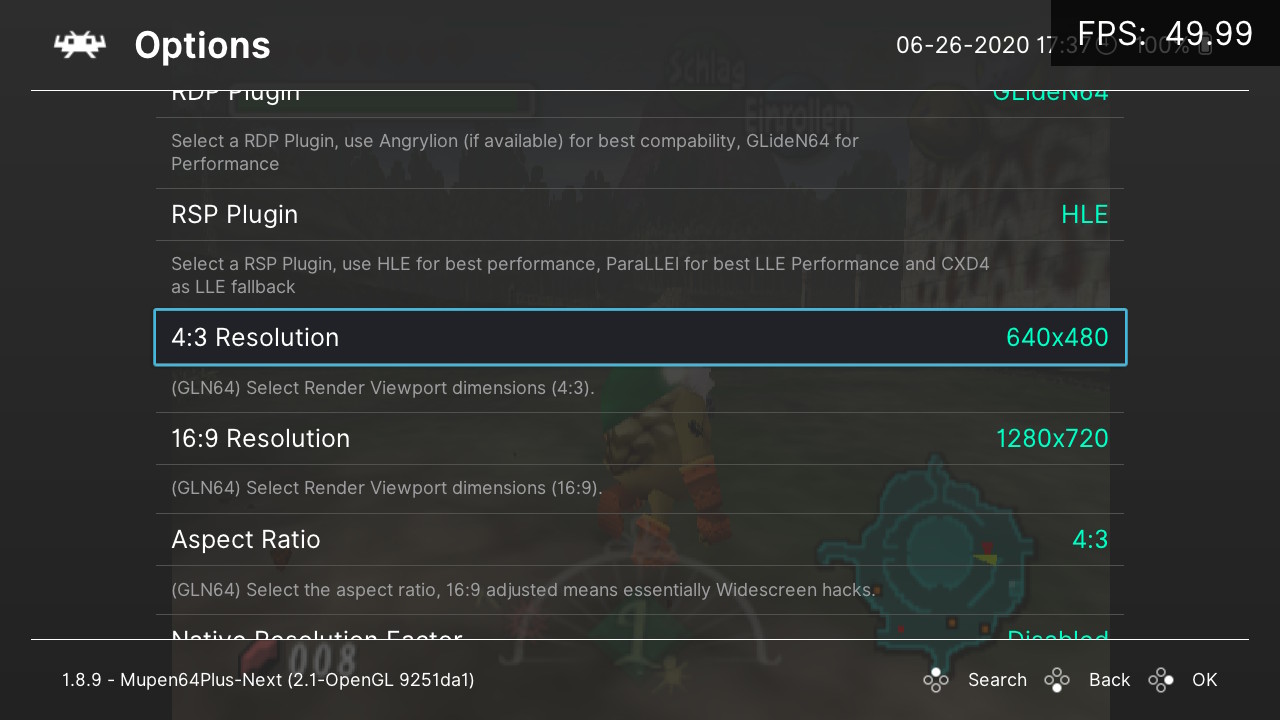
To use it, go to Quick Menu, Options. Make sure you have set ‘RDP Plugin’ to ‘GLideN64’ (the setting will not do anything with Angrylion and/or ParaLLEl RDP). Then turn ‘Threaded Rendering’ either on or off, and then restart the core (Close Content, and loading content again with the core).
Please note, I am aware that switching between fullscreen and windowed currently crashes when a game is running with the threaded renderer (same applies to changing Video Threaded in RetroArch), a fix is on my todo.

Benchmarks

Tests were performed on a Core i7 7700k desktop PC with a Geforce RTX 2080 Ti.

Game Non-Threaded Threaded Resolution
Super Mario 64 719 VI/s ~1000 VI/s 2x Native Resolution
Super Mario 64 701 VI/s ~1000 VI/s 4x Native Resolution
Super Mario 64 742 VI/s 780 VI/s 3840 x 2880

NOTE: These tests were performed with hyper threading enabled and CPU throttling, so take these figures with a grain of salt. The main important thing to take away from this is that VI/s is nearly 300 units of measurement faster at 2x to 4x native resolution compared to non-threaded rendering in this test.

This feature will significantly help platforms like Nintendo Switch and Raspberry Pi.

Dithering

In the past, HLE renderers have not really attempted to implement dithering (of course, with LLE RDP renderers you get it for free). An N64 game is typically rendered using a 16bit color buffer, and dithering is then used to reduce color banding and create the illusion of a higher color depth. GLideN64 in the past has always used 32bit rendering.

There are several new core options available:

  • Dithering Pattern
  • Dithering Quantization
  • RDRAM Image Dithering Mode

If you use native N64 resolution, you also may enable a dithering pattern to get a more authentic look, but even if you like to play in HD, this is something worth trying out!

ParaLLEl RDP

By now you’ve heard all about the revolutionary Vulkan-powered ParaLLEl RDP renderer, which debuted first in ParaLLEl N64. It is now included for the first time in Mupen64Plus-Next.

All the same features are available and more –

  • Compatibility on Android with ParaLLEl RDP should be much higher now as a result of a much more up-to-date mupen64plus-core. Games like Paper Mario, GoldenEye 007 and others would previously just crash on Android with ParaLLEl RDP+RSP.
  • Performance should be roughly ~5-10% faster on average than ParaLLEl N64. Sometimes a bit more.
  • Some compatibility issues that happened even on PC x86/x64 with ParaLLEl N64 are not an issue with Mupen64Plus-Next (such as Perfect Dark crashing at startup, Pokemon Snap graphics glitches, Mario no Photopi not working, Conker’s Bad Fur Day).

Over time we will probably repurpose ParaLLel N64 and let Mupen64Plus-Next take center stage.

Improved Core Options

Sub-labels descriptions got added to the core options. I hope this will make them a bit less confusing.
Please note that it’s currently not possible to hide the options on the fly so depending on the build configuration this might get a bit cluttered.
I am looking for solutions, but this should be a great improvement over the last versions nontheless!

Bugfixes and changes

– Android: Fixed garbage on the framebuffer with GLES3 (where the overscan would be)
– Android: Switched to “on Vertical Interrupt buffer swap mode” (might take slightly more perf) since the touch overlay was pretty much unusuable without it
– Updated Parallel-RSP
^- – Fix some stability issues in parallel-rsp on 64-bit
– Added Native Resfactor core option (set to disabled / 0 to use custom resolutions as you are used to)
^- Note: With Native Resfactor the resolution option will act as viewport size!
– Added Copy Aux to RDRAM core option
– Added a script to regenerate the INI Headers, updated to the latest variants
^- Note: It seems I still had cheats for OoT subscreen fix and DK64 bone displacement from when I first wrote the core, these caused some issues after it was fixed in the core, so I got rid of them for good, it was a oversight.
– Remove CountPerOp=1 for Quake 2 and Goldfinger
^- Note: After speaking with some upstream folks, nobody knows why it was even forced to 1, it caused crippeling performance on Android and Switch and after hours of testing no gamebreaking Issue was found, in the future I might work on getting rid of Count-Per-Op for good, it’s a nasty approximation.
– Allow higher Count-Per-Op
– Nintendo Switch: Lowered Firmware version requirements
– Added support for linking against system libaries
– Fixed LLE Fallback falsely being treated as supported, fixes F-Zero X Expansion HLE
– Exposed Hybrid filtering

These fixes are incorporated in both ParaLlEl N64 and Mupen64Plus-Next:

  • Vigilante 8’s character portraits are no longer wrongly coloured.
  • Mario Tennis’ intro screen no longer has tons of graphics bugs

Dynarec Issues

Over the last months, testers repeatedly encountered freezes in Ocarina of Time. I and Gillou spent hours on investigating the Issue and tracked it to the dynarec.
Sadly even after syncing core instances and comparing each recompiled block with the working MSVC builds led nowhere yet (tho we found a few other issues in code invalidation, which might’ve been an issue or not as well as borked caller saved regs..)
These fixes are still in the development stage and thus not included here. However I brought back the good ol’ TLB Invalidation hack as core option.
Setting it to the Ignore TLB Exceptions if not using TLB option will allow the game to continue so you can save it and restart (For this Issue you actually need to Close Content and start it again, a soft reset wont be enough). You will notice it happens when you suddenly see Epona carrots. Of course this is not a fix, but a side-effect is also that a bunch of broken romhacks work and it’s also useful for the upcoming GDB Server implementation, so I figured I will add it anyway.
Take note that this is confirmed as a mupen64plus-core upstream issue and that this Issue does not arise with Cached or Pure Interpreter!

Differences between Mupen64Plus-Next and ParaLLEl N64

  • ParaLLEl N64 has the following RDP plugins: Glide64, GLN64, Rice, Angrylion, ParaLLEl RDP. Glide64, GLN64, and Rice are aimed more at the lowend of graphics cards.
  • Mupen64Plus-Next has the following RDP plugins: GlideN64, Angrylion, ParaLLEl RDP.
    GLideN64 should be the best-in class HLE RDP renderer, but might have higher performance and GL requirements than the lower-end Gliden64/GLN64/Rice from ParaLLEl N64.
  • Both ParaLLEl N64 and Mupen64Plus-Next have the same RSP plugins (HLE, cxd4 LLE interpreter, and ParaLLEl RSP)
  • ParaLLEl N64 uses the Hacktarux dynarec for x86 32bit/64bit, and new_dynarec for ARM. Mupen64Plus-Next uses new_dynarecs for both x86 and ARM architectures, and tends to be a bit faster as a result.
  • ParaLLEl N64 has some built-in game specific alternate control schemes that you can switch on/off with the Select button. Mupen64Plus-Next does not have this yet.

Conclusion

Moving forward, we recommend you use Mupen64Plus-Next if you want to use LLE N64 (ParaLLEl RDP/RSP) with the highest compatibility and best performance.
Also, GLideN64 (provided your graphics card meets the OpenGL requirements) will work better than ParaLLEl N64’s equivalents.
Furthermore, Mupen64Plus-Next has a up to date version of mupen64plus-core, so it tends to have less game compatibility issues and the sound is better in games like Body Harvest.

ParaLLEl N64 might get repurposed towards the lower end as a result.

As a final note I want to give my thanks to dmrlawson for giving me a helping hand, fzurita for being very helpful, gonetz and his contributors for doing a awesome job with GLideN64 and Gillou68310 for all the hours he put in helping me investigate the dynarec issues (also thanks to Thom Rainier for never getting tired of OoT testing) as well as themaister for his work on Parallel RSP/RDP and the Vulkan implementation in Mupen64Plus-Next!

– m4xw

RetroArch 1.8.9 released!


RetroArch 1.8.9 has just been released.

Grab it here.

A Libretro Cores Progress Report will follow later.

Remember that this project exists for the benefit of our users, and that we wouldn’t keep doing this were it not for spreading the love with our users. This project exists because of your support and belief in us to keep going doing great things. If you’d like to show your support, consider donating to us. Check here in order to learn more. In addition to being able to support us on Patreon, there is now also the option to sponsor us on Github Sponsors! You can also help us out by buying some of our merch on our Teespring store!

Highlights

AI Service – Custom accessibility service support

The AI service feature has included new changes to allow closer integration between the service selected and the game being played, allowing the service to read and press gamepad buttons along with the current screen image. The example video above shows a custom service (still in development) designed to make Final Fantasy 1 accessible and playable by blind users.

When started, the AI service will continually parse the screen and describe what’s being shown. When in a town or overworld view, it will describe what’s around the player to the west, north, east, and south, as well as any new things of interest that have appeared on screen (eg: a townsperson, a weapon shop, treasure chest, etc.). When the emulator is paused, it will give a more detailed description of what’s on the screen, including how far the player can walk in all directions and all things of interest along with their coordinates relative to the player. If the player holds the select button at this time, then the AI service will read out the list of things of interest on the screen and allow the player to scroll through them and select one. When selected, the AI service will unpause the game and move the player to that thing and interact with it.

When on a menu or battle screen, the service will read out the text on the screen and the currently selected menu option.

We will have more information on this for you soon after the initial testing and feedback is over.

Core Management Options

  • The software license of each core is now shown in the ‘Core Downloader’ and ‘Load Core’ screen.
  • Pressing RetroPad Select on a Core Updater entry will now display any text in the description field of its info file
  • Installed cores are now highlighted via a [#] symbol
  • Pressing RetroPad Start on a selected, installed entry opens the Core Information menu (when using Material UI, swiping left or right triggers the same action). This means we can now view bios info etc. – and more importantly delete cores – without jumping through all the hoops of loading a core first and navigating all over the place
  • It’s now possible to hide ‘Experimental Cores’ from being shown in the ‘Core Downloader’ menu screen.

Backup cores when updating

By default now, a backup of the current Libretro core will be made when you upgrade a core from RetroArch’s builtin Updater service. In addition, you can also ‘freeze’ a core. ‘Freeze’ in this context means that the Updater service will not be able to overwrite your current core with the latest version from the Updater service.

Vulkan WSI improvements

There were some problem platforms with WSI (Window System Interface) currently, which version 1.8.9 partly addresses. This should theoretically reduce stalls on integrated GPUs.

  • Intel Mesa was broken when using Fences, we have to use Semaphores to acquire the swapchain or the entire GPU stalls.
  • Add support for either using fences or semaphores when syncing.
  • Prefer using semaphores for integrated GPUs (such as Intel HD) as it promotes better throughput over fences.
  • Do not use mailbox emulation on Android.
  • Also, to make this work, decouple frame index from swapchain index with regards to CPU-side synchronization. Before, swapchain index would be coupled with frame context, which is somewhat naive.

Changelog

What you’ve read above is just a small sampling of what 1.8.8 has to offer. There might be things that we forgot to list in the changelog listed below, but here it is for your perusal regardless.

1.8.9

  • AUTO SAVESTATES: Ensure save states are correctly flushed to disk when quitting RetroArch (fixes broken save states when exiting RetroArch – without first closing content – with ‘Auto Save State’ enabled)
    BUILTIN CORES: Builtin cores like ffmpeg and imageviewer would previously try to erroneously load a dynamic core named ‘builtin’ – this would fail and would just be a wasteful operation – this now skips dylib loading in libretro_get_system_info for builtin cores
  • CHEEVOS: Report API errors when unlocking achievements or submitting leaderboards
  • CHEEVOS: Support less common file extensions
  • CHEEVOS: Disable hardcore mode when playing BSV file
  • CHEEVOS: Correctly report unlocked non-hardcore achievements when hardcore is paused
  • CHEEVOS/M3U: Bugfix – did not handle absolute/relative paths in M3U files correctly before
  • CHEEVOS/M3U: Bugfix – it didn’t handle comments/directives
  • CHEEVOS/M3U: Bugfix – it doesn’t handle trailing whitespace
  • CHEEVOS/M3U: Bugfix – failed when loading M3U files with certain line endings
  • CORE MANAGEMENT: Add ‘core management’ menu (Settings -> Core)
  • CORE MANAGEMENT: Add option to backup/restore installed cores
  • CORE MANAGEMENT: Improved core selection logic
  • CORE INFO: Search search optimisations
  • CORE DOWNLOADER: Rename ‘Core Updater’ to ‘Core Downloader’
  • CORE DOWNLOADER: Add ‘Show Experimental Cores’ setting under Settings > Network > Updater
  • CORE DOWNLOADER: Core licenses are now shown for all entries in the Core Updater menu
  • CORE DOWNLOADER: Pressing RetroPad select on a Core Updater entry will now display any text in the description field of its info file
  • CORE DOWNLOADER: Installed cores are now highlighted via a [#] symbol
  • CORE DOWNLOADER: Pressing RetroPad start on a selected, installed entry opens the Core Information menu (when using Material UI, swiping left or right triggers the same action). This means we can now view bios info etc. – and more importantly delete cores – without jumping through all the hoops of loading a core first and navigating all over the place
  • CORE DOWNLOADER/UPDATER: Add option to automatically backup cores when updating
  • DISK CONTROL: Enable ‘Load New Disc’ while disk tray is open
  • INPUT: Added a hotkey delay option to allow hotkey input to work properly when it is assigned to another action
  • INPUT: Remove ‘All Users Control Menu’ setting, was buggy and will be properly reintroduced after input overhaul
  • LINUX: Set default saves/save states/system paths
  • LOCALIZATION: Add Persian language
  • LOCALIZATION: Add Hebrew language
  • LOCALIZATION: Add Asturian language
  • MENU: Proper line wrapping for message dialog boxes
  • MENU/HOTKEYS: Add sublabels to all hotkey bind entries
  • MENU/QUICK MENU: Suppress the display of ’empty’ quick menu listings when closing content
  • MENU/OZONE: Performance improvements
  • MENU/SDL: Add mouse controls
  • OPENGL1/VITA: Initial changes for HW context without FBO
  • OVERLAYS: Add options for moving the on-screen overlay
  • PLAYLISTS/WINDOWS: Fix core path entries in image/video/music history playlists
  • PS2: Add back CDFS support
  • SDL/GL: Advertise GLSL support
  • VIDEO/WIDGETS: Fix heap-use-after-free errors, leading to memory corruption
  • VITA: Added custom bubbles support
  • VITA: VitaGL update
  • VULKAN/WSI: Better frame pacing
  • VULKAN/WSI: Fix Intel Mesa being broken when using Fences, we have to use Semaphores to acquire the swapchain or the entire GPU stalls
  • VULKAN/WSI: Add support for either using fences or semaphores when syncing
  • VULKAN/WSI: Prefer using semaphores for integrated GPUs as it promotes better throughput over fences
  • VULKAN/WSI/ANDROID: Do not use mailbox emulation on Android
  • UWP/XBOX: Potentially improve performance by enabling ‘Game Mode’

ParaLLEl-RDP – How the upscaled rendering works

This is a technical article on how upscaling in LLE works on the N64 RDP. Accurate upscaling in LLE is something which has not been done before (it has been done in a HLE framework, but accurate is the key word here), due to its extremely intense performance requirements, but with paraLLEl-RDP running on the GPU with Vulkan, this is now practical, and the results are faithful to what N64 games would look like if games rendered at a very high resolution. There are no compromises on accuracy, and I believe this is a correct representation of upscaling in a “what-if” scenario. The changes required to add this were actually fairly minimal, and there aren’t really any hacks involved. However, we have to be somewhat conservative in what we attempt to enhance.

Main concepts

Unified Memory Architecture – fully accurate frame buffer behavior

A complicated problem with the N64 is that the RDP and CPU have a unified memory architecture, and this complicates a lot. We must assume that the CPU can read arbitrary pixels that the RDP rendered, and the CPU can overwrite pixels written by the RDP earlier. In upscaling, this gets weird very quickly since the CPU does not understand upscaling. To support this, the GPU renders everything twice, once in the native domain, and finally in the upscaled domain. With this approach, the CPU cannot observe that upscaling is happening. It also improves performance in synchronous mode, since we can just render native resolution before we unblock CPU, and the GPU can go on to render upscaled render passes asynchronously, which takes a longer time.

Rasterization at sub-pixel precision

The core mathematical problem to solve for upscaling is how we are going to rasterize at sub-pixel precision. This gets somewhat interesting, since the RDP is fully defined in fixed-point, and there is limited precision available. Fortunately, there are enough bits of precision that we can add extra sub-pixel precision to the rasterization equations. 8x is the theoretically maximum upscaling we can achieve without going beyond 32-bit fixed point math. 8x is complete overkill, 2x and 4x are more than enough anyways.

Instancing RDRAM

Given that we have a requirement of unified memory architecture, paraLLEl-RDP directly implements a unified memory architecture (UMA) as mentioned above where the GPU reads and writes directly into RDRAM. This ensures full accuracy, and this is usually where HLE fails, as implementing UMA at this level is not practical with the traditional graphics pipeline in GPUs. To extend paraLLEl-RDP’s approach to upscaling, I went with multiple copies of RDRAM, one copy for each sub-sample. This works really well, because at any time, if we detect that any write happens in an unscaled context, e.g. CPU writes, we can simply duplicate samples up to upscaled domain. This is essentially some kind of faux MSAA where each pixel has multiple samples associated with it. This is the memory we end up allocating for a 4x upscale (4×4 = 16 samples):

  • RDRAM (8 MB) – Allocated on host with VK_EXT_external_memory_host. This is fully coherent with emulated CPU.
  • Hidden RDRAM (4 MB) – Device local
  • RDRAM reference buffer (8 MB) – Device local
  • Multisampled RDRAM (8 * 16 MB) – Device local
  • Multisampled Hidden RDRAM (4 * 16 MB) – Device local

The reference buffer is there so we can track when CPU writes to RDRAM. Essentially, before we render anything on the GPU, we compare RDRAM against the reference buffer. If there is a difference, the CPU must have clobbered the pixel, and the RDRAM is now duplicated to all the samples of RDRAM. After rendering something, we update the reference buffer, so we know it’s safe to use upscaled pixels later.

When rendering an upscaled pixel (X, Y), we convert the coordinate to native pixel (X, Y) and convert the sub-pixel to an RDRAM instance, e.g.:

ivec2 upscaled_pixel = ivec2(x, y);
ivec2 subpixel = upscaled_pixel & (SCALING_FACTOR - 1);
ivec2 native_pixel = upscaled_pixel >> SCALING_LOG2;
int rdram_instance = subpixel.y * SCALING_FACTOR + subpixel.x;
read_write_rdram(native_pixel, rdram_instance);

Upscaled VI interface

Adding upscaling to the VI interface is fairly straight forward since we can convert e.g. 16 samples back to a 4×4 block of pixels. From there, we just follow the exact same algorithms that we do for native rendering. This means we get correct VI AA, divot and de-dither happening at high resolution.

Modifying rasterization rules

The RDP is a span rasterizer, a very classic design. The rasterization rules are extremely specific and cannot be accurately represented using normal OpenGL/Vulkan triangle rasterization rules, which are based on barycentric plane equations (to the best of my knowledge you can only approximate).

The RDP receives pre-computed triangle setup data from the RSP. We specify three lines with the triangle setup, where one line is the “major” line XH, and a second line is picked from the two “minor” lines XM/XL, depending on y >= YM. Two values YH and YL limit which scanlines we should render. This lets us implement triangles, or more complicated primitives if we want to. Bisqwit made a really cool ongoing video series on software rendering a while back which also implements a span rasterizer, which is very useful to watch if you want a deeper understanding of this approach.

This triangle setup data is defined more specifically as:

  • XH, XM, XL: 32-bit values in the format of s12.15.x. The 4 MSB are sign-extended, and the single LSB is ignored (we can exploit this bit for more precision later!)
  • dXHdy, dXMdy, dXLdy: 32-bit values in the format of s12.13.xxx. 4 MSBs are sign-extended, and 3 LSBs are ignored. This represents the slope of the line for XH, XM and XL.
  • YH: This is a s12.2 value which represents the first scanline we render. There is 2 bits of subpixel precision, which is very useful because the RDP will sample coverage for 4 sub-scanlines per scanline.
  • YM: This s12.2 value represents the first sub-scanline where XL is selected as the minor line, otherwise XM is used.
  • YL: This represents the final sub-scanline which is rendered. The sub-scanline of YL is not included in rasterization.

The algorithm for native resolution in GLSL:

// Interpolate X at all 4 Y-subpixels.
// Check Y dimension.
int yh_interpolation_base = int(setup.yh) & ~(SUBPIXELS - 1);
int ym_interpolation_base = int(setup.ym);

int y_sub = int(y * SUBPIXELS);
ivec4 y_subs = y_sub + ivec4(0, 1, 2, 3);

// dxhdy and others are (setup value >> 2) since we're stepping one sub-scanline at a time, not whole lines. This is why more LSBs are ignored for the slopes.
ivec4 xh = setup.xh + (y_subs - yh_interpolation_base) * setup.dxhdy;
ivec4 xm = setup.xm + (y_subs - yh_interpolation_base) * setup.dxmdy;
ivec4 xl = setup.xl + (y_subs - ym_interpolation_base) * setup.dxldy;
xl = mix(xl, xm, lessThan(y_subs, ivec4(setup.ym)));

ivec4 xh_shifted = quantize_x(xh); // A very specific quantizer, see source ...
ivec4 xl_shifted = quantize_x(xl);

ivec4 xleft, xright;
if (flip) // Flip is a bit set in triangle setup to mark primitive winding.
{
    xleft = xh_shifted;
    xright = xl_shifted;
}
else
{
    xleft = xl_shifted;
    xright = xh_shifted;
}

We have now computed a range of which pixels to render for each sub-scanline, where [xleft, xright) is the range. If xright <= xleft, the sub-scanline does not receive coverage. The quantizer is somewhat esoteric, but we essentially quantize X down to 8 sub-pixels of precision (>> 13). This is used later for multi-sampled coverage in the X dimension.

To add upscaling, the modifications are straight forward.

int yh_interpolation_base = int(setup.yh) & ~(SUBPIXELS - 1);
int ym_interpolation_base = int(setup.ym);
yh_interpolation_base *= SCALING_FACTOR;
ym_interpolation_base *= SCALING_FACTOR;

int y_sub = int(y * SUBPIXELS);
ivec4 y_subs = y_sub + ivec4(0, 1, 2, 3);

// Interpolate X at all 4 Y-subpixels.
ivec4 xh = setup.xh * SCALING_FACTOR + (y_subs - yh_interpolation_base) * setup.dxhdy;
ivec4 xm = setup.xm * SCALING_FACTOR + (y_subs - yh_interpolation_base) * setup.dxmdy;
ivec4 xl = setup.xl * SCALING_FACTOR + (y_subs - ym_interpolation_base) * setup.dxldy;
xl = mix(xl, xm, lessThan(y_subs, ivec4(SCALING_FACTOR * setup.ym)));

This is an accurate representation, as the only thing we do here is to shift in more bits into triangle setup, as long as this does not overflow, we’re golden. After this step, we have scissoring. Scissor coordinates are u10.2 fixed point, so it means the maximum resolution for the RDP is 1024×1024. With 8x upscale and 8 sub-pixels of X precision, we can barely pack the resulting range in unsigned 16-bits without overflow.

Modifying varying interpolation

Attribute interpolation is a little more interesting. There are 8 varyings, which all have the same setup data:

  • Shade Red/Green/Blue/Alpha
  • S
  • T
  • 1/W
  • Z

Each varying has 4 values:

  • Base value – sampled at coordinate (XH, YH) (kinda … it’s complicated)
  • dVdx – Change in value for 1 pixel in X dimension
  • dVde – Change in value when following the major axis down one line, and sampling at the next line’s XH. Basically dVde = dVdx * dXdy + dVdy. I’m not sure why this even exists, it makes the interpolation math a little easier I suppose?
  • dVdy – This feels very redundant, but it is what it is. It is only used for coverage fixup and LOD computation.

We cannot shift in extra bits here, unlike rasterization, so we have to be a little creative here. To stay faithful, and avoid overflow, we need to ensure that the interpolation is correct for each sample point which matches sample points for native resolution, and for the inner sub-pixels, we remove some bits of precision in the derivative. Essentially, instead of doing something like this (not the correct math, see code, here for brevity):

int base_interpolated_x = ((setup.xh + (y - base_y) * setup.dxhdy)) >> 16;
rgba = attr.rgba;
int dy = y - base_y;
int dx = x - base_interpolated_x;
rgba += dy * attr.drgba_de;
rgba += dx * attr.drgba_dx;

we do …

int base_interpolated_x = ((setup.xh + (y - base_y) * setup.dxhdy)) >> 16;
rgba = attr.rgba;
int dy = y - base_y;
int dx = x - base_interpolated_x;
rgba += (dy >> SCALING_LOG2) * attr.drgba_de + (dy & (SCALING_FACTOR - 1)) * (attr.drgba_de >> SCALING_LOG2);
rgba += (dx >> SCALING_LOG2) * attr.drgba_dx + (dx & (SCALING_FACTOR - 1)) * (attr.drgba_dx >> SCALING_LOG2);

The added error here is microscopic.

Workarounds

Some games do not work correctly when we upscale, since the game never intended to render sub-pixels. This usually comes into play in two major scenarios, which we need to workaround.

Using LOD for clever hackery

The mip-mapping on N64 is quite flexible, and sometimes two entirely different textures represent LOD 0 and LOD 1 for smooth distance based effects. When upscaling with e.g. 4x, we essentially get a LOD factor which is a LOD bias of -2 (log2(1/4)). An optional workaround is to compensate by applying a positive LOD bias ourselves to emit LOD levels the game expects. Ideally, this workaround is applied only in places where it’s needed.

Sprite rendering / TEX_RECT

Many games render sprites with TEX_RECT with the expectation that textures are rendered 1:1 with input texels to output texels. When we start upscaling, the game might have forgot to disable bilinear filtering, and we start filtering outside the texture boundaries, i.e., against garbage, which shows up as ugly seams in the image. The simple workaround is to render TEX_RECT primitives as if they are not upscaled. This is necessary anyways for the COPY pipe, since the COPY pipe only updates the varying interpolator every 8th framebuffer byte. We cannot safely upscale these kinds of primitives either way.

Conclusion

There isn’t much more to it. Adding upscaling to ParaLLEl-RDP was not all that complicated compared to the other insanity that went into making this renderer work. It’s a principled approach to the upscaling which I believe could theoretically work in a custom RDP hardware design.