
NOTE: This is a pre-alpha version of RetroArch for UWP/Xbox One! Please be aware that the current product is far from polished, and that whatever you see here might not be reflective of the finished product later on. Our sole purpose for releasing this is that Dominater01 had already made a release and we felt it would be remiss not to share this with our users, regardless of its current level of polish.
PLEASE BE AWARE, THIS IS A ROUGH DRAFT OF RETROARCH AS A WINDOWS 10/XBOX APP. THE FINAL PRODUCT WILL BE MUCH BETTER AND IN NO WAY IS THIS REFLECTIVE OF THE QUALITY OF THE FINAL PRODUCT.
We ask for your patience while testing this; you might find file system performance lacking and some manual steps might need to be performed that are obviously not user friendly. Do note that we are very conscious of these current limitations and we hope to have them resolved in future versions.
Where to get it
Go to our RetroArch Downloads page.
For Windows 10 PCs, go to the Windows 10 logo and download both the certificate and the .appx file.
For Xbox One users, just go to the Xbox One logo and download the pre-alpha.
NOTE: This won’t replace the regular Windows version on PC. For regular PC users, the UWP port is nothing but a downgraded/gimped version of our main Windows version. You can use this version for academic purposes, but I would not recommend using it primarily on Windows.
Running this on PC
1. Download and extract this version of RetroArch on your PC.
2. Make sure you download the certificate too, you will need it immediately afterwards –
Download certificate here.
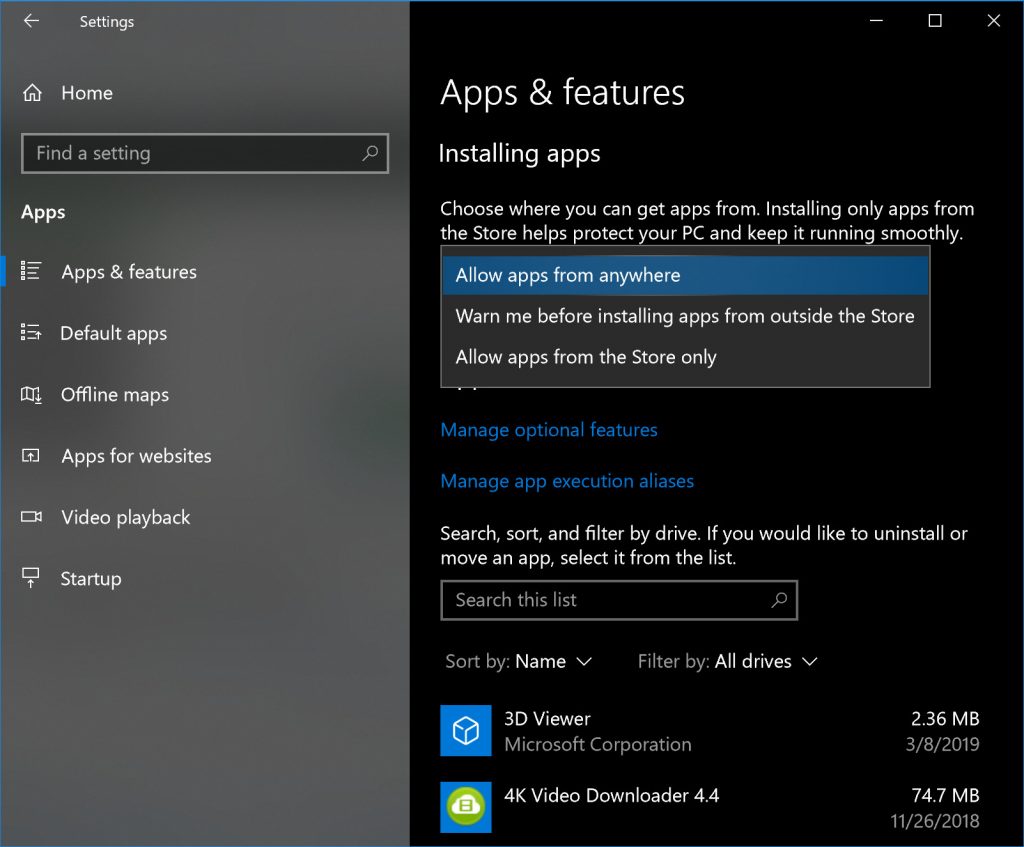
3. First, make sure that you can actually install Windows/UWP apps from outside the Windows Store. Go to Settings -> Applications. At ‘Installing Apps’, select ‘Allow apps from anywhere’. In case you’d prefer it to be limited to Store-only apps, you can change this back later after you have finished these instructions and installed RetroArch already on your PC.
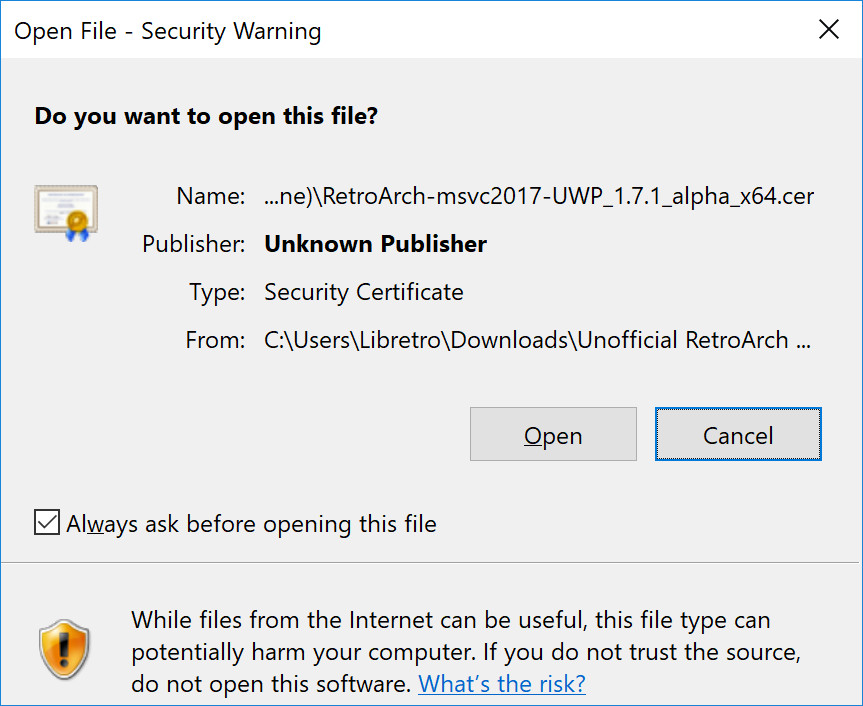
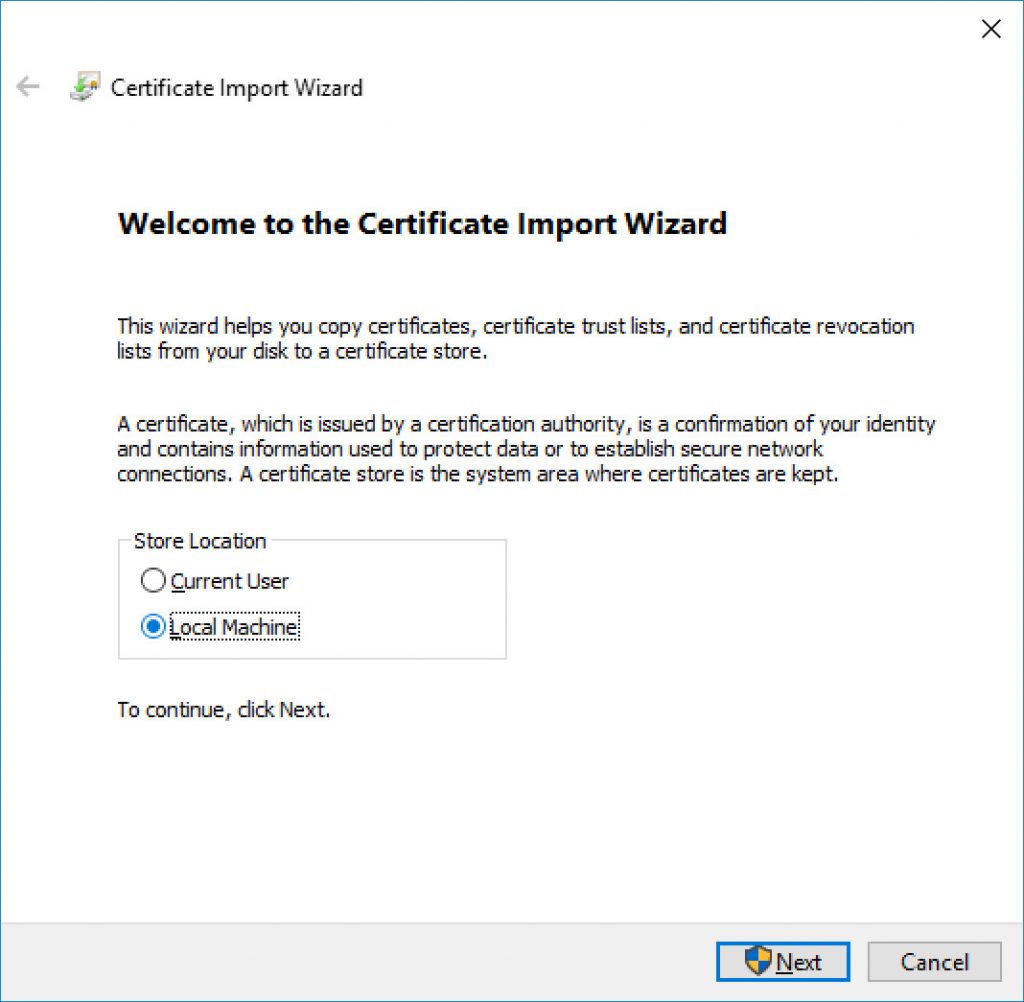
4. Now we need to install the certificate that we downloaded in step 2. Double click on it.
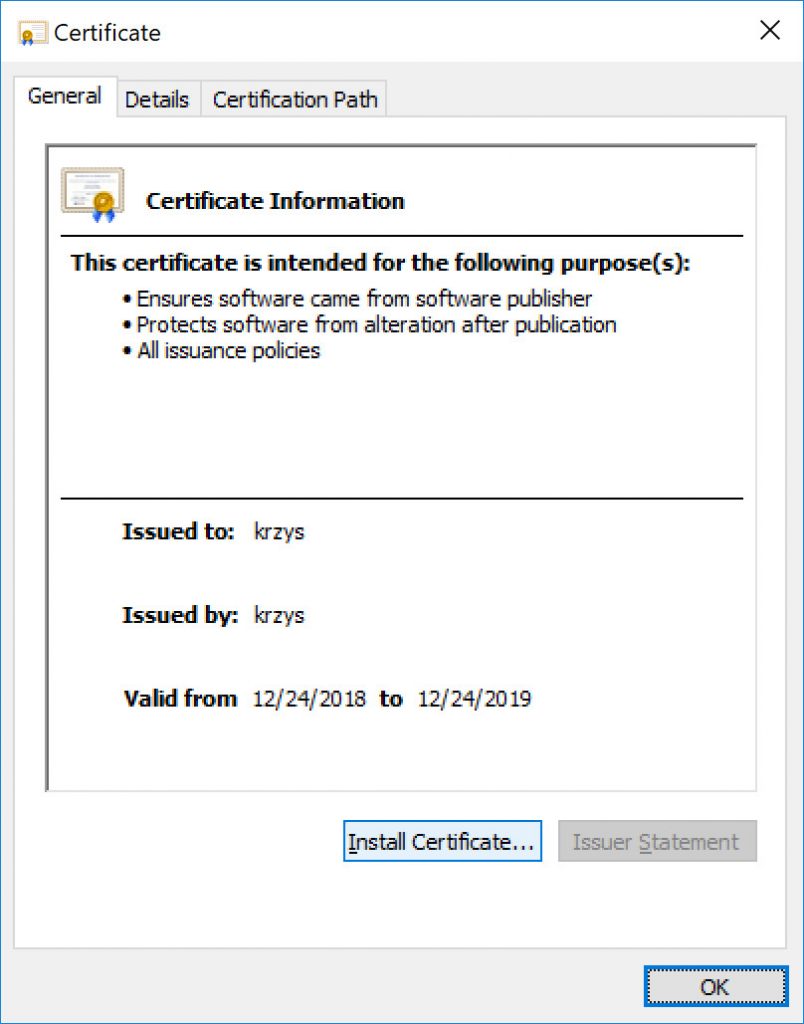
5. Click on ‘Install Certificate”.
When you are at this screen and it asks for any dependencies, you might have to add this file :
Microsoft.VCLibs.x64.14.00.appx.
6. A Certificate Wizard will now appear. Of the two questions, select “Local Machine”.
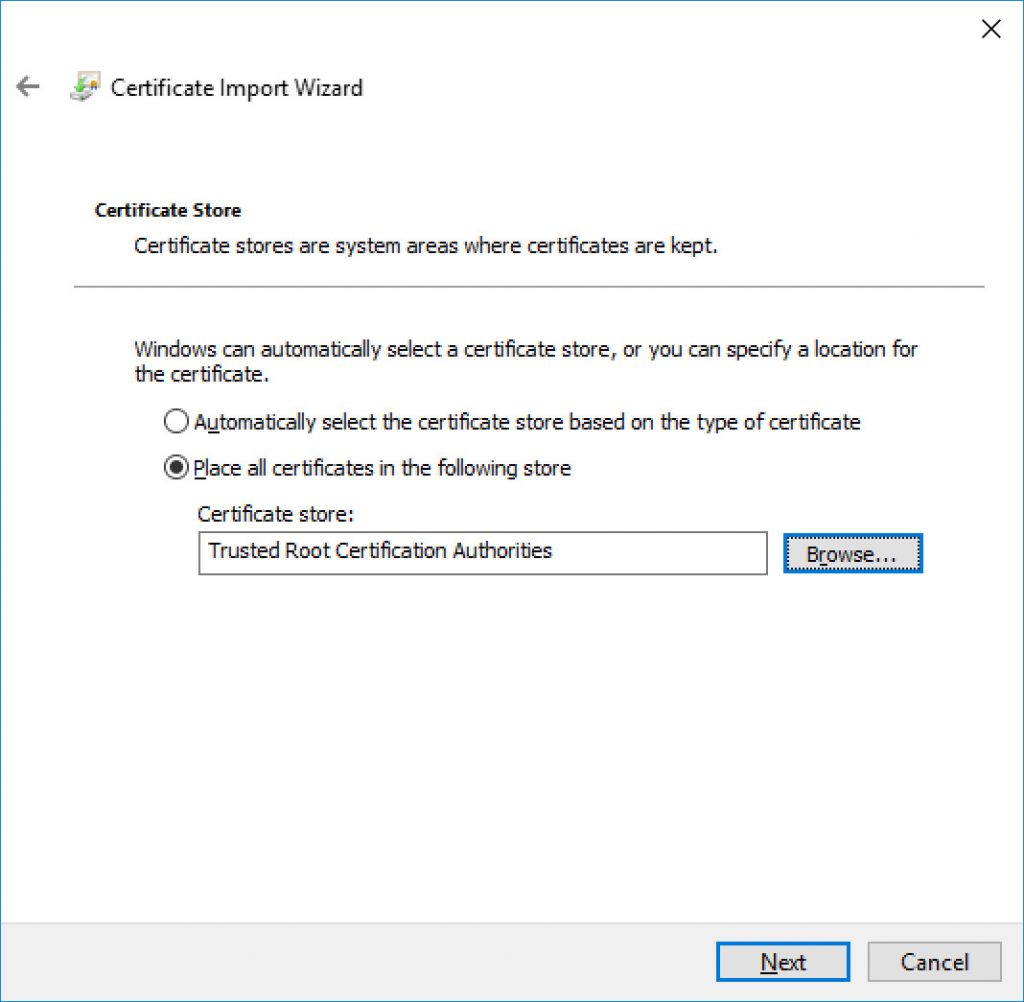
7. Check ‘Place all certificates in the following store’, click on ‘Browse…’, and select ‘Trusted Root Certification Authorities’.
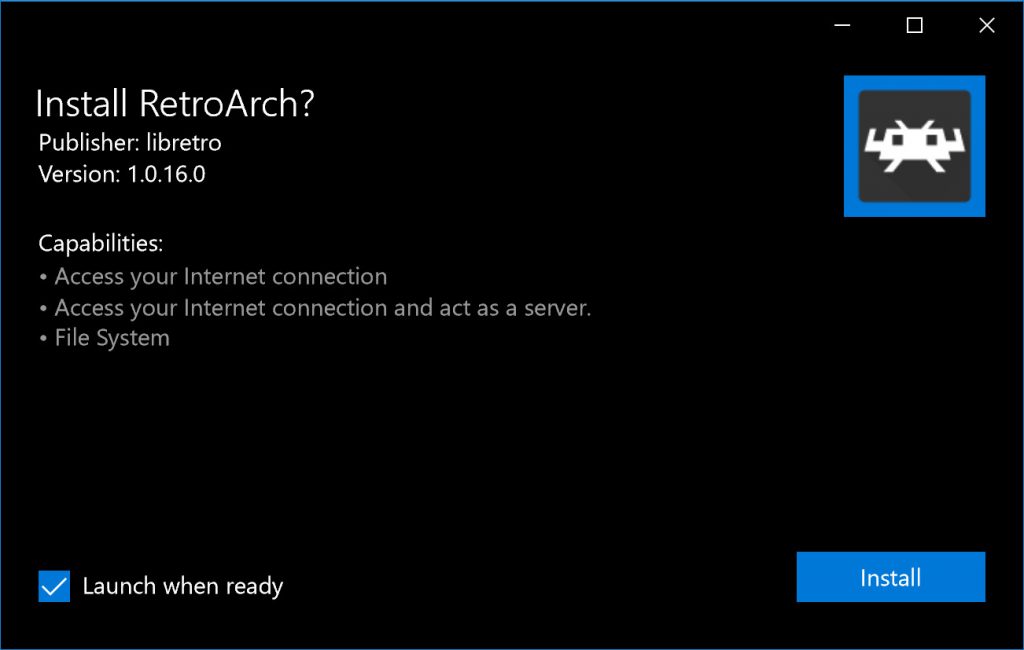
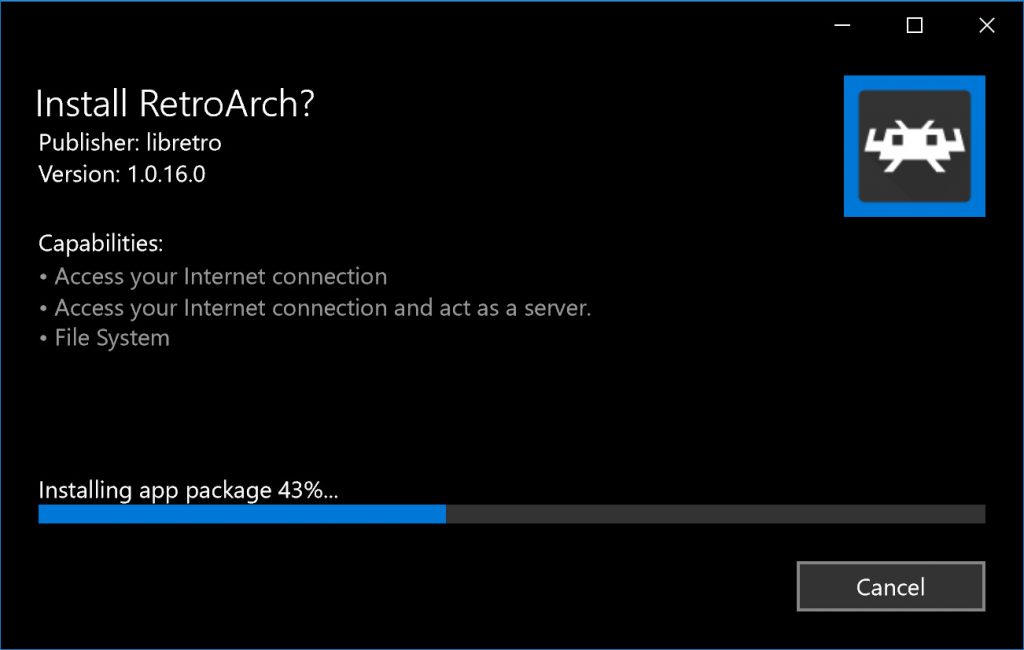
8. After we have verified that the certificate is successfully installed, we start up RetroArch.appx. If an app identical to this was already installed, you would not be able to install this program right now. As it is, click on ‘Install’.
Running this on Xbox One
1. Download and extract this version of RetroArch on your PC.
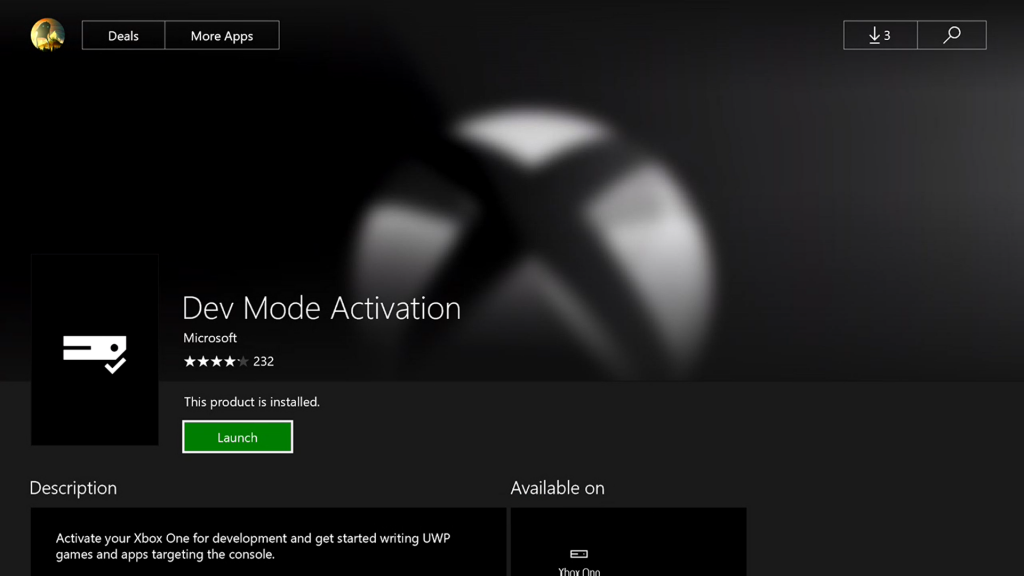
2. Go to your Xbox. Make sure you have changed your Xbox to ‘Developer Mode’ (see here for more information on how to do that).
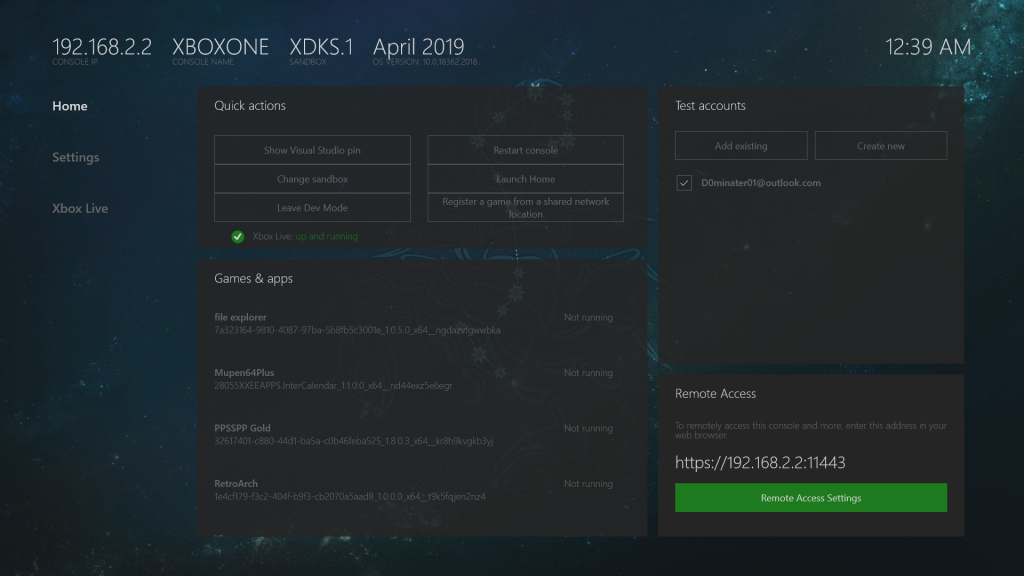
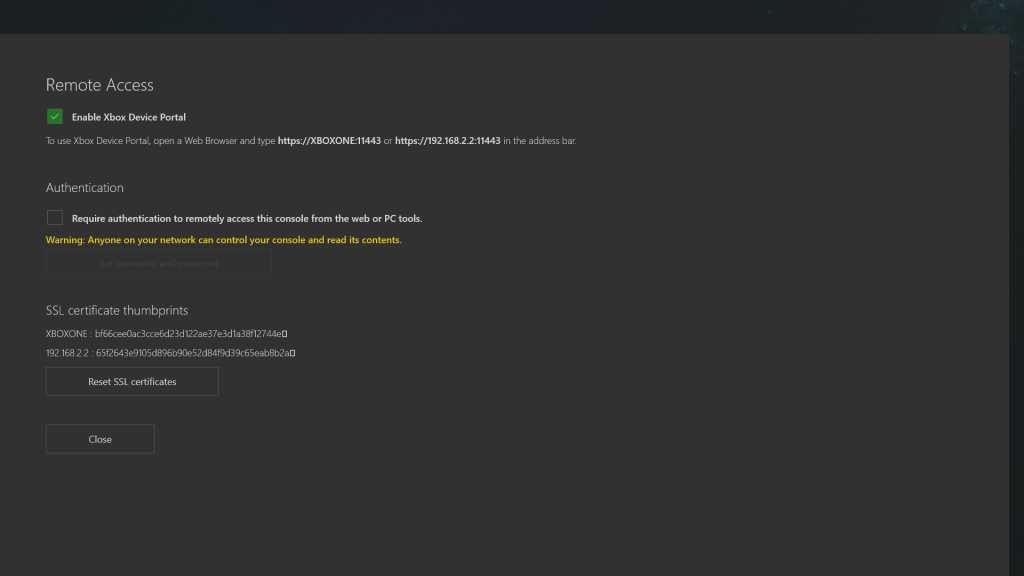
3. On the Developer home screen, go to “Remote Access Settings” and enable Xbox Device Portal. You might have to setup a username and password as well. You can do this by selecting Remote Control settings.
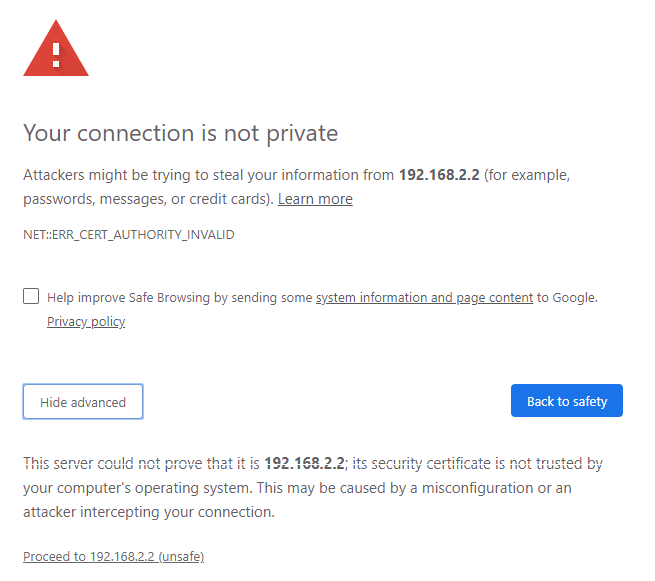
When you connect to the IP on PC and you see this page, make sure to click ‘Show Advanced’ and click ‘Proceed’.
4. Go to the Device Portal on your PC. This is the IP of your xbox one (it will show up on the Developer home screen) (if its being picky do this https://ip:port)
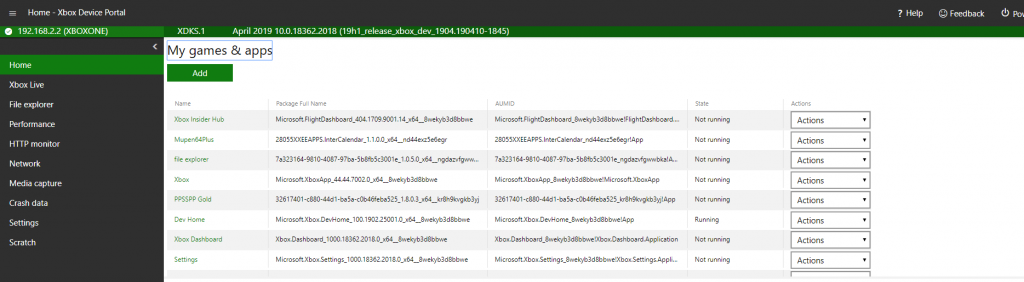
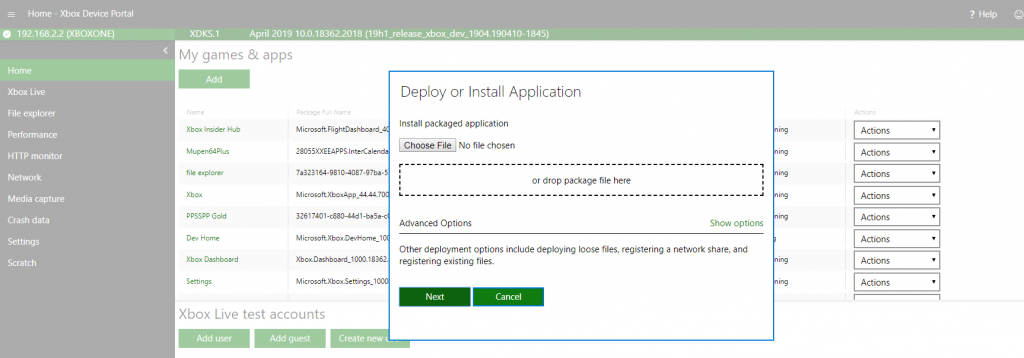
5. Goto “Add” on device portal and choose the .appxbundle (see step 1) then hit next
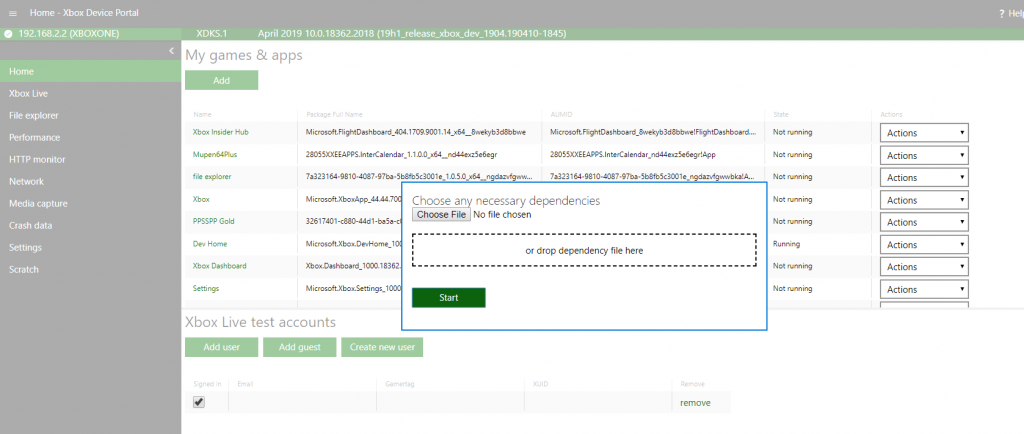
6. Goto “Choose File” if there are any dependency files needed (you will have to install all files one at a time) then hit next.
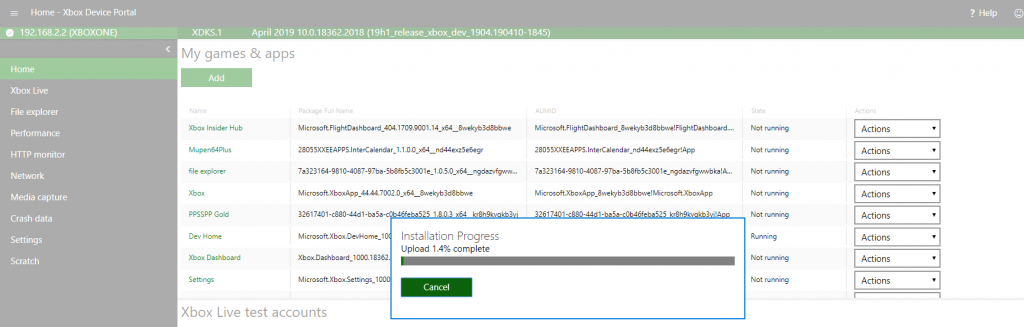
7. It will install. After this is finished, you can go to the Xbox One and run RetroArch.
8. You should now be able to run RetroArch UWP on Xbox One.
Compatibility list
Dominater01 has made a Google Spreadsheet compatibility list for RetroArch on Xbox One.
First-time setup procedures
As has hopefully been stressed before, this is a very early version of RetroArch for UWP devices. As such, the first time you start it up, you need to do some first-time configuration before everything looks properly and is ready to go.
In this video, you can see the first-time setup procedure – it is the same for both Xbox One and Windows 10 –
Set type of RetroArch App on Xbox One to ‘Game’ in order to get faster USB disk access
By default, any app you install gets assigned with type ‘App’. In order for RetroArch to become much quicker at accessing USB storage, we will need to change it to ‘Game’.
Be aware that after making this change, you will need to reboot your Xbox One for the changes to take effect. Otherwise you might run into issues.
NOTE: You will only be able to use USB 3.0 HDDs/storage on Xbox One.
Gain access to files beyond the sandbox
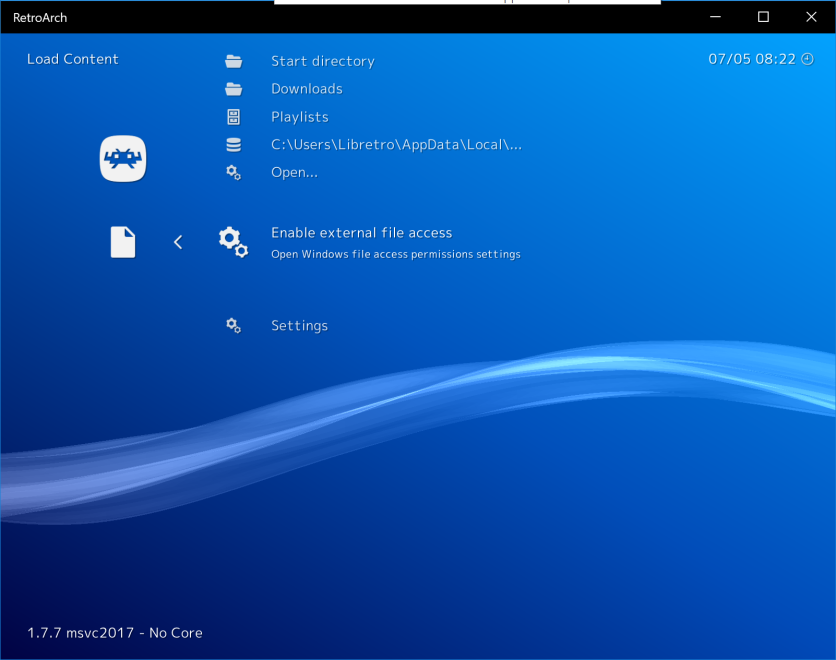
By default, your level of access to the filesystem with an UWP app is limited to the basic sandbox directory your app lives in. This is of course far too limiting for most RetroArch users, so to enable full filesystem access, go to Load Content, and then select ‘Enable external file access’.
You will be presented with a screen looking like this:
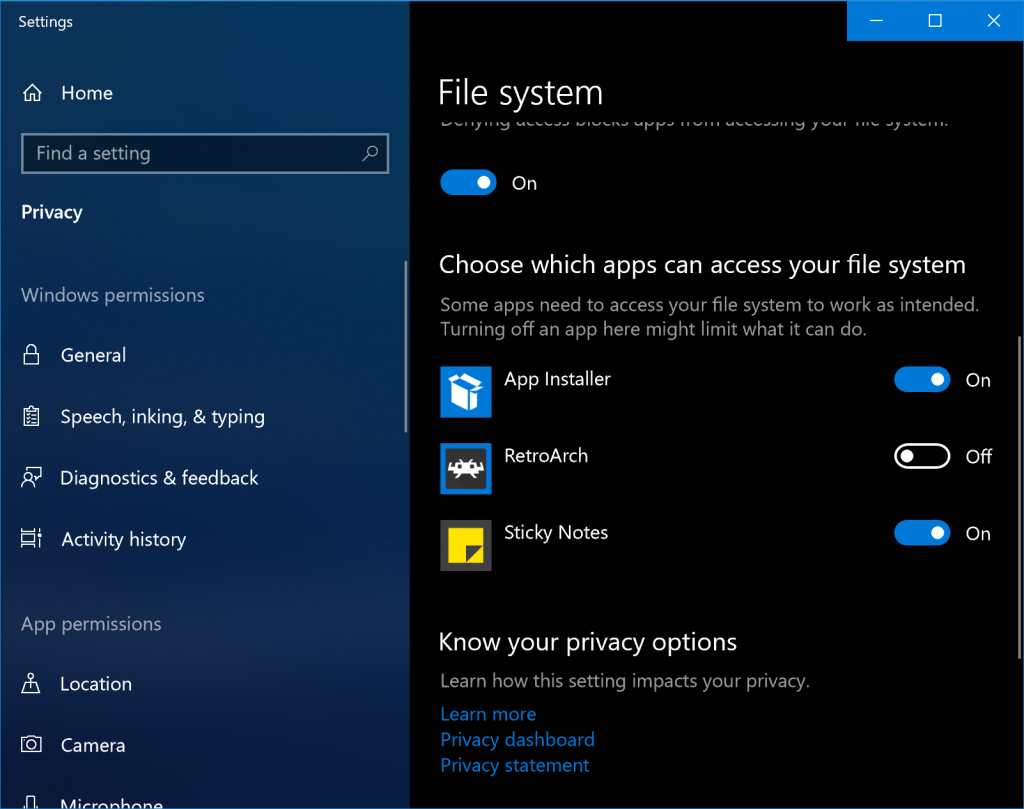
Go to ‘Choose Which Apps Can Access your file system’ and make sure that RetroArch is enabled there. This dialog screen might then close, and you might have to restart the program again.
What works
- Fully working Direct3D 11 driver
- Menu drivers like XMB/MaterialUI/Ozone/RGUI work as you would expect.
Already known issues
- Very slow filesystem performance.
- [Core issues] Closing content when running a PSP game with PPSSPP crashes RetroArch.
- [Core issues] Loading savestates on the PCSX ReARMed core crashes.
- [Core issues] Dolphin Core doesn’t work.
- GL Cores aren’t compatible/loadable (this is because only Direct3D 11 is being used right now, and we arent’ using ANGLE right now).
- RetroArch on Xbox One won’t highlight the text on the onscreen keyboard unless set to a white background.
- Having the rewind feature on slows the PCSX core
- Setting directories to USB by default isn’t saving correctly.
- Scanning content currently does not work.
- Leaving retroarch idle for hours crashes.